Radar is a useful tool with familiar uses such as detecting aircraft and observing weather. It also has some less known applications, such as a technology known as ground-penetrating radar (GPR). Despite the difficulty of sending and receiving radio waves through solid objects, with the right equipment it’s possible to build a radar that works underground as well.
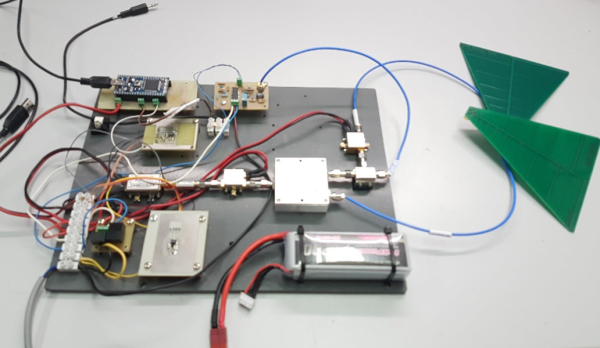
GPR is used often for detecting underground utilities, but also has applications in other fields such as archaeology and geology. For those people in these fields, a less expensive GPR was the priority of a group presenting at a 2017 National Institute of Telecommunications of Poland conference (pdf warning). The presentation goes into specific detail on how to build a GPR for around €600, much less than commercial offerings.
The presentation begins by highlighting the basics of GPR, then details the hardware bill of materials for the transmitting circuit, receiving circuit, and the DC power supplies. It also details the theory behind the software needed to get the circuit running properly, and has code as well. The processing is done on a 32-bit Mbed platform, and the rest of the GPR is built with easy-to-source components as well.
It’s always good to see useful hardware projects that bring costs of traditionally expensive equipment down to the grasp of average people. Even traditional radar systems are now available for hundreds of dollars, and we’ve even seen attempts at other GPR systems before as well.
Thanks to [Stefan] for the tip!