Sinterit Pulls SLS 3D Printer Entry Level Price Down To Just $8k

Almost exactly two years ago, news of a great revolution in 3D printing carried itself through blogs and tech columns. Patents were expiring, and soon the ‘squirting filament’ printers would be overtaken by a vastly better method: selective laser sintering. In the last two years, the market has been markedly silent on the possibilities of SLS technology, until now, at least. Today, Sinterit is launching their first printer. It’s an SLS printer that builds objects by fusing nylon powder with a laser, producing things with much better quality than filament-based printers.

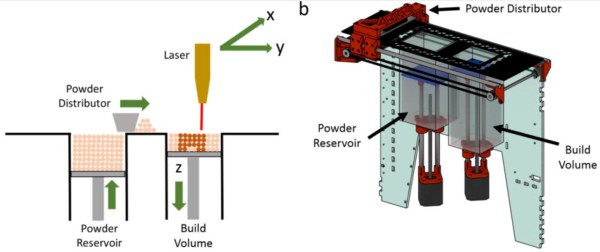
The Sinterit Lisa is a true laser sintering printer, able to create objects by blasting nylon powder with a 5W laser diode. Inside this box that’s about the same size as a laser printer is a CoreXY mechanism to move the laser diode around, heated pistons, cylinders, feed bed and print bed for keeping the print volume at the right temperature and the top layer perfectly flat. The layer thickness of the printer goes down to 0.06 mm, and the maximum print size is 13 x 17 x 13 cm. Material choice is, for now, limited to black PA12 nylon but other materials are being tested.

Continue reading “Sinterit Pulls SLS 3D Printer Entry Level Price Down To Just $8k”

Stuffing Everything On A DIP32 Package

Putting an full microcontroller platform in a DIP format is nothing new – the Teensy does it, the Arduino nano does it, and a dozen other boards do it. [Alex] and [Alexey] aren’t content with just a simple microcontroller breakout board so they’re adding a radio, an OLED, an SD card reader, and even more RAM to the basic Arduino platform, all in a small, easy to use package.

The DIPDuino, as [Alex] and [Alexy] are calling it features an ATmega1284 processor. To this, they’re adding a 128×32 pixel OLED, a micro SD slot, and 1Mbit of SRAM. The microcontroller is a variant that includes a 2.4 GHz Zigbee radio that allows for wireless connections to other DIPDuinos.

What are [Alex] and [Alexey] going to do with their cool little board? They’re planning on using the OLED for a watch, improve their software so the firmware can be updated from the SD card, and one of [Alex]’s friends wants to build a RepRap controller with one of these. There’s a lot of potential with this board, and we’re interested in seeing where the guys take the project from here.

Hello RAMPS, Meet ESP8266

The proliferation of  DIY 3D printers has been helped in large measure by the awesome open-source RepRap project. A major part of this project is the RAMPS board – a single control board / shield to which all of the other parts of the printer can be easily hooked up. A USB connection to a computer is the usual link of choice, unless the RAMPS board has the SD-Card option to allow the 3D printer to operate untethered. [Chetan Patil] from CreatorBot built a breakout board to help attach either the ESP8266 WiFi or the HC-05 Bluetooth module to the Aux-1 header on the RAMPS board. This lets him stream G-code to the printer and allow remote control and monitoring.

While the cheap ESP8266 modules are the current flavor of the season with Hackers, getting them to work can be quite a hair tearing exercise. So [Chetan] did some hacking to figure out the tool chain for developing on the ESP module and found that LUA API from NodeMcu would be a good start. The breakout board is nothing more than a few headers for the ESP8266, the HC-05 and the Aux-1 connections, with a few resistors, a switch to set boot loader mode and a 3.3V regulator. If you’re new to the ESP8266, use this quick, handy, guide by [Peter Jennings] to get started with the NodeMCU and Lualoader. [Chetan]’s code for flashing on the ESP8266, along with the Eagle board design files are available via his Github repo. Just flash the code to the ESP8266 and you’re ready to go.

One gotcha to be aware of is to plug in the ESP module after the printer has booted up. Otherwise the initial communication from the ESP module causes the printer to lock up. We are sure this is something that can be taken care of with an improved breakout board design. Maybe use a digital signal from the Arduino Mega on the RAMPS board to keep the ESP module disabled for a while during start up, perhaps? The video after the break gives a short overview of the hack.

Continue reading “Hello RAMPS, Meet ESP8266”

3D Printing on Inflatable Structures

3D Printed Muscle Is Inflated During Printing

Just when you think you’ve seen it all… [Fergal Coulter] over on the RepRap forums just came up with a method of 3D printing on inflatable structures — wait what?

The process uses a custom 3D printer with a paste extrusion head, and a 4th axis — with a pneumatic air supply. Using a spray deposition method, a silicone tube is formed, and then each layer is cured using a infrared light, which is also built into the system. Once the silicone is thick enough, it is then pressurized to inflate through the air-permeable mandrel. A laser then scans the shape of the inflated silicone to allow the computer to generate tool paths for the surface. Then you hit print. Simple right?

Continue reading “3D Printed Muscle Is Inflated During Printing”

Free 3D printing in NY

FREE 3D Printing In New York?

Looking to prototype some of your designs for the Hackaday Prize? Miss the Shapeways Gift Card Giveaway we did? Well if you happen to live in NYC, [John Tirelli] just wrote in to tell us about a FREE 3D printing lab!

That’s right — free. They don’t even charge for materials.

And we aren’t talking about a bunch of community rickety RepRaps falling apart in someone’s college dorm, nope, this place has CAD workstations with SolidWorks licenses, industrial Stratasys printers (Fortus 250mic, SST 1200 es, and a uPrint SE Plus) — not to mention a Roland LPX-1200 DS 3D laser scanner! Oh, and they’re getting a Fortus 400 and Connex 3 Objet soon!

It’s all thanks to a grant for Haverstraw Rockland Community College, which allowed them to open up this Smart Lab.

RCC’s 3D Printing Smart Lab offers manufacturers a proof-of-concept center where they can evaluate, customize, and expedite prototypes in a sandbox environment. The Smart Lab’s services are available to New York companies free of charge. Assistance is provided by RCC staff and CAD (Computer Assisted Design) students.

How awesome is that? Sounds like you do have to be a New York Company… but you filed that LLC paperwork, right?

Continue reading “FREE 3D Printing In New York?”

glue rep strap

Wood & Glue RepStrap Works Surprisingly Well

Even with the cost of 3D Printers continually falling, entering the hobby still requires a significant investment. [Skeat] had some typical 3D Printer components available but didn’t have access to a printer for making the ever-so-common frame parts of typical RepRap designs.

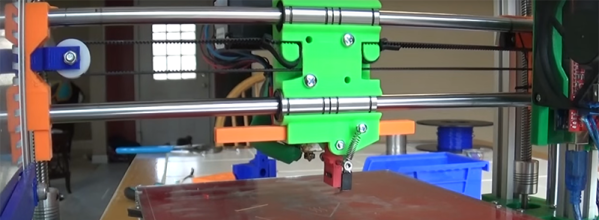
glue rep strap [Skeat’s] plan was to cobble together a printer just good enough to print out parts for another, more robust one. The frame is made from wood, a very inexpensive and available material. The frame is not screwed together and doesn’t have any alignment tabs, it’s just hand cut pieces glued together. Each portion of the frame is laid out, aligned with a carpenter’s square and then glued together. This design and assembly method was intentional as [Skeat] didn’t have access to any precision tools. He stated that the only parts of the frame that had to be somewhat precise were the motor mount holes. The assembly process is well documented to aid anyone else looking to make something similar.

In addition to the wooden frame, all of the components are glued in place. That includes the bearings, rods, limit switches and even the Z axis motor! After seeing the photos of this printer, it would be easy to dismiss it as a poor performer. The below video shows that this printer’s print quality can keep up with any hobby level machine available. We wonder if [Skeat] is rethinking making another since this one works so well.

Continue reading “Wood & Glue RepStrap Works Surprisingly Well”

maplemaker mini v2 3d printer

MapleMaker 3D Printer Is As Printable As They Get

The term RepRap is fairly common and gets thrown around too often when generally talking about DIY 3D Printers. We must remember that the intent of the RepRap project “…is about making self-replicating machines…” and of course “…making them freely available for the benefit of everyone…“.

[MiniMadRyan] has recently designed a printer that could be considered the embodiment of the RepRap philosophy. He’s calling it the MapleMaker Mini V2. An extremely high percentage of the parts required to build this printer are, in fact, printable themselves. The frame pieces are printed, all of which can be printed on the printer thanks to the 6x8x6 inches print volume. The overall design is aesthetically pleasing, resembling that of a Lulzbot Mini.

The MapleMaker Mini V2 is self-replicating. The other part of the RepRap goal is to be free to the community. The design files are available on YouMagine and the assembly manual is better than those provided by most commercial companies. So if you’re looking to build a printer, be sure to add this one to your short list!