Split Keyboard Uses No PCB

When [daniely101] wanted a split keyboard, he decided to build his own. It wound up costing $25 to create a wireless board with no custom PCB required. Each half has its own microcontroller, and the whole thing connects via Bluetooth. While we don’t mind making a PCB, we can appreciate that you could change your mind easily with this wiring scheme.

The 3D printed case holds the keys, and then it is just a matter of carefully soldering the keys to the microcontrollers. Of course, each side also has to have its own battery. The ZMK firmware is split in half, one part for each side of the keyboard. The nRF52840 CPUs have plenty of wireless connectivity. The keys are set in rows and columns, so the amount of soldering back to the controller is manageable.

While we applaud the wireless design, it does seem odd that you have to charge both halves and turn them on and off separately. But that’s the nice thing about a design like this — you could modify the design to not have a split. Or, you could allow one flexible wire pair to run across for power. Of course, you could modify the layout, including adding or deleting keys.

You might consider adding a pointing device. At least you don’t have to pull out a saw.

Continue reading “Split Keyboard Uses No PCB”

ZPUI Could Be Your Tiny Embedded GUI

One of the most frustrating things to me is looking at a freshly-flashed and just powered up single board computer. My goal with them is always getting to a shell – installing packages, driving GPIOs, testing my proof of concept code, adjusting the device tree to load peripheral drivers. Before I can do any of that, I need shell access, and getting there can be a real hassle.

Time after time, I’ve struggled trying to get to a shell on an SBC. For best results, you’d want to get yourself a keyboard, monitor, and an Ethernet cable. Don’t have those, or there’s no space to place them? Maybe a UART connection will work for you – unless it’s broken or misconfigured. Check your pinouts twice. Sure, nowadays you can put WiFi credentials into a text file in /boot/ – but good luck figuring out the IP address, or debugging any mistakes you might make formatting the file. Nowadays, Pi 4 and 5 expose a USB gadget connection on the USB-C port, and that helps… unless you’re already powering the Pi from that port. There’s really no shortage of failure modes here.

If you put a Pi on your network and it goes offline, you generally just don’t know what happened unless you reboot it, which can make debugging into a living hell. I’ve dealt with single-board computers mounted above fiberglass lifted ceilings, fleets of Pi boards at workshops I organized, pocket-carried Pi boards, and at some point, I got tired of it all. A hacker-aimed computer is meant to be accessible, not painful.

Continue reading “ZPUI Could Be Your Tiny Embedded GUI”

ESP32 Dashboard Is A Great Way To Stay Informed

The original ESP32 may be a little long in the tooth by now, but it remains a potent tool for connected devices. We were drawn to [Max Pflaum]’s ESP32 Dashboard as a great example, it’s an ESP32 hooked up to an e-paper display. The hardware is simple enough, but the software is what makes it interesting.

This is deigned as a configurable notification tool, so to make it bend to the user’s will a series of widgets can be loaded onto it. The device runs MicroPython, making it easy enough to write more than the ones already on place. The screen is divided into four zones, allowing for a range of widgets to be used at once. All the details can be found in a GitHub repository.

We like it for its configurability and ease of programming, and because it delivers well on the promise of a useful device. An ESP32 and e-ink combination with MicroPython apps is something we’ve seen before in the world of badges.

Just For Laughs: Charlie Douglass And The Laugh Track

I ran into an old episode of Hogan’s Heroes the other day that stuck me as odd. It didn’t have a laugh track. Ironically, the show was one where two pilots were shown, one with and one without a laugh track. The resulting data ensured future shows would have fake laughter. This wasn’t the pilot, though, so I think it was just an error on the part of the streaming service.

However, it was very odd. Many of the jokes didn’t come off as funny without the laugh track. Many of them came off as cruel. That got me to thinking about how they had to put laughter in these shows to begin with. I had my suspicions, but was I way off!

Well, to be honest, my suspicions were well-founded if you go back far enough. Bing Crosby was tired of running two live broadcasts, one for each coast, so he invested in tape recording, using German recorders Jack Mullin had brought back after World War II. Apparently, one week, Crosby’s guest was a comic named Bob Burns. He told some off-color stories, and the audience was howling. Of course, none of that would make it on the air in those days. But they saved the recording.

A few weeks later, either a bit of the show wasn’t as funny or the audience was in a bad mood. So they spliced in some of the laughs from the Burns performance. You could guess that would happen, and that’s the apparent birth of the laugh track. But that method didn’t last long before someone — Charley Douglass — came up with something better. Continue reading “Just For Laughs: Charlie Douglass And The Laugh Track”

A Prunt 3D printer control board is shown mounted in a 3D printer, just behind a power supply, in the center of the image.

Keeping Snap And Crackle Under Control With Prunt Printer Firmware

For quite some time now, Marlin has been the firmware of choice for any kind of custom 3D printer, with only Klipper offering some serious competition in the open-source world. [Liam Powell] aims to introduce some more variety with the development of Prunt, a 3D printer control board and firmware stack.

Smooth motion control is Prunt’s biggest advantage: Klipper and Marlin use trapezoidal (three-phase) motion profiles, which aim for acceleration changes with physically impossible rapidity, leading to vibrations and ringing on prints. By contrast, Prunt uses a more physically realistic 31-phase motion profile. This lets the user independently adjust velocity, acceleration, jerk, snap, and crackle (the increasingly higher-order derivatives of position with respect to time) to reduce vibration and create smoother prints. To avoid sharp accelerations, Prunt can also turn corners into 15-degree Bézier curves.

The focus on smooth motion isn’t just a software feature; the Prunt control board uses hardware timers to control step generation, rather than the CPU. This avoids the timing issues which Klipper sometimes faces, and avoids slowing other parts of the program down. The board also seems to have a particular focus on avoiding electrical damage. It can detect short circuits in the heaters, thermistors, fans, and endstops, and can cut power and give the user a warning when one occurs. If the board somehow experiences a serious electrical fault, the USB port is isolated to prevent damage to the host computer. The firmware’s source is available on GitHub.

If you’re more interested in well-established programs, we’ve given a quick introduction to Klipper in the past. We’ve also seen people develop their own firmware for the Bambu Lab X1.

Photo of AlphaPhoenix looking at an airplane flying through the air

Weighing An Airplane As It Flies Overhead

Recently, [AlphaPhoenix] weighed an airplane. Normally, that wouldn’t be much of an accomplishment. Except in this case, the airplane happened to be in flight at the time. In fact we’re not sure what is more remarkable, as he not only weighed real actual airplanes but a paper airplane too!

The sealed box essentially acts as a pressure sensor.

To test the concept, a large scale is made from foamcore and four load cells which feed into an Arduino which in turn is connected to a laptop for a visualization. After a brief test with a toy car, [AlphaPhoenix] goes on to weigh a paper airplane as it flies over the scale. What we learn from the demonstration is that any weight from a flying object is eventually transferred to the ground via the air.

In the second part of the video a new, smaller, type of scale is created and taken to the airport where airplanes flying overhead are weighed over the course of three days. This new apparatus is basically a pressure sensor enclosed in a nominally air-tight box, essentially a fancy type of barometer. Measurements are taken, assumptions are made, and figures are arrived at. Unfortunately the calculated results are off by more than one order of magnitude, but that doesn’t stop this experiment from having been very cool!

If you’re interested in weighing things for fun or profit be sure to check out Hackaday Prize 2022: Arduino-Powered Weighing Scale Has A Real Analog Display or Reverse Engineering A Bathroom Scale For Automated Weight Tracking.

Continue reading “Weighing An Airplane As It Flies Overhead”

Capturing Screenshots Using A Fake Printer

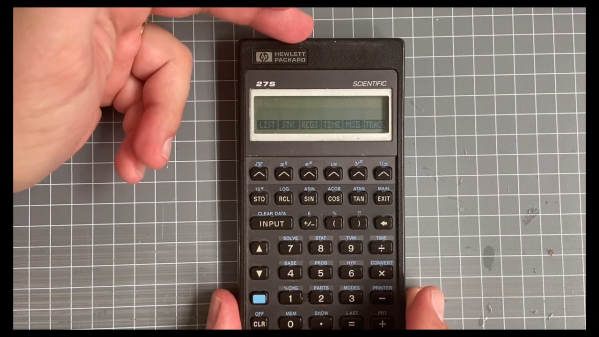
If you have very old pieces of analogue test equipment with CRTs on your bench, the chances are they will all have surprisingly similar surrounds to their screens. Back when they were made it was common to record oscilloscope screens with a Polaroid camera, that would have a front fitting for just this purpose.

More recent instruments are computerized so taking a screen shot should be easier, but that’s still not easy if the machine can’t save to a handy disk. Along comes [Tom] with a solution, to hook up a fake printer, and grab the screen from a print.

Old instruments come with a variety of ports, serial, IEE-488, or parallel, but they should usually have the ability to print a screen. Then capturing that is a case of capturing an interpreting the print data, be it ESC/P, PCL5, Postscript, or whatever. The linked page takes us through a variety of techniques, and should be of help to anyone who’s picked up a bargain in the flea market.

This isn’t the only time we’ve touched on the subject of bringing older computerized equipment into the present, we’ve also shown you a disk drive emulator.

Thanks [JohnU] for the tip.