Much discussion goes on in the guitar world about the best hardware to use. Whether its pickups, how they’re positioned, or even the specific breed of wood on the fretboard, it’s all up for debate. [Eli Hughes] put much of that to one side, however, with his innovative “Active Pickguard” project.
The project reimagines the electronics of an electric guitar from the ground up. Instead of typical electromagnetic pickups, six individual piezo pickups are built into the bridge – one for each individual string. The outputs of these pickups is conditioned and then read by the analog-to-digital converter of a Freescale Kinetis K40. The DSP-capable chip can then be used to apply all manner of effects. [Eli] demonstrates the guitar providing an uncanny imitation of an acoustic guitar, before demonstrating jazz and overdrive tones as well.
The Kinetis chip also features touch-sensitive inputs, which [Eli] put to good use. All the hardware is built into a pickguard-shaped PCB, complete with touch controls for things like volume, tone, and choosing different DSP patches.
Unlike a regular guitar, this one needs a power supply, which it gets via a CAT 6 cable, in place of the usual 1/4″ guitar cable. The CAT 6 also carries audio out to a converter box which allows the audio to be output to a regular guitar amplifier.
It’s a neat build, and one that shows just how modern technology can reimagine a simple 20th-century instrument. DSP really is magic, after all. Video after the break.
Anyone who’s ever had to deal with the aftermath of a leaking battery knows how much damage such a failure can cause. Degrading batteries leak corrosive chemicals that eat away PCB traces, clog up connectors and generally leave everything looking nasty. Getting your gadget working again usually calls for lots of scrubbing, followed by patiently tracing suspect connections and restoring any broken ones.
We doubt, however, that anyone has ever gone through as much effort as [Lee Smith] has on his Atari 800 XL. This example was listed on eBay in a severely damaged state, having been stored under an entire box of leaking batteries. [Lee] put in a bid and, to his own bemusement, won the auction. He was now the proud owner of a classic gaming machine which was covered in a thick brown crust of battery residue.
A first inspection showed that the damage was more than skin-deep: even inside the computer’s case it was one big mess of crusty brown junk. [Lee] first spent several hours on the plastic case, using different cleaning agents and an ultrasonic bath, and managed to get the case almost spotless again. The keyboard presented a larger challenge however: not only did it require thorough cleaning of every single switch and keycap, the keyboard’s matrix on the PCB had several connections missing, which had to be restored using bodge wires.
With the keyboard working again, [Lee] turned to the mainboard. This turned out to be an even greater challenge, with several components (including a few custom chips) damaged beyond repair. With the help of a few eBay replacements parts and (again) countless hours of scrubbing, the mainboard started to look healthy again. After a few tests, [Lee] felt confident enough to hook up the entire system and turn it on. And his efforts had paid off: the battered Atari dutifully displayed its BASIC prompt, ready for its second lease of life.
Despite its diminutive proportions, the thrust to weight ratio of the DJI Mini 2 is high enough that it can carry a considerable amount of baggage. So it’s no surprise that there’s a cottage industry of remotely controlled payload releases that can be bolted onto the bottom of this popular quadcopter. But [tterev3] wanted something that would integrate better with DJI’s software instead of relying on a separate transmitter.
As explained in the video below, his solution was to tap into the signals that control the RGB LED on the front of the drone. Since the user can change the color of the LED at any time with the official DJI smartphone application, decoding this signal to determine which color had been selected is like adding several new channels to the transmitter. In this case [tterev3] just needed to decode a single color to use as a “drop” signal, but it’s not hard to imagine how this concept could be expanded to trigger several different actions with a few more lines of code.
Examining the LED control signal.
[tterev3] wrote some software to decode the 48 bits of data being sent to the LED with a PIC18F26K40 microcontroller, which in turn uses an L9110H H-Bridge to control a tiny gear motor. To get feedback, he’s using a small magnet glued to the release arm and a Hall-effect sensor.
Concerned about how much power he could realistically pull from a connection that was intended for an LED, he gave the release its own battery that is slowly charged while the drone is running. You could argue that since the motor only needs to fire up once to drop the payload, [tterev3] probably could have gotten away with not recharging it at all during the flight. But as with the ability to decode additional color signals, the techniques being demonstrated here hold a lot of promise for future development.
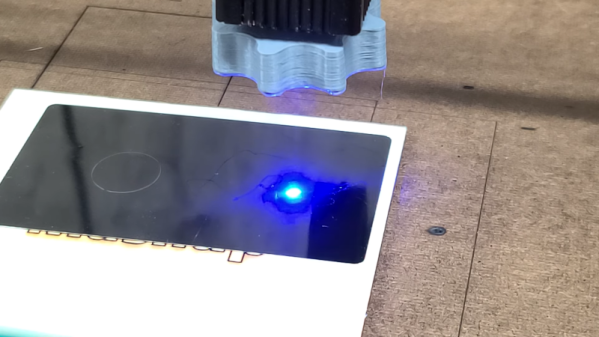
If you’ve used a diode laser engraver or cutter, you know that focus is critical. You’d think it would be relatively simple to get a sharp focus, but it isn’t that simple. [Makers Mashup] shows in a video how to use an adjustable IR filter to cut out all the light bleed to get a sharp image to make focusing simpler.
The filter he shows adjusts from 530nm to 750nm and is made to screw into a 72mm lens, but it works fine with your eyeballs, too. [Makers Mashup] says he’ll eventually make a stand for it so he can look through it with both hands free.
There are an awful lot of machines on the market these days that fall under the broad category of “cheap Chinese laser cutters”. You know the type — the K40s, the no-name benchtop CO2 cutters, the bigger floor-mount units. If you’ve recently purchased one of these machines from one of the usual vendors, or even if you’re just thinking about doing so, you’ll likely have some questions. In which case, this “Chinese Laser Cutters 101” online class might be right up your alley. We got wind of this though its organizer, Jonathan Schwartz of American Laser Cutter in Los Angeles, who says he’s been installing, repairing, and using laser cutters for a decade now. The free class will be on February 8 at 5:00 PM PST, and while it’s open to all, it does require registration.
We got an interesting tip the other day that had to do with Benford’s Law. We’d never heard of this one, so we assumed was a “joke law” like Murphy’s Law or Betteridge’s Rule of Headlines. But it turns out that Benford’s Law describes the distribution of leading digits in large sets of numbers. Specifically, it says that the leading digit in any given number is more likely to be one of the smaller numbers. Measurements show that rather than each of the nine base 10 digits showing up about 11% of the time, a 1 will appear in the leading digit 30% of the time, while a 9 will appear about 5% of the time. It’s an interesting phenomenon, and the tip we got pointed to an article that attempted to apply Benford’s Law to image files. This technique was used in a TV show to prove an image had been tampered with, but as it turns out, Hollywood doesn’t always get technical material right. Shocking, we know, but the technique was still interesting and the code developed to Benford-ize image files might be useful in other ways.
Everyone knew it was coming, and for a long time in advance, but it still seems that the once-and-for-all, we’re not kidding this time, it’s for realsies shutdown of Adobe Flash has had some real world consequences. To wit, a railroad system in the northern Chinese city of Dalian ground to a halt earlier this month thanks to Flash going away. No, they weren’t using Flash to control the railroad, but rather it was buried deep inside software used to schedule and route trains. It threw the system into chaos for a while, but never fear — they got back up and running by installing a pirated version of Flash. Here’s hoping that they’re working on a more permanent solution to the problem.
First it was toilet paper and hand sanitizer, now it’s…STM32 chips? Maybe, if the chatter on Twitter and other channels is to be believed. Seems like people are having a hard time sourcing the microcontroller lately. It’s all anecdotal so far, of course, but the prevailing theory is that COVID-19 and worker strikes have lead to a pinch in production. Plus, you know, the whole 2020 thing. We’re wondering if our readers have noticed anything on this — if so, let us know in the comments below.
And finally, just because it’s cool, here’s a video of what rockets would look like if they were transparent. Well, obviously, they’d look like twisted heaps of burning wreckage on the ground is they were really made with clear plastic panels and fuel tanks, but you get the idea. The video launches a virtual fleet — a Saturn V, a Space Shuttle, a Falcon Heavy, and the hypothetical SLS rocket — and flies them in tight formation while we get to watch their consumables be consumed. If the burn rates are accurate, it’s surprising how little fuel and oxidizer the Shuttle used compared to the Saturn. We were also surprised how long the SLS holds onto its escape tower, and were pleased by the Falcon Heavy payload reveal.
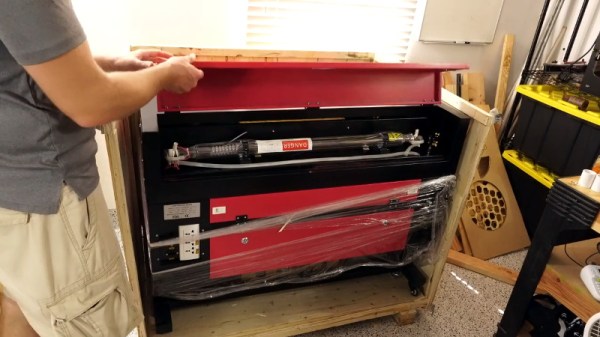
At this point if you’re even remotely interested in home laser cutters, you know about the K40. These imported machines are very impressive considering they only cost around $400 USD, but naturally, quite a few corners had to be cut to get the price down. If you’re looking for something with a bit more punch and much higher build quality, a new breed of 60 watt lasers have started popping up on the usual import sites for around $2,000 USD.
While these more expensive machines are certainly much higher quality than the K40, [Jeremy Cook] found there was still plenty of room for improvement. For example, the machine didn’t have any switch cut off the laser when somebody opens the lid. While we don’t doubt some readers will consider this more of a feature than a bug, it’s hard to believe that a tool that costs this much wouldn’t at least offer such a thing as an option.
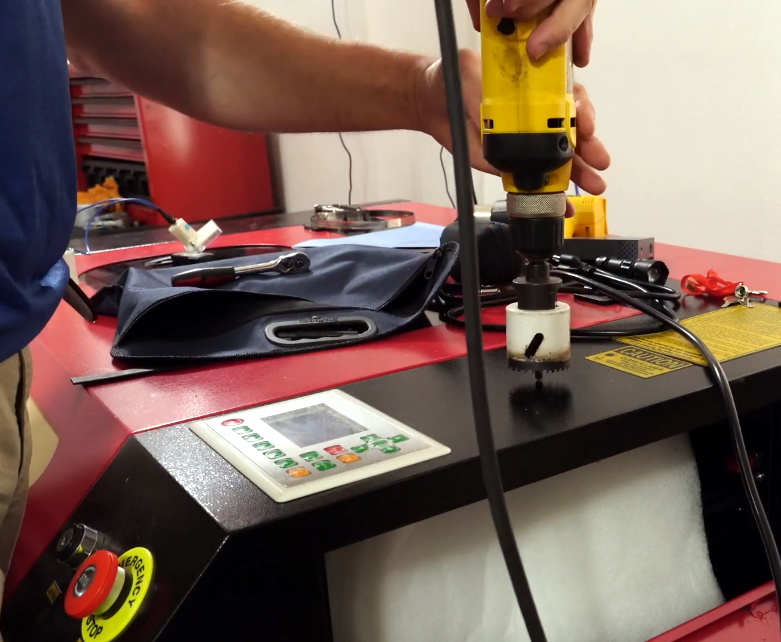
Drilling a hole for the ammeter.
[Jeremy] also decided to add his own ammeter so he could see how much power the laser is drawing. While not strictly required for day to day operation, it turns out that the controller in many of these machines has a tendency to push the laser tubes beyond their design limits on the higher power settings. With the spec sheet for your tube and a permanent in-line ammeter, you can verify you aren’t unwittingly shortening the life of your new cutter.
Even if you ignore the modifications [Jeremy] makes in his video, it’s still a very illuminating look at what it takes to get one of these lasers ready for operation. Not only do you have to get the thing out of its shipping crate safely, but you need to come up with some way to deal with the fumes produced and get the water cooling system hooked up. It’s a decent amount of work, but the end results certainly look impressive.
While the K40 is still probably the better bet for new players, it’s good to see that there are some viable upgrades for anyone who’s outgrown their entry level machine but isn’t in a position to spend the money on an Epilog.
In case you needed more confirmation that we’re living in the future, a flight on approach to Los Angeles International Airport on Sunday night reported “a guy in a jet pack” flying within about 300 yards of them. A second pilot confirmed the sighting. It’s worth watching the video after the break just to hear the recordings of the conversation between air traffic control and the pilots.
The sighting was reported at about 3,000 feet which is an incredible height for any of the jet packs powerful enough to carry humans we’ve seen. The current state of the art limits jet pack tech to very short flight times and it’s hard to image doing anything more than getting to that altitude and back to the ground safely. Without further evidence it’s impossible to say, which has been an ongoing problem with sightings of unidentified flying objects near airports.
While superheros (or idiots pretending to be superheros) flying at altitude over the skies of LA sounds far fetched, the RC super hero hack we saw nine years ago now comes to mind. At 300 yards, that human-shaped drone might pass for an actual person rather than a dummy. This is of course pure speculation and we don’t want to give the responsible members for the RC aircraft community a bad name. It could have just as easily been trash, balloons, aliens, or Mothra. Or perhaps the pilot was correct and it was “some guy” flying past at 3,000 feet. That’s not impossible.
We anxiously await the results of the FAA’s investigation on this one.