Home Decorating With Tiny Arcade Cabinets

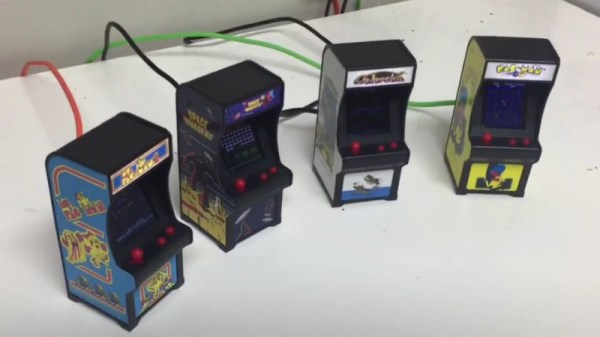
Thanks to the general miniaturization of electronics, the wide availability of cheap color LCD screens, and the fact that licensing decades old arcade games is something of a free-for-all, we can now purchase miniature clones of classic arcade cabinets for about $20 USD. In theory you could play these things, but given they’re less than 4 inches in height they end up being more of a desk novelty than anything. Especially since it seems like most of the effort went into making the cabinet itself; a classic example of “form over function”.

Unfortunately, if you want to buy these little arcade cabinets to use as decoration for your office or game room, they aren’t particularly well suited to the task. The “demo” mode where the game plays itself doesn’t last for very long, and even if it did, the game would chew through batteries at an alarming rate. [Travis] decided to tackle both issues head on by powering his Tiny Arcades over USB and locking them into demo mode.
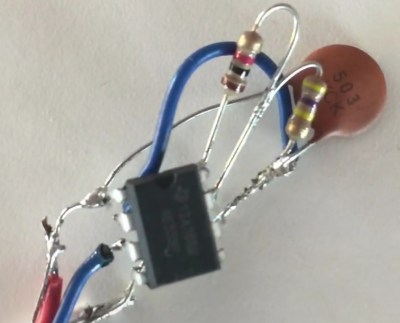
The stock power for the Tiny Arcade comes from three AAA batteries, or 4.5 V. This made it easy enough to run over  5 V USB, and a four port USB charger is used to provide power to multiple machines at once. Forcing the game to stay in demo mode wasn’t much harder: a 555 timer was used to “push” the demo button with a frequency of every 10 seconds or so to keep the game up and running. A simple timer circuit was put together in the classic “dead bug” style, and sealed up with liquid rubber so it would play nice with the insides of the Tiny Arcade.

Since his little machines wouldn’t need their stock power switches anymore, [Travis] rewired the speaker lead through it. So now the machine stays on and in demo mode as long as it’s plugged into USB power, and you can flip the switch on the back to turn off the sounds. Perfect for sitting up on a shelf or the corner of your desk.

Usability issues not withstanding, there’s a pretty big (no pun intended) following for micro sized arcade cabinets. We’ve seen projects ranging from modding a Game Boy Advance to even tinier scratch builds.

Continue reading “Home Decorating With Tiny Arcade Cabinets”

DIY Diner Booth With Cocktail Table Arcade

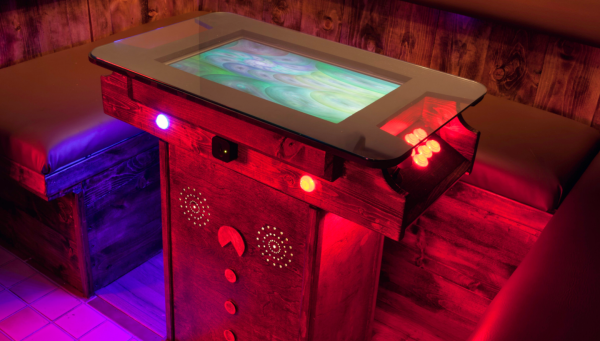
[Glennzo] has a house with some odd interior design choices. The most glaring one is a living room/den complete with a green Jacuzzi hot tub straight out of the 1980s. The tub really didn’t fit with [Glennzo’s] plan to use the space as a bar and game room, so out came the Sawzall and demo hammer. The tub was in its own little alcove, possibly a converted closet. [Glennzo’s] turned the space into a restaurant style booth complete with a cocktail arcade table.

The fiberglass tub was relatively easy to cut up and remove. This left the wood framed tile tub surround. The surround was extended to become a booth seat. A bit of creative woodworking, some vinyl cushions, and the booth itself was ready. But what good is a booth without a table?

The cocktail table arcade machine is powered by a mini-tower running MAME. The monitor is an old 21″ LCD. The frame of the table is plywood and pine lumber, finished with stain and polyurethane. The illuminated buttons and interface came from an arcade control kit, which made wiring a snap. The table is topped off with a custom 3/8″ thick piece of glass.

The final product looks great and fits the room perfectly. Now [Glennzo] just needs a BarBot to finish off the perfect hacker and gamer paradise!

Mini Tetris Game Packs A Tiny85

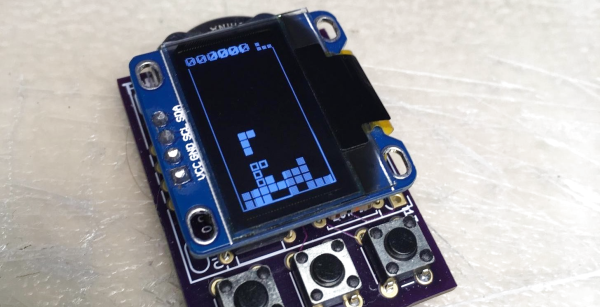
[dombeef] originally built pocketTETRIS as a Father’s Day gift for his Tetris-loving pops. However, having finished the project he’s decided to share it with the universe, and it’s looking rather sweet.

He made the game the smallest he could make, with size limitations imposed by a 0.96” OLED display, the coin-cell battery pack, and his desire for a durable 3D-printed case. It uses a ATtiny85 for the brains, mounted on a custom PCB that [dombeef] designed in KiCad. The Arduino code was modified from Andy Jackson’s ATtinyArcade code, giving it three-button capability instead of two. [dombeef] has details on the project page on Hackaday.io as well as 3D-design and PCB-design files on the project’s code repository on GitHub.

We’ve published a fair number of Tetris posts in the past, including skyscraper Tetris, playing Tetris on a soldering iron, and Tetris in 446 bytes. What’s the smallest Tetris you’ve seen?

IPad Tossed Out For RetroPie Arcade Cabinet Redux

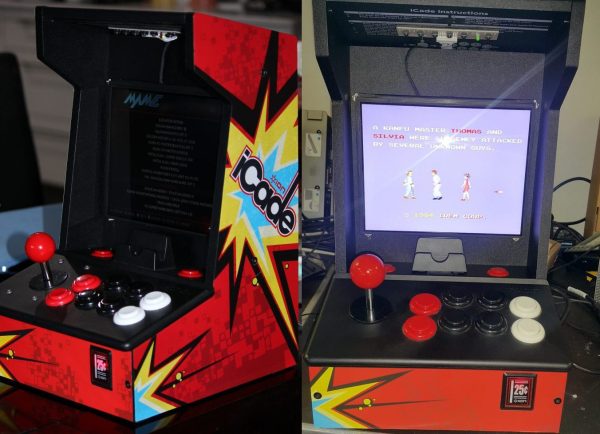
The naming and remixing in this project can get a little confusing to those unfamiliar with the different elements involved, but what [John Gerrard] has done is take a stylish mini arcade cabinet intended as a fancy peripheral for an iPad and turned it into an iPad-free retro arcade gaming cabinet. He also designed his own power controller for graceful startup and shutdown.

The project started with a peripheral called the iCade (originally conceived as a fake product for April Fool’s) and [John] observed it had good remix potential for use as a mini retro gaming cabinet. It was a good starting point: inexpensively purchased off eBay with suitable arcade-style joystick and buttons, a nice layout, and plenty of hacking potential. With a small variety of hardware from familiar sources like eBay and Aliexpress, [John] rounded up most of what he needed.

Continue reading “IPad Tossed Out For RetroPie Arcade Cabinet Redux”

Arcade Cabinet Build Takes Quarters, Dispenses Fun

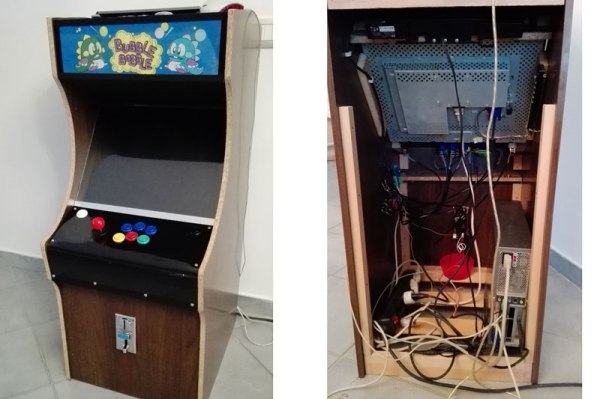
Building an arcade cabinet seems to be a rite of passage for many hackers and woodworkers. Not that there is anything wrong with that: as this series of posts from [Alessandro] at boxedcnc shows, there is an art to doing it well.

His final build is impressive, with quality buttons, a genuine-looking banner, and even a coin slot so he can charge people to play. His build log covers both the carpentry and electronic aspects of the build, from cutting the panels to his own code for running the coin acceptor that takes your quarter (or, as he is in Italy, Euro coins) and triggers the game to play.

To extract money from his family, he used the Sparkfun COM-1719 coin acceptor, which can be programmed to send different pulses for different coins, connected to an Arduino which is also connected to the joystick and buttons. The Arduino emulates a USB keyboard and is connected to an old PC running MAME with the Attract Mode front end. It’s a quality build, down to the Bubble Bobble banner, and the coin slot means that it might even make some money back eventually.

Bartop Arcade RetroPie Powered Laser Cut

[hhtat] wanted to build an arcade cabinet since his days in high-school. Only recently have the tech planets aligned. Looking into the night sky he saw a laser cutter, the Raspberry Pi, and lowering prices on key components and thought, “this is the year.”

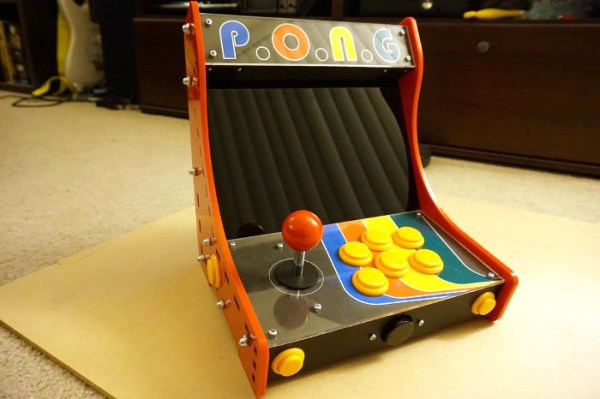
Much like an arcade cabinet we posted earlier, this one sits on a counter top. With full controls and a nice screen, it provides a lot of the experience without the additional explaining to the SO why the living space should house a giant decaled MDF box.

The frame was designed in SketchUp and vectors were made in Inkscape. The frame was lasercut out of MDF and Acrylic. Decals were printed and applied. The resulting case, build from tab and slot construction, is attractive.

The internals are simple. A Raspberry Pi with a fast SD card acts as the brain. Rather than make it difficult on himself, [hhat] bought a pre-made controls kit from eBay. Apparently there is a small market for this stuff. He also purchased an IPS screen with built in controller. The IPS panel gives the arcade cabinet a desireable wide viewing angle.

The final product looks like a lot of fun and we can see it turning at least one person into an unintentional loner at any house party.

Bartop Arcade Honors Aspect With 4:3 IPad Screen

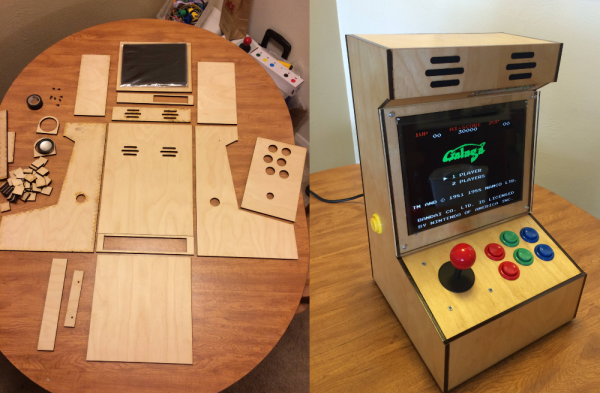
Let’s face it, we all love arcades, but not all of us can fit a full size stand-up in our homes. [Bentika] knew the solution was a bartop style cabinet, but it had to be designed and built to his specifications. You see, he’s a bit of an aspect ratio nerd. Only a proper 4:3 screen would do for emulating games designed for just such a display. Modern 4:3 displays are hard to come by, unless of course you have an iPad handy. The 1024 x 768 screens used on the early model iPads are perfect for the task.

Driving these screens used to be a chore, but thanks to hacker reverse engineering and overseas manufacturing, these days, controllers are only a few clicks away. [Bentika] ordered a controller for the iPad 1 screen from eBay. What he got was a controller that only worked with the iPad 2 screen. Thankfully he had a pile of old iPads to play with, so it wasn’t an issue.

[Bentika] designed his cabinet using AutoDesk 123D based upon a basic outline provided by [Joshendy]. His final cut patters were created with Adobe Illustrator. He was able to get the entire cabinet laser cut for around $160, including materials. Cabinet assembly was easy, thanks to plenty of square gussets used to align the various pieces.

The controller for this arcade is of course a Raspberry Pi 2 running RetroPie. [Bentika] used a control block to interface the joystick and buttons to the Pi itself. RetroPie lends itself to “keyboardless” operation, he didn’t have to bring any of the Pi’s USB ports outside the case.

We have to say the final results are very nice. This system has all the portability of a CRT based bartop setup without the weight. You can check out more discussion of this hack over on Reddit, or click past the break for the video.

Continue reading “Bartop Arcade Honors Aspect With 4:3 IPad Screen”