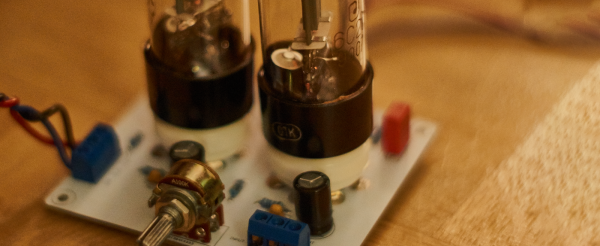
For this year’s Hackaday Prize, [skrodahl] is building a beautiful tube preamp. It’s a masterpiece of glass and free electrons, it already works, and it sounds great.
This circuit is a modified version of the Bastard, an amp published in the Danish magazine Ny Elektronik nearly 20 years ago. The original amp was a true bastard, with a transistor phono stage, a valve line stage, and an input selector that used relays. [skrodahl]’s version only uses the line stage, but part of the name remains as a nod to the original design.
The design of this amp uses octal 6J5 tubes, a 80 VDC, 0.1 A and 6 VDC, 1.5 A power supply. This is actually two projects in one, with the power supply comprising an another entire project.
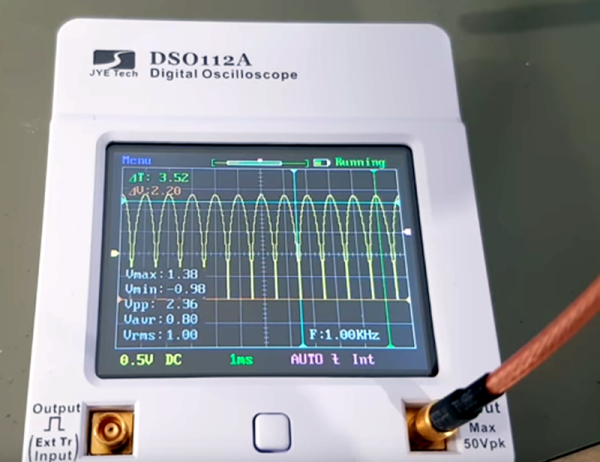
[skrodahl]’s BSTRD is built, and it works, but the question remains: how does it sound? Unlike so, so many tube amp projects on the Interwebs, [skrodahl] actually has test and measurement gear to figure out what the frequency response and THD measurements actually are. For the frequency response, this amp is dead flat from 10 Hz to 30 kHz. THD is somewhere between 0.35-0.4%, or more than acceptable.
This is a great little project, and an awesome extension to an already popular Open Source project. It’s also a great entry for the Hackaday Prize, and we’re pleased to see it entered in this year’s contest.