How The Game Genie Works

Those of us old enough to remember blowing into cartridges will probably remember the Game Genie – a device that plugs in to an NES, SNES, Sega Genesis, or Game Boy that gives the player extra lives, items, changes the difficulty, or otherwise modifies the gameplay. To someone who doesn’t yet know where the 1-up is in the first level of Super Mario Bros., the Game Genie seems magical. There is, of course, a rhyme and reason behind the Genie and [The Mighty Mike Master] put together a great walkthrough of how the Game Genie works.

There are two varieties of Game Genie codes – 6-character codes and 8-character codes. Both these types of codes translate into a 15-bit address in the game ROM (from 0x8000 to 0xFFFF for the 6502-based NES) and a data byte. For the 6-character codes, whenever the address referenced by the Game Genie code is accessed, a specific data byte is returned. Thus, infinite lives become a reality with just a 6-character code.

Some games, especially ones made in the late years of their respective systems, use memory mapping to increase the code and data provided on the cartridges. Since areas of data are constantly being taken in and out of the CPU’s address space, merely returning a set value whenever a specific address is accessed would be disastrous. For this bank-switching setup, the Game Genie uses an 8-bit code; it’s just like the 6-bit code, only with the addition of a ‘compare’ byte. Using an 8-bit code, the Game Genie returns a specific byte if the compare bytes are equal. Otherwise, the Genie lets hands off the original data to the CPU.

Of course, all this information could be gleaned from the original patent for the Game Genie. As for the circuitry inside the Game Genie, there’s really not much aside from an un-Googleable GAL (general array logic) and a tiny epoxied microcontroller. It’s an amazingly simple device for all the amazement it imbued in our young impressionable minds.

Continue reading “How The Game Genie Works”

Manual Transmission For Gamers

manual-transmission-for-gamers

If that stick shift just doesn’t feel right in your hand it’s time for a change. This hack puts a gaming joystick in the center console of your hoopty as a gear shifter.

[Ilias] used a joystick from about 1991 to replace the stock shifter. It jogs our memory when he mentions that this thing saw a lot of use playing X-wing vs. Tie Fighter. Boy did we burn up a ton of time playing that one too! He actually broke the stock part getting it off (find a shop manual for your car if you’re afraid of this). But once the grip was removed he was relieved to find the joystick fit perfectly. The two molded plastic halves of the joystick screw together. To join them with the shifting level he used epoxy putty.

The momentary push switch for that thumb button is still in there. But it doesn’t look like he hooked it up to anything. If we were to give this one a try we’d have to find some use for it. Got any suggestions? Let us know in the comments.

3D Printed Pip-Boy, Geiger Counter Not Included

pip

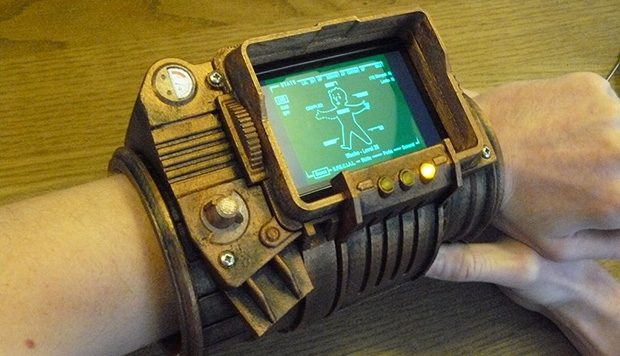
Yes, we all love portal guns and crowbars, but there’s one piece of video game paraphernalia that could conceivably be a useful piece of hardware for the modern technologist. It’s the Pip-Boy 3000, the wrist-wearable computer from Fallout, and now you can print on on your 3D printer.

All the pieces for this Pip-Boy are available over on Thingiverse. Included in those files are a dozen plastic parts that, when assembled, come together to form a wrist-mounted computer. You could, of course, print out a static image of a Pip-Boy screen for this build, but [dragonator] made a little addition to his model – he put in a space for a smartphone, so all your environmental sensors and inventory management also work with this 3D printed model.

This is far from the first wearable Pip-Boy we’ve seen, but it is the first that’s able to be fabricated on a 3D printer, and comes with the nice bonus of being the best phone case ever. It’s still a lot of work to put this together, but we’re going to say the results are fantastic.

You can check out the demo video of the Pip-Boy below.

Continue reading “3D Printed Pip-Boy, Geiger Counter Not Included”

Giving The VirtualBoy A VGA Out

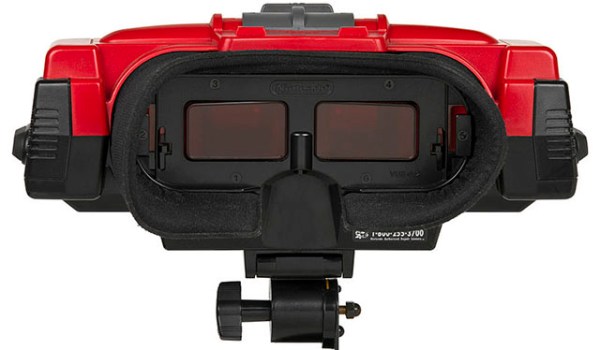
Nintendo’s VirtualBoy – the odd console-inside-a-pair-of-goggles  and arguable ancestor of Nintendo’s 3DS – was a marvelous piece of technology for its time. In a small tabletop unit, you were able to play true 3D video games at an impressive 384 x 224 pixel resolution. Of course the VirtualBoy was a complete failure, but that doesn’t mean hardware tinkerers are leaving this wonderful system to video game collectors. [furrtek] has been playing around with his VirtualBoy and managed to add VGA out.

As a 3D system with two displays, any sort of video out was rightfully ignored by the VirtualBoy system designers. Still, [furrtek] wanted some sort of video out on his system, so he began poking around with a small FPGA board to generate some VGA signals.

The two displays inside the VirtualBoy aren’t your normal LCD display – as seen in this iFixit teardown. they’re really two linear LED arrays that generate a single line of 244 pixels, with mirrors scanning the line in the in the Y axis. These LED arrays are controlled by the VirtualBoy CPU through a series of shift registers, and by carefully tapping the lines of each LED array, [furrtek] was able to copy all the image data into the RAM of an FPGA.

After stuffing an XESS XULA-200 FPGA board inside the case of his VirtualBoy, [furrtek] wired up a few resistors for a DAC and installed a VGA out port on the underside of his console. Everything worked the first time he powered it up, and he began playing his VirtualBoy on his big screen TV.

Because [furrtek] is only reading one of the VirtualBoy’s displays, all the 3D data – and the main feature of the VirtualBoy – is lost when it’s displayed on a TV. 3D TVs do exist, though, and we’d love to see an improved version of this that captures data from both of the VirtualBoy displays.

You can see [furrtek]’s video of his mod in action below.

Continue reading “Giving The VirtualBoy A VGA Out”

Playing Meat Boy On An FPGA

We usually look at these FPGA University projects and think how much fun it must have been to get credit for the work. But in this case we can’t image the grind it must have been to implement the game mechanics of Meat Boy in an FPGA. See how well it came out in the clip after the break.

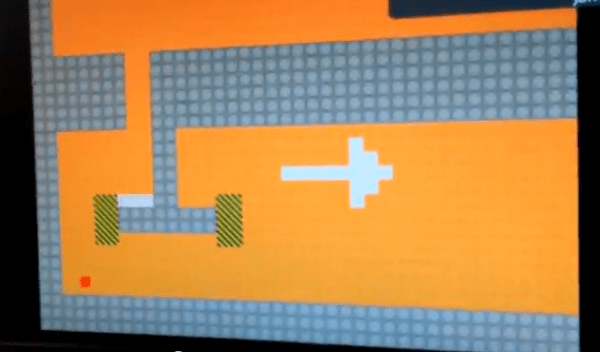
Remember that with an FPGA you’re basically building hardware devices by using code. The Reddit discussion of the project sheds some light on where to start (and even shares the source code). The Altera DE2 is pushing the game to a monitor using SXGA at 60Hz. The map is laid out as a collection of 32×32 tiles, each represented by 2 bits in memory. [SkipToThe3nd] does go into detail about how the physics work but we can’t even begin to paraphrase that part of the discussion.

The game being cloned here is Meat Boy, the Flash game predecessor to Super Meat Boy. If you’ve never heard of the title we’d suggest watching Indie Game: The Moviea documentary which follows several independent game developers as they try to get their titles to market.

Continue reading “Playing Meat Boy On An FPGA”

A Gamecube And N64 Console Mashup

gc

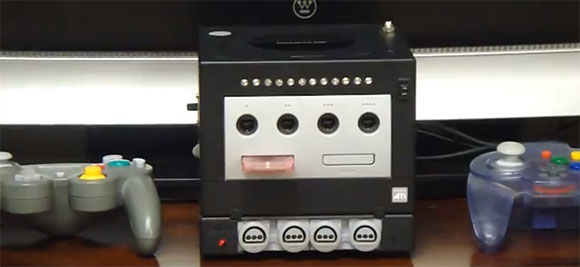
[Hailrazer] over on the Made by Bacteria forums was a bit tired of all his consoles cluttering up the space underneath his TV. No worries, though, because it’s actually fairly easy to combine a Gamecube and an N64 into one system that looks very professional.

While [Hailrazer]’s Gamecube was left reasonably complete, not including the addition of a mod chip and SD card to hold Gamecube disk images, the N64 portion of the build required quite a bit of hardware hacking. After finding a Game Boy Advance player for a Gamecube – a neat hardware add-on that allows you to play GBA games on a Game Cube – [Hailrazer] thought he found the perfect enclosure for an N64 case mod.

The guts of the GBA player were thrown out and the guts of an N64 were carefully filed down to fit inside their new home. An Everdrive 64 holds almost every US N64 release on an SD card, making access to the cartridge port unnecessary.

A switch on the side of the Gamecube toggles the video and audio output between the Gamecube and N64. It’s a neat little setup, and packs two consoles into the space of the tiny Gamecube.

Continue reading “A Gamecube And N64 Console Mashup”

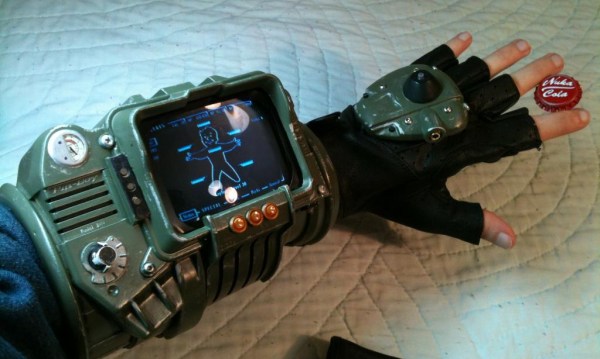
A Wearable Pipboy 3000

[Zachariah Perry] builds a lot of replica props, and judging from the first few offerings on his blog he’s quite good at it. We enjoyed looking in on the Captain America shield and Zelda treasure chest (complete with music, lights, and floating heart container). But his most recent offering is the wearable and (kind of) working Pipboy 3000 from the Fallout series.

From his description in the video after the break it sounds like the case itself came as a promotional item that was part of a special edition of the game. He’s done a lot to make it functional though. The first thing to notice is the screen. It’s domed like the surface of a CRT, but there’s obviously not enough room for that kind of thing. The dome is made from the lens taken out of a slide viewer. It sits atop the screen of a digital picture frame. [Zachariah] loaded still images from the game into the frame’s memory, routing its buttons to those on the Pipboy. He also added a 12 position rotary switch which toggles between the lights at the bottom of the screen.

A little over a year ago we saw a more or less fully functional Pipboy. But that included so many added parts it was no longer wearable.

Continue reading “A Wearable Pipboy 3000”