It’s a dream come true: remote control of a real car. Besides being a lot of fun, a life-size RC vehicle has some practical applications, like performing rescue operations or delivering supplies to dangerous areas. For [Carter], [Dave], [Ryan], and [Sean], the dream became reality in the span of 24 caffeine-and-chicken-finger-fueled hours during an Ohio State University hackathon. They dubbed the system MagiKarpet because it sits in place of the floor mat and runs on pixies.
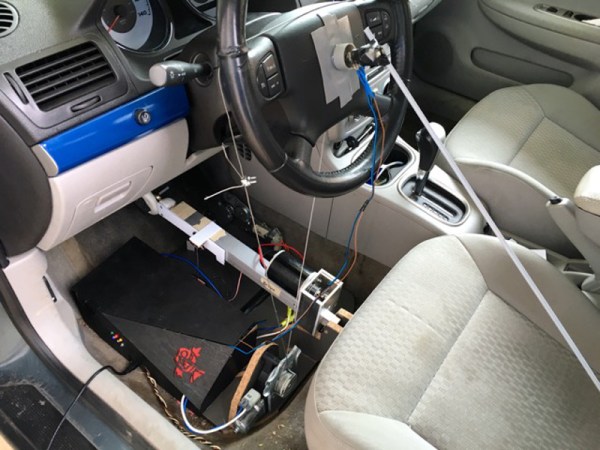
The plan was to control the throttle, brake, and steering of a Chevy Cobalt using a PlayStation controller. For added fun, a camera mounted high above the back bumper would provide a third-person view, and this feed would be displayed on a monitor in the backseat. Everything is controlled by an Arduino Mega. A beefy linear actuator works the brake and is attached temporarily with a band of Shapelock that slips around the pedal. The throttle is pushed by a lever attached to a car window motor. Another motor connects to the steering wheel with cables that can turn it 90° left and right. Although the build was successful, they ran into a couple of issues. But what’s a hackathon experience without a few problems?
The linear actuator was jammed for about an hour after some early testing, but they got it unstuck. The PS controller was borked, so they had to roll their own joysticks. The school wouldn’t let them actually drive it around because of safety (killjoys but we get it), so they put it up on a jack to demonstrate it for the judges. They took second place, though we can’t imagine what would have beat this. Check out the complete build video after the break.
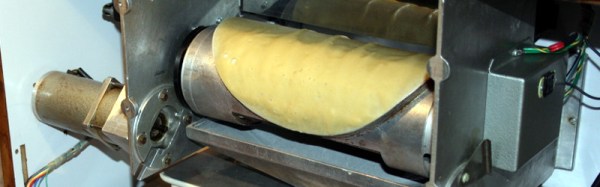
You might remember these guys from last year around this time. They took first place at the same hackathon with Robottermilk Puncakes, a app-controlled pancake machine. Now that you’re hungry for pancakes, feast your eyes on this endless one.