Do you love coffee? Of course you do. Do you sometimes wish you could drink coffee instead of water? Do you want to void the warranty on your hot water heater? Yes? Well, then we have the hack for you!
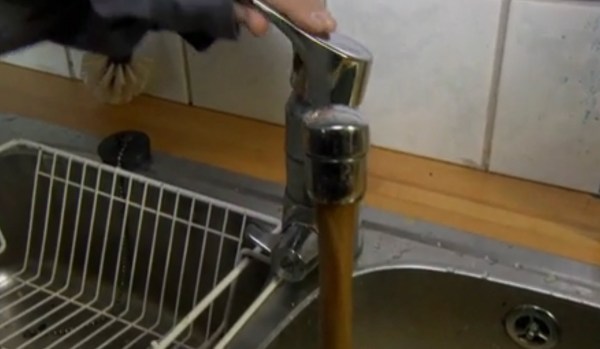
A Norweigan science show called Ikke gjør dette hjemme (Do Not Try This at Home) decided it would be fun to see what would happen if you turned your hot water heater into a giant coffee machine. They didn’t put much effort into the conversion, in fact, they just opened up the tank and poured copious amounts of instant coffee into the tank. But they did it, and that saves us from wondering if it’s possible. Spoiler: It is.
Stick around after the break to see the water run brown — in a good way.
The 2015 Hackaday Prize included something new: a prize for the Best Product. The winner took home $100k in funding, a six-month residency at the Supplyframe Design Lab in Pasadena, and help turning a budding product into a full-grown success. And the winner is…
Vinduino
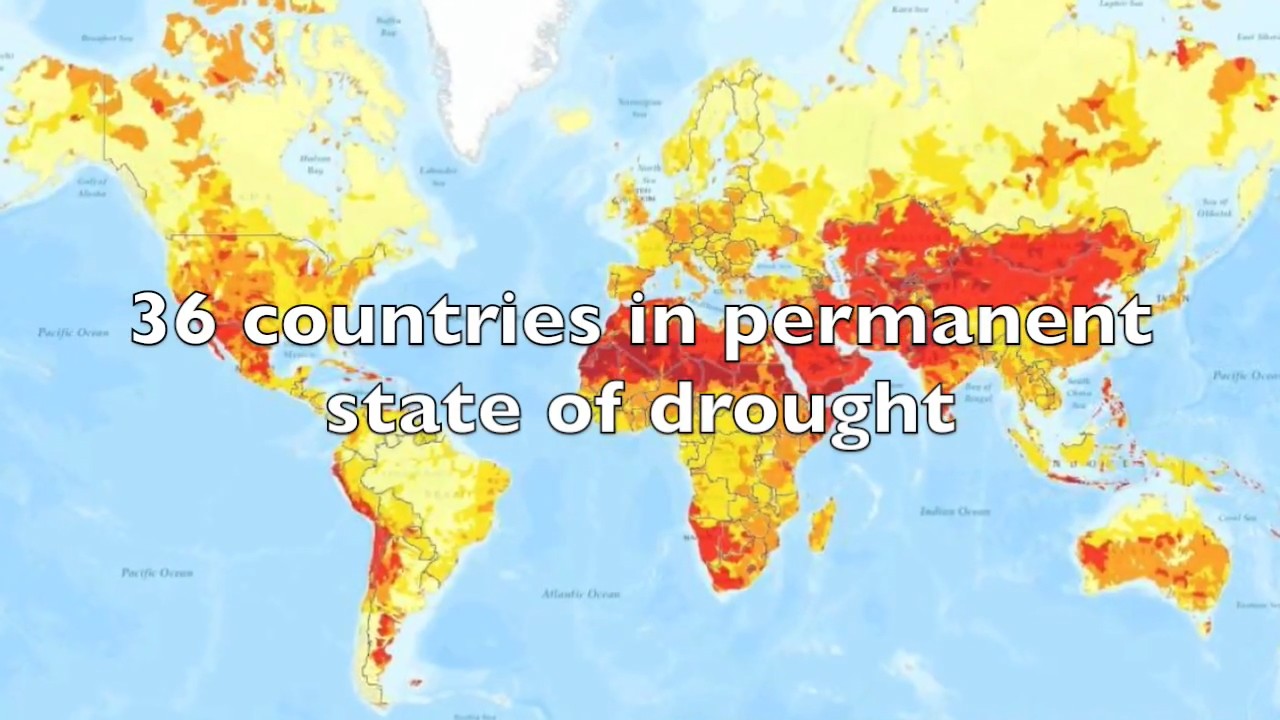
Water is a crucial element for farming: the plants need enough, but not too much. Water is also an increasingly precious resource all over the world. In California, five times as much water is used in agriculture as is used by residential consumers. A 25% reduction in agricultural use, for instance, would entirely offset all urban water use. With this in mind, a number of California farmers are trying to voluntarily reduce their water consumption. But how?
One important development is targeted irrigation. Getting precisely the right amount of water to each plant can reduce the fraction lost to evaporation or runoff. It’s a small thing, but it’s a very big deal.
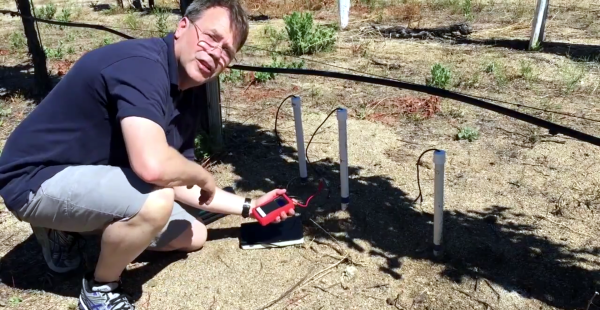
Cue Vinduino, a long-running project of “gentleman farmer” and hacker [Reinier van der Lee]. As a system, Vinduino aims to make it easy and relatively inexpensive to measure the amount of water in the soil at different depths, to log this information, and to eventually tailor the farm’s water usage to the plants and their environment. We were able to catch up with [Reinier] at the Hackaday SuperConference the day after results were announced. He shared his story of developing Vinduino and recounts how he felt when it was named Best Product:
The product that won Best Product is simple, but very well executed. It’s a hand-held soil moisture sensor reader that couples with a DIY soil probe design to create a versatile and inexpensive system. All of the 2015 Best Product Finalists were exceptional. Vinduino’s attention to detail, room for expansion, and the potential to help the world pushed this project over the top.
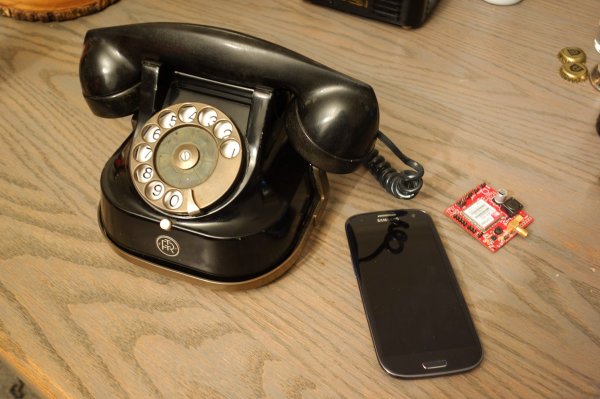
Sometimes, the answer to, “Why would you bother with a project like that?” is just as simple as, “Because it’s cool.” We suspect that was the motivation behind [Dirk-Jan]’s project to make portable versions of classic rotary telephones.
On style points alone, [Dirk-Jan] scores big. The mid-1950s vintage Belgian RTT model 56 phone has wonderful lines in its Bakelite case and handset and a really cool flip-up bail to carry it around, making it a great choice for a portable. The guts of the phone were replaced with a SIM900 GSM module coupled with a PIC microcontroller and an H-bridge to drive the ringer solenoids, along with a Li-ion battery and charger to keep it totally wireless – except for the original handset cord, of course. The video after the break show the phone in action both making and receiving calls; there’s something pleasing on a very basic level about the sound of a dial tone and the gentle ringing of the bell. And it may be slow, but a rotary dial has plenty of tactile appeal too.
Rotary-to-cell conversions are a popular “just because” project, like this conversion designed to allow an angry slam-down of the handset. The orange Siemens phone in that project is nice and all, but we really favor the ’50s look for a portable.
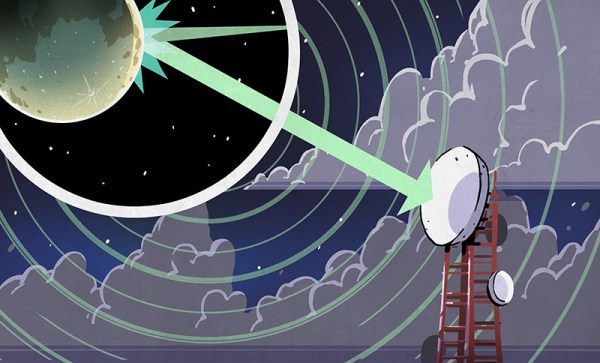
It has to be hard to be a kid interested in radio these days. When I was a kid, there was a lot of interesting things on shortwave. There wasn’t any cable TV (at least, not where I lived) so it was easy to hack antennas and try to pull in weak TV and broadcast stations. The TV stations were especially interesting.
It was one thing for me to build a dish antenna to pick up Star Trek from a station just barely out of range. But sometimes you’d get some really distant TV station. The world’s record is the reception of a BBC TV station in Australia (a distance of 10,800 miles). That’s extreme, but even from my childhood home near New Orleans, I’ve personally picked up TV stations from as far away as New Mexico. Have you ever wondered how that’s possible?
Radio signals behave differently depending on their frequency. The TV frequencies used in the old analog signals were VHF signals (well, the channels between 2 and 13 in the United States, anyway). In general, those signals usually travel through the air, but don’t bounce off any part of the atmosphere. So if you aren’t in a line of sight with the transmitter, you can’t see the broadcast. The other problem is that local stations tend to drown out weak distant stations. A TV DXer (ham lingo for someone trying to hear distant signals) has to wait for local stations to go silent or listen on frequencies where there are no local stations.
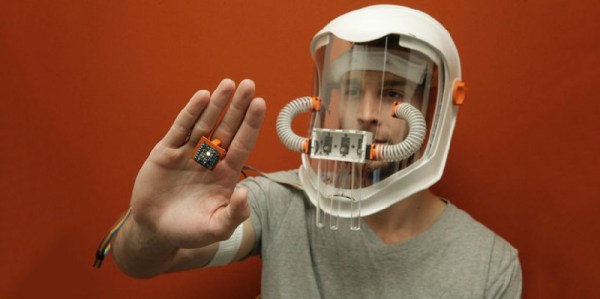
Synesthesia is a mix-up of sensory perception where stimulation of one sense leads to a stimulation of a second sense. This is the condition where Wednesdays can be blue, the best part of your favorite song can be orange, and six can be up and to the right of seventy-three. While you can’t teach yourself synesthesia – it’s something you’re born with – [Zachary] decided to emulate color to smell synesthesia with his most recent electronics project.
For his synesthesia mask, [Zach] is turning varying amounts of red, green, and blue found with a color sensor into scents. He’s doing this with an off-the-shelf color sensor, an Intel Edison, and a few servos and test tubes filled with essential oils. The color sensor is mounted on a ring, allowing [Zach] to pick which colors he wants to smell, and the scent helmet contains a small electronics box fitted with fans to blow the scent into his face.
There’s more than one type of synesthesia, and if you’re looking for something a little more painful, you can make objects feel loud with a tiny webcam that converts pixels into pulses of a small vibration motor.
Suspension bridges are far and away the target of choice in America’s action blockbusters. In just the past three years, the Golden Gate Bridge has been destroyed by a Kaiju, Godzilla, a Skynet-initiated nuclear blast, and a tsunami. Americans don’t build real bridges anymore, or maintain the ones that we have, but we sure love to blow them up in movies.
There is logic here: A disaster scene involving a famous bridge serves both to root the film in the real world and to demonstrate the enormity and the immediacy of the threat. The unmaking of these huge structures shocks us because many bridges have gained an aura of permanence in our collective consciousness. Although we know when the Brooklyn Bridge was built and who built it, we feel like it has always been there and always will be. The destruction of our familiar human topography is even more disturbing than the deaths of the CGI victims, and I’m not just saying that as a misanthrope who loves bridges.
However, in all of the planning, storyboarding, rendering, and compositing of these special effects shots, nobody pauses to consider how suspension bridges actually behave. I can accept messianic alien orphan superheroes and skyscraper-sized battle robots, but I will not stand for inaccurate portrayals of structural mechanics. It’s fine to bend the laws of physics if the plot warrants it, but most suspension bridge mistakes are so needless and stupid that their only function seems to be irritating engineers.
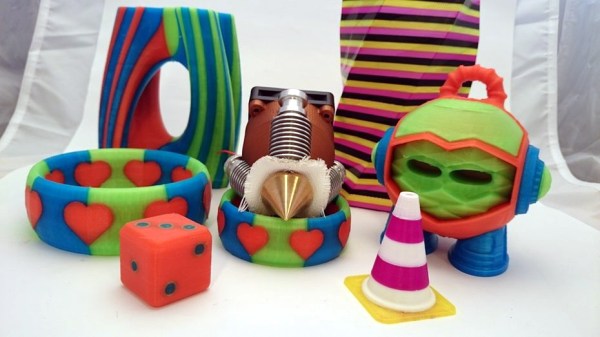
It’s safe to say we’ve hit a bit of a plateau with hobby based 3D printers using FDM technology. Print quality is pretty high, they’re about as fast as they’re going to get, and compared to commercial machines they’re a pretty good bang for your buck. So what’s next? What about printing in color?
It is possible to print in color using a regular 3D printer and a bit of patience, but it’s really not economical or efficient. We’ve seen multiple extruder heads for 3D printing as well, but there are many problems with that due to calibration and trailing plastic from one head to another. So what if you could feed multiple color filaments into a single mixing head?
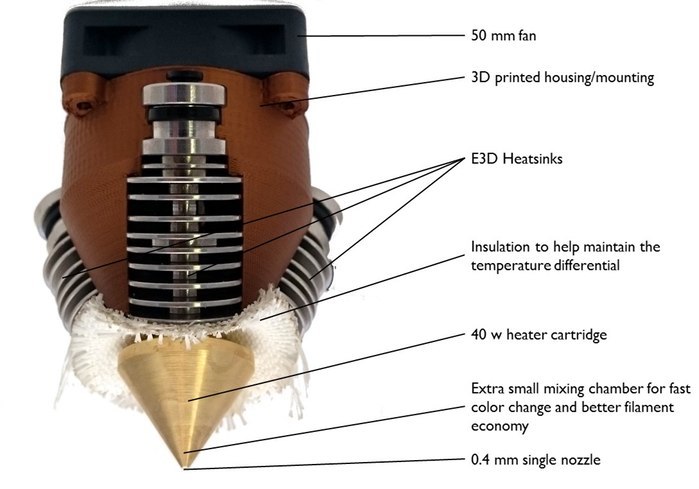
Well, it turns out you can. Earlier this year RepRap ran a Kickstarter for the development of the Diamond Hotend — a single nozzle multi-color extruder. It’s in production now and appears to work quite well. It’s also compatible with many 3D printers as long as the motherboard has triple extruder support.

 It is possible to print in color


