A T-Shirt At Amalthea

Personnel Transfer Vehicle HM-6YK was thirty two hours out of Ganymede station en route to Amalthea when the alarm went off. Captain Peter Cole was awake in a bunk, staring at his tablet, waiting for the alarm when Bill Friars, the rookie pilot came down. ‘Hey, cap! We got a problem here.”Wha?’ Pete feigned he was just awoken. ‘What’s up?’

‘Our terminal guidance radar is out, and we’re less than three hours from approach. I reset the system, and it’s looking like a hardware problem.’

‘That’s impossible. We were just checked out on Callisto a month ago.’ Pete headed up to the flight deck and minutes later the subordinate’s assessment proved correct.

‘Coulda been a meteor.’ Bill sheepishly suggested, displaying the requisite amount of self-doubt required of his rank.

‘If it was that we’d have more problems on our hand than a broken radar. We’re gonna need this fixed quick. Suit up; I’ll go dig the spare out of the locker.’

6YK was a small ship, barely three hundred tons. Her nuclear drives propelled her around the Jovian system, usually transporting cargo between the far-flung outposts around the inner moons. This trip, she was carrying twenty three researchers to the Lyctos base, retrieving 5 tons of cargo, six pax, then heading off again to Ganymede station. The entire trip would take 52 hours. This was Bill’s first run.

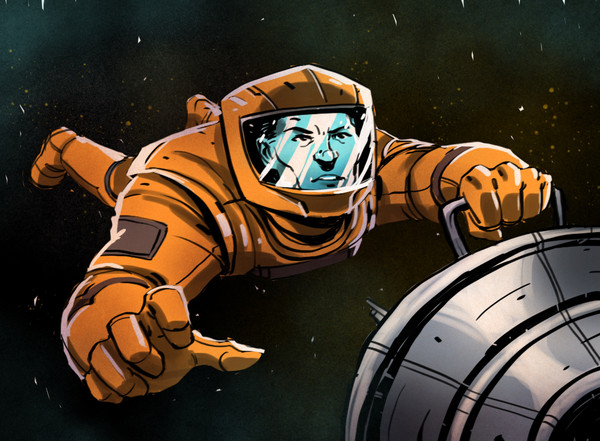
‘Just get out there and replace this module.’ Pete had eight thousand hours logged in the system, and three thousand on this run alone. Bill had done his EVA training at Deimos station, but for both men the sight of the swirling ivory, reds, and subtle blues of the crescent Jupiter invoked the fear of an ancient and angry god. For Bill, knowing he was only protected from the radiation by his hard suit and the improbably thin beryllium glass visor, this god became even more frightening.

The stubby, box-like ship glistened with octathiocane picked up around Io’s orbit. The radio crackled ‘Lotta dust out here, Pete.’ Bill slowly made his way to the radar assembly, latching carabineers from handgrip to handgrip. ‘Looks like it’s just gone’ Bill looked at the familiar antenna mount. ‘Metal fatigue or something.’

‘I don’t care what happened.’ The insertion burn was just two hours away, and their target was approaching at seventy kilometers per second. ‘Just get it fixed.’

Bill removed the remaining sliver of metal from the base and tossed it aside. The new feed horn fit comfortably in its socket. If nothing else, these ships were easily repairable. ‘We have guidance.’ The radio cackled. ‘Why don’t you get back in here?’ Bill reversed his steps around the ship.

As the airlock repressurized, the engines started their long burn for capture. ‘Good work, kid.’ This was the first indication of approval the captain had given since leaving the station. Helmet and gloves off, Bill struggled to unlatch the polycarb hard suit.

Bill reached into the locker and pulled out the t shirt he’d been wearing on the bridge just an hour ago. The gold logo was nearly the same color as the octathiocane dusty dirtying the airlock.

Intel Releases Edison, A Computer Slightly Larger Than An SD Card

Announced at the beginning of this year, Intel’s Edison is the chipmakers latest foray into the world of low power, high performance computing. Originally envisioned to be an x86 computer stuffed into an SD card form factor, this tiny platform for wearables, consumer electronic designers, and the Internet of Things has apparently been redesigned a few times over the last few months. Now, Intel has finally unleashed it to the world. It’s still tiny, it’s still based on the x86 architecture, and it’s turning out to be a very interesting platform.

The key feature of the Edison is, of course, the Intel CPU. It’s a 22nm SoC with dual cores running at 500 MHz. Unlike so many other IoT and micro-sized devices out there, the chip in this device, an Atom Z34XX, has an x86 architecture. Also on board is 4GB of eMMC Flash and 1 GB of DDR3.  Also included in this tiny module is an Intel Quark microcontroller – the same as found in the Intel Galileo – running at 100 MHz. The best part? Edison will retail for about $50. That’s a dual core x86 platform in a tiny footprint for just a few bucks more than a Raspberry Pi.

When the Intel Edison was first announced, speculation ran rampant that is would take on the form factor of an SD card. This is not the case. Instead, the Edison has a footprint of 35.5mm x 25.0 mm; just barely larger than an SD card. Dumping this form factor idea is a great idea – instead of being limited to the nine pins present on SD cards and platforms such as the Electric Imp, Intel is using a 70-pin connector to break out a bunch of pins, including an SD card interface, two UARTs, two I²C busses, SPI with two chip selects, I²S, twelve GPIOs with four capable of PWM, and a USB 2.0 OTG controller. There are also a pair of radio modules on this tiny board, making it capable of 802.11 a/b/g/n and Bluetooth 4.0.

Edison

The Edison will support Yocto Linux 1.6 out of the box, but because this is an x86 architecture, there is an entire universe of Linux distributions that will also run on this tiny board. It might be theoretically possible to run a version of Windows natively on this module, but this raises the question of why anyone would want to.

The first round of Edison modules will be used with either a small breakout board that provides basic functionality, solder points, a battery charger power input, and two USB ports (one OTG port), or a larger board Edison board for Arduino that includes the familiar Arduino pin header arrangement and breakouts for everything. The folks at Intel are a generous bunch, and in an effort to put these modules in the next generation of Things for Internet, have included Mouser and Digikey part numbers for the 70-pin header (about $0.70 for quantity one). If you want to create your own breakout board or include Edison in a product design, Edison makes that easy.

edisonbreakout

There is no word of where or when the Edison will be available. Someone from Intel will be presenting at Maker Faire NYC in less than two weeks, though, and we already have our media credentials. We’ll be sure to get a hands on then. I did grab a quick peek at the Edison while I was in Vegas for Defcon, but I have very little to write about that experience except for the fact that it existed in August.

Update: You can grab an Edison dev kit at Make ($107, with the Arduino breakout) and Sparkfun (link down as of this update never mind, Sparkfun has a ton of boards made for the Edison. It’s pretty cool)

Welcome To The Old School: Restoring Antique Radios

Before the second world war Radio was a revolution in mass-communication much like the internet today. Fortunes were made and lost, empires built, epic patent battles ensued, all of which resulted in the world being more connected than ever before, which makes for a really great story (and a great Ken Burns documentary).

Last month we showed you how to modify a vintage radio to play your own audio source through it while re-using the existing electronics and maintaining its functionality. In this post we will show you how to restore any vacuum tube radio. You will learn basic repair/restoration procedures from a different era when it was actually worth repairing consumer electronics. Plug into history and get your hands on the most influential technology of the first-half of the 20th century!

Continue reading “Welcome To The Old School: Restoring Antique Radios”

THP Hacker Bio: John Costik

A surprising amount of entries for The Hackaday Prize are medical devices, and the regulatory problems associated with that domain. [John Costik]’s Diabetes Data, Everywhere is one of the few projects that is perfect for a world where the words ‘hack’ and ‘FDA’ simply cannot be found in the same sentence.

[John]’s son was diagnosed with Type 1 diabetes at a very young age, and very early [John], his family, and the school nurse have had to deal with the nearly innumerable tasks that type 1 diabetes management entails. A Dexcom continuous glucose monitor is a big help, providing a wealth of glucose logging in a small, wearable device.

This monitor, however, is relatively locked down; the stock device is unable to push data to the Internet. [John] reverse engineered the protocol for this glucose monitor, enabling [John] to monitor his son’s blood glucose levels from anywhere on the planet.

There’s a huge community of people waiting for the technological advancements of the last thirty years, like the Internet and portable, networked devices, to make it into medical devices. [John]’s project has already gotten a bit of local news coverage, and is a perfect example of expanding the capabilities of existing devices to make his and his family’s life more convenient.

Bio/interview below.

Continue reading “THP Hacker Bio: John Costik”

PiMagic RaspPi to Arduino Shield Interface

Adding I/O To The Rasberry Pi Models A & B

The Raspberry Pi has been the basis for many cool projects. Even so, Models A and B have been criticized for having only a handful of GPIO pins available. Sure, the new Model B+ has a 40-pin GPIO header but what if you want to use your old RaspPi with a bunch of in and outputs? [Steve] is one of those guys and has done something about it by creating a pretty neat solution he calls the PiMagic. It’s a Pi Plate that has an on board ATMEGA328 running an Arduino bootloader. The RaspPi and the Arduino communicate via UART as [Steve] felt it was a bit simpler than going the SPI or I2C route.

The RaspPi GPIO’s run on 3.3v and the ATMEGA328’s like 5v. To solve this, the PiMagic has a Level Shifter that keeps the I/O of the two boards happy. Older Pi’s had a problem burning out PCB traces when supplying too much current on the 5v supply line. [Steve] threw in a fuse that will burn out before the Pi does to ensure that no Pi’s were harmed in the making of this project.

Now that a bunch of I/O are available, how do you physically access them? Well, the PiMagic has female headers in the typical Arduino layout. This way any Arduino Shield will plug right in. [Steve] made all his source files available for those who want to make one themselves. Find an assembly video after the break.

Continue reading “Adding I/O To The Rasberry Pi Models A & B”

A Detailed Look At The 7805 Voltage Regulator

We’re quite sure that all hobbyists have used the 7805 voltage regulator at least once in their lives. They are a simple way to regulate 7V+ voltages to the 5V that some of our low power projects need. [Ken Shirriff] wrote an amazingly detailed article about its theory of operation and implementation in the silicon world.

As you may see in the picture above such a regulator is composed of very different elements: transistors, resistors, capacitors and diodes, all of them integrated in the die. [Ken] provides the necessary clues for us to recognize them and then explains how the 7805 can have a stable output even when its temperature changes. This is done by using a bandgap reference in which the difference between transistor base-emitter voltages for high and low current is used to counter the effects of temperature. As some elements looked a bit odd during [Ken]’s reverse engineering process, he finally concluded that what he purchased on Ebay may be a counterfeit (read this Reddit comment for another opinion).

Unbricking A BluRay Drive

All BluRay player, devices, and drives contain a key that unlocks the encryption and DRM present on BluRay discs. Since 2007, the consortium responsible for this DRM scheme has been pushing updates and revocation lists on individual BluRay releases. Putting one of these discs in your drive will brick the device, and this is the situation [stephen] found himself in when he tried to watch Machete Kills. Not wanting to update his software, he searched for a better solution to unbrick his drive.

Every time [stephen] played or ripped a disc, the software he was using passed a key to the drive. This key was compared to the revocation list present on the drive. When a match was found, the drive bricked itself. Figuring the revocation list must be stored on a chip in the device, [stephen] broke out the screwdriver and started looking around inside the drive.

There aren’t many chips inside a modern BluRay drive, but [stephen] did manage to find a few Flash chips. These Flash chips can be dumped to a computer using a BusPirate, and comparing the dump to a publicly available ‘Host Revocation List Record’, [stephen] was able to find the location on the Flash chip that contained the revocation list.

The next task was to replace the revocation list currently on the drive with an earlier one that wouldn’t brick his drive. [stephen]’s MakeMKV install made this very easy, as it keeps a record of all the revocation lists it runs across. Updating the Flash in the drive with this old list unbricked the drive.

This is only a temporary fix, as [stephen] still can’t put a new disc in the drive. A permanent fix would involve write protecting the Flash and preventing the drive from ever updating the revocation list again. This would be a very complex firmware hack, and [stephen] doesn’t even know what architecture the controller uses. Still, the drive works, saved from terrible DRM.