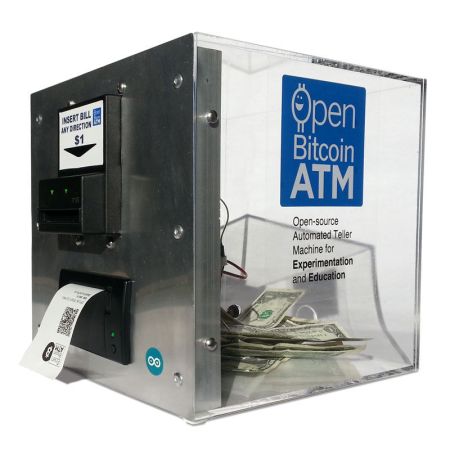
If there’s one thing Bitcoins can benefit from, it’s easier accessibility for first-time users. The process can be a bit daunting if you’re new to cryptocurrency, but [mayosmith] is developing an open Bitcoin ATM to help get coins in the hands of the masses. There are already some Bitcoin dispensers out there. The Lamassu is around 5k a pop, and then there’s always the option of low-tech Condom Vending Machine conversions.
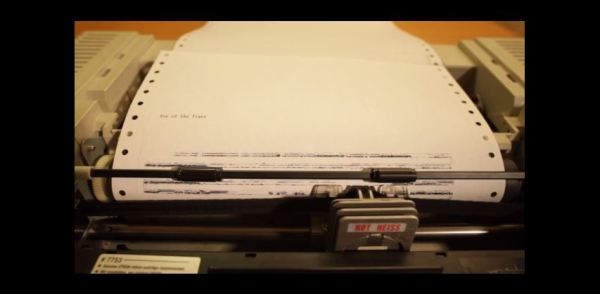
[mayosmith’s] build is still in the proof-of-concept phase, but has some powerful functionality underway. The box is made from acrylic with a front plate of 12″x12″ aluminum sheet metal, held on by 2 aluminum angles and some bolts. Slots were carved out of the aluminum sheet for the thermal printer and for bill acceptor—the comments identify it as an Apex 7000. Inside is an Arduino with an SD Shield attached. Dollars inserted into the acceptor trigger the Arduino to spit out a previously-generated QR code for some coins via the thermal printer, though all values are pre-determined at the time of creation and stored sequentially on the SD card. Stick around for a quick video below, and check out the official page for more information: http://openbitcoinatm.org
 Like a lot of us, [Andrea] has a habit of disassembling everything he runs into. He recently came across a fairly substantial motor he’d salvaged and envisioned