Fail Of The Week: EPROM Reading And Erasing

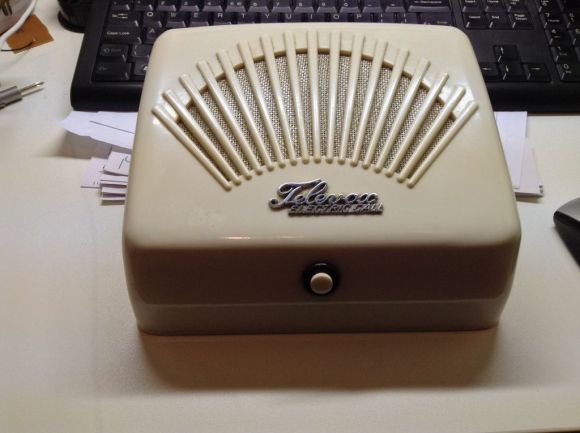
It may be a failure but it sure does look cool. [Scott Lawrence] had a fair number of EPROM chips on hand and decided to get rid of the traditional eraser and programmer in order to play around with the concepts using his own hardware. He was met with disappointment at several steps in the process. No worries though, each of these upsets sent him back to the drawing board and he learned way more than he ever would have if it had actually worked. It’s fair to say this failure was highly successful.

Continue reading “Fail Of The Week: EPROM Reading And Erasing”

The Intel-powered Arduino

Dev boards based on microcontrollers and ARM System on Chips are everywhere, but finding a small pocketable computer based on an Intel processor has been difficult to find. [Massimo] of Arduino just unveiled a new Intel architecture Arduino-compatible board at the Rome Maker Faire. It’s called the Galileo, and it has everything you’d expect from a juiced-up Arduino running x86.

The main chip is an Intel Quark SoC running at 400MHz with 256 MB of DRAM. On board is a Mini-PCIe slot, 100Mb Ethernet port, Micro SD slot, RS-232, and USB host and client ports. Here’s the datasheet for the Galileo with all the applicable information.

The Galileo can be programmed with the standard Arduino IDE, but from the getting started guide, it looks like this board is running Yocto, a stripped down Linux for embedded environments.

Realistically, what we have here is a board with about the same processing power as a Raspberry Pi, but with Arduino compatibility, and a Mini PCIe port for some really fun stuff. It will be interesting to see what can be made with this board, but if you have any ideas on what to do with a Galileo before it’s released in two months, drop a note in the comments.

Making A Bathymetric Book By Hand And Searching For An Easier Way

We first saw this Bathymetric Book at our local hackerspace, Sector67, quite some time ago. [Caroline Rose] gave a seven minute presentation on the project as part of the monthly meeting which is open to the public. You can get a pretty good feel for the book that includes a to-scale depth representation of Crater Lake in the introductory post which she recently published. Each page makes up one topographical ring of the lake. Put them all together and you’ve got a really amazing way to explore the watery depths of the deepest lake in the United States.

The book you see above is hand made. She downloaded the depth data from the US Geological Survey, then put it through some processing in order to print one elevation level on each page. That’s when the work really began. She cut out every page by hand! The four-plus hour task was grueling. And just for a bit of added punishment she even made a second book. But at Tuesday night’s follow-up presentation she said never again.

[Caroline] developed a much faster and still accurate technique for producing the bound-book depth maps. She is using a laser cutter and a different binding technique. By using folded packets of paper, rather than individual pages, she is able to cut out three double-sheets at once — including holes for the binding thread and the outline of the finished pages themselves. This cuts the process down to about four minutes of laser cutter time.

For now you’ll have to settle for a time-lapse video of the hand-cutting process (embedded below). But we hope to post an update when she makes more information about the laser-cut version available.

Continue reading “Making A Bathymetric Book By Hand And Searching For An Easier Way”

Rubber Band Blaster Shoots 10 Rounds A Second

rubber band blaster

Office warfare has just been stepped up a notch and it’s time to hide in your cubicles! Enter the Rubber Band Blaster-32, a fully automatic rubber band handgun with switchable barrels for quick reloading.

It features a unique trigger release design that we haven’t seen before. By using a pull string release, [Dave] the inventor was able to load multiple rubber bands per barrel for individual firing, one by one. Hold down the trigger and as the firing wheel spins up, you can start shooting up to 10 rounds a second!

According to [Dave], reload time is around a minute per barrel, but the barrels can be stored loaded and ready to go, so pack a few mags and hang out behind the water cooler. That’s the last time [Bill] from accounting steals my stapler!

To see this puppy in action, sit tight after the break!

Continue reading “Rubber Band Blaster Shoots 10 Rounds A Second”

DIY Pressure Plate Switch For Your Haunted House

Pressure Plate

Yes, its Halloween time again and the hacks are going to be crawling out of the woodwork for the rest of the month. [Rich Osgood] is off to a good start promising one hack every week until Halloween. Judging from this first project, a DIY pressure plate switch, we think there’s going to be a common theme to follow. [Rich] constructs his pressure plate for almost no cost using cardboard, tinfoil and duct tape. It couldn’t be easier, so make lots of these if your haunting project requires pressure plate triggers to activate any spooks. Judging by the cardboard construction it’s likely they will fail after multiple uses, but you can switch one out quickly requiring only two hookup wires and a bit of tape.

Hopefully we aren’t stealing [Rich’s] thunder by recommending using Xbee wireless remote sensors to covertly monitor guests or trigger spooktacular scares.

We will be keeping an eye out for [Rich’s] follow-up Halloween hacks. Join us after the break to watch the tutorial video on making homemade pressure plates.

Continue reading “DIY Pressure Plate Switch For Your Haunted House”

PocketQubes: Even Smaller Than A CubeSat

Qube

Over one hundred CubeSats have been launched by hundreds of organizations and universities from around the globe. These have proven very useful in technology demonstration, Earth imaging, and other applications. There is, however, one large downside to the CubeSat platform. Even though it is designed to hitch a ride on launches of larger satellites, they’re still very expensive to develop and launch – somewhere between $60,000 and $125,000.

PocketQubes are a new design of satellite that bring the cost of personal satellites down to what Universities and amateur radio enthusiasts can actually afford. Instead of spending $125k on a 10cm cube CubeSat, the PocketQube, a 5cm cube, can be launched to a 700 km orbit for about $20,000.

Already, four PocketQubes are scheduled for launch in November to a 700km solar synchronous orbit, including $50SAT, a small radio transceiver put together by some ham guys, and The WREN a very impressive PocketQube with 3-axis reaction wheels and plasma thrusters.

Right now, the PocketQube kickstarter is only for aluminum structures that will become the skeleton of a small, 5cm cube satellite. There’s also the PocketQube Shop that provides a little more background on the project.

JTAGulator Finds Debug Interfaces

jtagulator

[Joe Grand] has come up with a tool which we think will be useful to anyone trying to hack a physical device: The JTAGulator. We touched on the JTAGulator briefly during our DEF CON coverage, but it really deserves a more in-depth feature. The JTAGulator is a way to discover On Chip Debug (OCD) interfaces on unfamiliar hardware.

Open any cell phone, router, or just about any moderately complex device today, and you’ll find test points. Quite often at least a few of these test points are the common JTAG / IEEE 1149.1 interface.

JTAG interfaces have 5 basic pins: TDI (Test Data In), TDO (Test Data Out), TCK (Test Clock), and TMS (Test Mode Select), /TRST (Test Reset) (optional).

If you’re looking at a PCB with many test points, which ones are the JTAG pins? Also which test points are which signals? Sometimes the PCB manufacturer will give clues on the silk screen. Other times you’re on your own. [Joe] designed the JTAGulator to help find these pins.

Continue reading “JTAGulator Finds Debug Interfaces”