Adding A Timer Feature To This Desk Lamp

timer-lamp

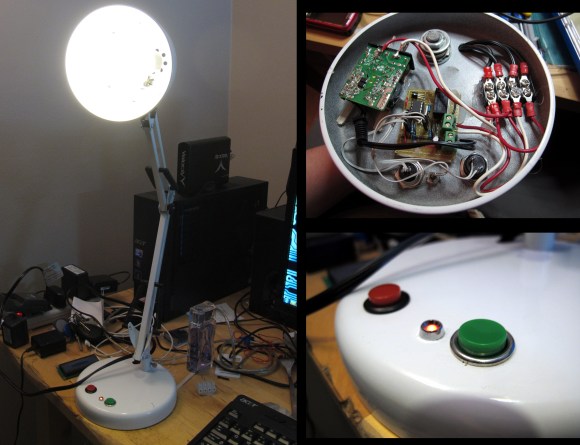
[Steven Mackaay] added a simple user interface that implements a shutoff timer for his desk lamp. His project log comes in two parts, the breadboarding and the actual implementation.

He wanted a few things out of the build. The first is an LED that would help him find the lamp in the dark. The second feature is a shutoff timer with different delay options. To get everything working he used a PIC microcontroller to drive a mechanical relay. That relay switches the mains power to the lamps. Now he uses one button to switch the lamp on and off. The other selects a shutoff timer of one, five, or thirty minutes. Power for the control circuitry is provided by the green wall wart PCB seen in the photo of the electronic guts.

This is a pretty general setup that could be applied to a lot of other mains switching applications. Just connect the logic hardware to some type of relay.

Webcam Eye-tracking Moves Robot-powered Skittles Candy

robot-powered-skittles

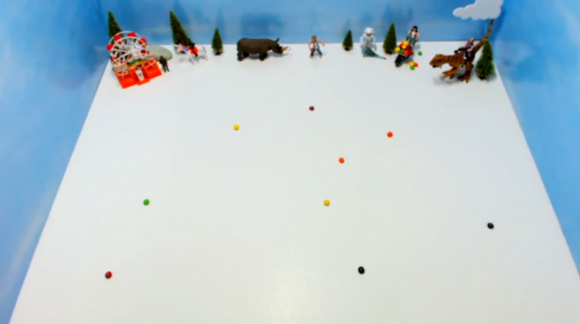
This is a great hack, and it’s an advertisement. We wish this were the norm when it comes to advertising because they’ve really got our number. Skittles enlisted a few engineers to build a web interface that moves robot-powered candies.

When we started looking into this we figured that a few robots were covered with over-sized cases that looked like Skittles. But that’s not it at all. What you see above is actually upside down. The top side of the white surface has one tiny wheeled robot for each candy. A magnet was embedded in each Skittle which holds it to the underside of the surface. The user interface was rolled out on a Facebook page. It uses a common webcam for eye tracking. When you move your eyes, the robot controlling your assigned candy moves in that direction. See for yourself in the cllip after the break.

So we say bravo Mars Inc. We love it that you decided to show off what’s behind to curtain. As with the Hyundai pixel wall, there’s a whole subset of people who might ignore the ad, but will spend a lot of time to find out how it was done.

Continue reading “Webcam Eye-tracking Moves Robot-powered Skittles Candy”

Making Graphene With A DVD Burner

A group of researchers have figured out how to produce graphene using a DVD drive. This discovery helps clear the path for mass production of the substance, which was discovered in the late 1980’s. More recently, the 2010 Nobel Prize for Physics was awarded to a team that produced two-dimensional graphene; a substance one just atom thick. One method of doing so used Scotch tape and is mentioned in the video after the break as a technique that works but is not feasible for large-scale production.

The process seen here starts with graphite oxide because it can be suspended in water. This allows a lab technician to evenly distribute the substance on a plastic surface. Note the use of optical discs. The second part of the process involves hitting the dried layer of graphite oxide with a laser. It just so happens that this can be done with a consumer DVD drive. The result is graphene that can be used in circuits and may have potential as a fantastic super-capacitor.

Continue reading “Making Graphene With A DVD Burner”

Wooden Box Repeats Rhythm Used When Knocking On The Lid

knock-box-build

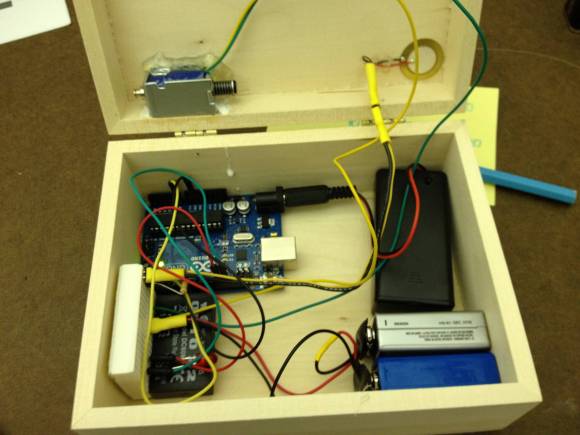
[Paul Mandel] just finished building this knock box project. It’s a familiar concept that uses a solenoid to tap on the side of the box. The Arduino driven setup monitors vibrations on the lid. When you knock on the box, it records the pattern and plays it back using the solenoid.

He was inspired by a knock-detecting door lock. Using that code as the starting point he implemented a system that takes input from a simple push button and echos back the rhythm using the Pin 13 LED on the Arduino board. This is a great way to start as it removes the complexity of driving a solenoid and monitoring a piezo element. After a bit of success he implemented each of those hardware modules one at a time. You can get a look at the final product in the clip after the break.

One of our favorite version of this project is still the knock block from several years back.

Continue reading “Wooden Box Repeats Rhythm Used When Knocking On The Lid”

Raspberry Pi Laptop Is Just A Little Too Big For A Pocket

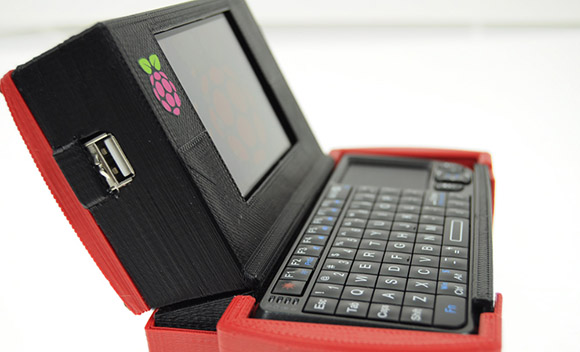
Over on the Parts People blog, [Nathan] created his own Raspberry Pi laptop. It’s got all the bells and whistles, including a keyboard, trackpad, battery, and even a 3D printed case.

Of course [Nathan]’s laptop contains a Raspi, but the other included parts are where this palmtop computer is turned into something useful. For powering the Pi and 3.5″ composite LCD, [Nathan] took apart the battery pack from an old Dell laptop. By throwing out the bits of plastic surrounding these rechargeable cells and reusing the battery connector, [Nathan] was able to power the Pi, and all the peripherals for 10 hours.

Also included in [Nathan]’s Raspi palmtop is a 64 GB SSD connected to the powered USB hub. This, along with the 4 GB boot SD card, provides more than enough storage for listening to a music library, or even watching a few TV shows on the 3.5″ screen,


Open Source Software Defined Radio Transceiver

SDR

As the year draws to a close, we must look back and look at the advances in amateur radio this year. The RTL-SDR tuner hack, a USB TV Tuner to create a software defined radio receiver, is one of the greatest hacks of the last 12 months and a great justification for 2012 being the year of software defined radio receivers. 2013 is shaping up to have even more advances in the state of software defined radio. This time we’ll be transmitting as well, possibly with [AE9RB]’s Peaberry SDR transceiver.

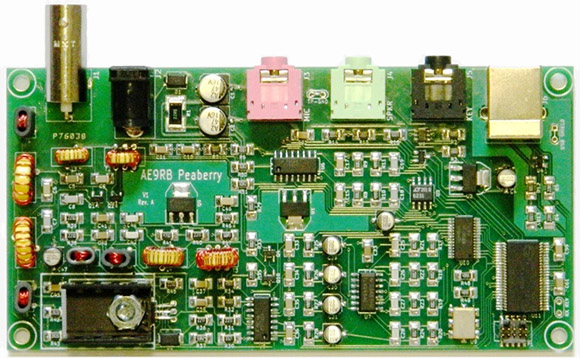
The Peaberry SDR transceiver is a kit to both transmit and receive on every HAM band between 160 meters (1.8 MHz) to 17 meters (18 MHz). It does this through a USB interface and a 48kHz, 24-bit interface that is (or will shortly be) compatible with all the major SDR interfaces.

While the Peaberry SDR requires an amateur radio license to operate, we can’t wait to see what else will be coming to the software defined radio scene in the next year.

Thanks [Zach] for sending this one in.

Arduino Compatible Christmas Tree

tree

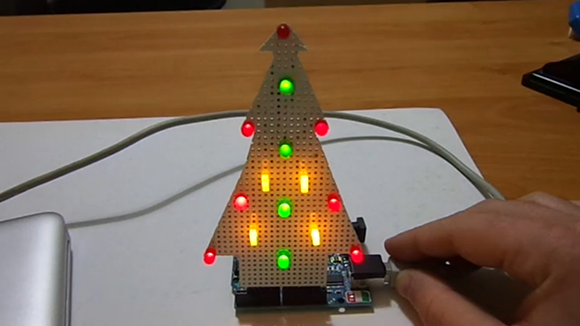
It wouldn’t be the holidays without an LED Christmas tree, and luckily [Danilo] brings the goods with an Arduiinofied LED Christmas tree (Italian, translation).

In the past week, we’ve seen LED Christmas trees of digital logic and a great freeform circuit version. Unlike these other builds [Danilo]’s LED tree uses a piece of protoboard masterfully cut into the shape of a Christmas tree. There’s no PCB for this build; just a lot of bare wires and a lot of patience.

Because [Danilo]’s tree makes use of the PWM pins on his Arduino, it was possible to connect his tree to the Arduino with a few 90 degree headers. This provides a great base for his tree and makes it possible to build a professional-looking enclosure for his project.

You can check out [Danilo]’s tree in action after the break.

Continue reading “Arduino Compatible Christmas Tree”