Geeks Living Off The Grid Are Hard On Batteries

Many of you will remember [Mikey Sklar] from the multitude of times he’s been on hackaday. What you may not have noticed is that he is an ubergeek, living off the grid.

He has Solar PV battery bank, three electric vehicles, a shipping container loaded with battery powered tools and a small army of iRobot Roomba’s for cleaning. Getting the maximum lifetime out of a battery by removing sulfation is essential to keep expenses down.

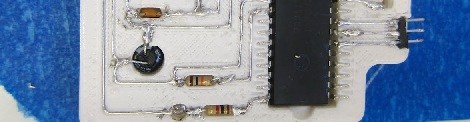
Keeping expenses down is nearly a full time job when trying to live the homestead lifestyle. Our current culture makes it extremely difficult to survive completely on self made/grown things and bartering. They seem to be doing pretty well though. One way he can reduce his costs while still getting to enjoy some modern gadgets is to get longer life out of his batteries.  He does this by using a capacitive battery charger and desolfator that he designed and affectionately calls “Da Pimp”. He also brings in a little bit of income by selling kits!

 A capacitive charger behaves like a constant current power supply dynamically adjusting the voltage to get over the batteries internal resistance. Plus there is a pulse from the AC/DC conversion. This allows for old batteries to last longer and for dumpster dived to be used as replacements. Capacitive chargers are small, silent and super efficent (up to 60% more so than cheap transformer based chargers).

Of course, [Mikey] is a supporter of sharing information so you can also go to his site and download the schematics,bill of materials, gerber files, and files for the housing,  to build one yourself.

Building A Color Sensor Using Luminosity

[Richard Osgood] is back again with an interesting project. This time he has constructed a color sensor. His initial design was to use three LEDs and a photoresistor. He would shine a red, then green, then blue LED on a surface and record the reflected light with the photoresistor allowing him to determine how much reflected light there was of each color. Unfortunately, he found it to be completely unreliable. An attempt at using a light frequency sensor didn’t work either. What did finally work, was a luminosity sensor shown above.

Finally, his prototype worked. Unfortunately only the red LED gives readings that he considers to be adequate with the blue and green being “not all quite right”.  With this type of circuit, he could build a clone of the magic chameleon lamp.

Reminder: SpaceX Launch Tomorrow. Watch It Live!

There isn’t a hacker out there that isn’t interested at least a little bit in the prospect of building a mission specific rocket to explode someone off the face of the planet… without killing them. We got a tiny taste of what is coming when they let us watch their engine test a few weeks ago. Tomorrow, May 19th, they are going to broadcast a launch live! You can watch it on their site beginning at 1:15 AM pacific. For some additional insight, you can also read the tweets of [Elon Musk], the founder of spaceX during the event.

Take a few minutes and enjoy the video below that discusses the program and some of the engineering obstacles they’ve had to overcome.

[via BoingBoing]

Continue reading “Reminder: SpaceX Launch Tomorrow. Watch It Live!”

Conductive Ink Circuit Experiments

This glowing LED is proof that the experiments [Nvermeer] is doing with conductive ink are working. We’re filing this one as a chemistry hack because  you need to hit the lab ahead of time in order to get the conductivity necessary for success. He reports that this technique uses a copper powder suspended in an epoxy intended for spray painting. Before mixing the two he etched the powder in ammonium persulfate, then washed it in deionized water which made it a much better conductor.

We gather that the ink was applied with the brush seen in the photo. But since this uses that spray paint friendly solution to host the copper powder we wonder about stenciling with something like masking tape in order to spray the circuit paths onto the substrate.

There’s not too much info up yet, but [Nvermeer] does link to one of our other favorite conductive ink projects.

Scavenging From Consumer Electronics To Make A Flame-powered Phone Charger

[Gigafide] just finished building this flame-powered phone charger. The concept is not new. He grabbed a Peltier cooler and used the temperature differential between a flame and a heat sink to produce electricity used by the charger. If you search around here enough you’ll find plenty of candle-powered devices, and a few hacks that use a Peltier device in a bit more interesting way. But we really like his high-production value video, straightforward explanation of the concepts, and ability to source the components in consumer devices. We don’t think you’ll be disappointed by his video found after the break.

The Peltier device comes out of a USB drink chiller. It is supported by a metal stand made from electrical box covers and threaded rod. Underneath he’s using a gel fuel can used by the food industry, and above he’s got  CPU heat sink and fan. This setup puts out around 1.5V but he’ll need a boost converter to charge a phone with that. A single AA battery charger meant to power your phone in a pinch is perfect for this application.

Continue reading “Scavenging From Consumer Electronics To Make A Flame-powered Phone Charger”

Adding Kilometers To A Radio Meant Only For Meters

The NRF 24L01+ radio transceiver can be found in a lot of wireless project builds. But it’s only meant to work at a range of a few meters. [Achu Wilson] found that he could greatly extend the range by as much as 2 kilometers. All he needed to do was build this high-gain antenna.

He already had an idea of what he wanted to use the RF link for, so a directional antenna is no a problem. He chose a biquad setup with a back reflector, then used NEC2 to model the design and tweak it for the best performance possible. It only took him about two hours to complete the build, and manages a 10 dB gain. Not bad for some wire and a scrap of sheet meta.

This is the same transceiver chip used in the SNES wireless mod. If only we had a really powerful set of binoculars we could play the extremely long-distance game of Mario Kart we’ve always dreamed about.

Printing Circuitry On A RepRap

Over on the RepRap blog, [Rhys] has been experimenting with molten metal to build circuits with the RepRap.

Last June, [Rhys] found a neat alloy made of Tin, Bismuth, and a little bit of Indium that melts at around 130° C, and has just the right properties to be extruded with a standard RepRap setup. The results were encouraging, but the molten metal quickly dissolved the brass and aluminum nozzles [Rhys] was pushing liquid metal through.

The solution to this problem was solved by anodizing the heck out of a RepRap nozzle to make a hard, protective oxide layer. Already [Rhys] has logged hundreds of hours squirting molten metal out of his RepRap with no signs of any damage to the nozzle.

Since [Rhys] figured out how to print in metal, he whipped up an extremely minimal Sanguino board. You can see this RepRapped PCB running a LED blink program after the break. Now to work on the RepRap pick and place…

Continue reading “Printing Circuitry On A RepRap”