Putting A Software Defined Radio On A Mac

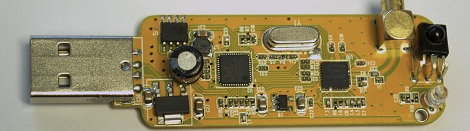
A few months ago [Antti Palosaari] discovered cheap USB TV tuners could be used as a software-defined radio. Since then, we’ve seen these TV tuners receive signals from GPS satellites and even the signals between air traffic control and passenger aircraft. Like everything cool, Mac support for these drivers is slightly terrible so [hpux735] wrote his own Cocoa app to support these amazing dongles.

[hpux735]’s driver is a port of the osmocom driver, repackaged as a native Cocoa app so the terribly fickle libusb and other dependencies aren’t needed. All the code is up on GitHub, ready for you to start playing around with SDR.

As far as tutorials for those wading into the deep waters of software-defined radio, a number of how-to guides have popped up over the last month to get SDR noobs up and running quickly. Here’s a few of the best ones we’ve seen:

[braingram] put up an Instructable for Ubuntu users.

For people who have a Windows box lying around [balint] put up a getting started guide.

There’s a slightly more thorough Windows guide here.

Most of the development in the TV tuner SDR community is happening on the RTLSDR subreddit, and there’s more than enough info there to do just about anything with these TV tuner dongles. If you come up with a novel use for one of these dongles, send it in on the tip line.


Heathkit Closes Down, Again.

With this rather large flip flop, Heathkit has closed its doors… again. The company that so many of us remember fondly from their myriad of electronics kits originally closed its doors in 1992. Last year, there was an announcement of a revival and a call for kit submissions. Unfortunately, it looks like that just didn’t work out. While this isn’t an official announcement, the facts appear to line up to Heathkit closing their doors.

If you’d like to re-live a few fond memories, here’s a Heathkit unboxing at EMSL.

Destroying Stuff For The Good Of All Mankind

NC state’s constructed facilities laboratory is a place where things get broken for science. We’ve shared several videos lately of things being sliced, diced, sheared, exploded, and smashed, purely for the fun of it, and now we feel like we should compensate a little bit. No, we’re not going to undergo physical punishment, instead, we’ll share some educational destruction.

In the video after the break, you can see a few things pushed to their absolute limits, then a bit further. The Constructed Facilities Laboratory is a research lab that tests the limits of some of the infrastructure that we rely on daily. Bridges, roads, walls, support beams. Someone needs to figure out what they can really handle. Even more interesting than the short video below, are all the different videos in the tour that explain how the facility is constructed an how they operate. Take a few minutes and enjoy the tour.

Continue reading “Destroying Stuff For The Good Of All Mankind”

Pipe Crawling Snake Robot Is A Masterpiece Of A Senior Project

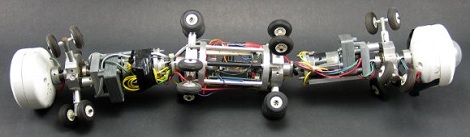
Here’s an oldie but a goodie: [Eiki], [Mark], and [Sheraz] built a pipe crawling robot for their senior engineering project at Florida Atlantic University way back in 2004. Despite being a rather old build, its aged well and still demonstrates the clever ways the guys overcame some engineering obstacles.

The original plan for the pipe crawler was to mount three spring-loaded wheels 120° apart at the fore and aft of each robot section. Six independent wheels for each section of the robot is overly complex, and too much for a single operator to control; the team moved on to a ‘screw drive’ system where each wheel is canted forward a few degrees. This drive system propels the snakebot along by simply spinning, although it does bring in a few challenges all its own.

The robot had separate sections consisting to house a motor, camera, and electronics, so a way to pass wires through a rotating shaft was needed. This came in the form of a few pairs of incredibly small ball bearings around a hollow shaft. After the mechanical portion of the build was finished, the team moved on to the electronic part where an IMU was built out of three small gyroscope sensors mounted perpendicularly to each other.

Sadly, there are no videos of the inside of a sewage pipe from the pipe crawler’s point of view, but YouTube wasn’t launched until a year after this project was finished.

The Trials Of Working With Brushless DC Motors For The First Time.

We’ve all worked with DC motors at some point. Even if you aren’t a big hardware person, you’ve probably at least picked up a motor as a kid and touched a battery to the leads causing it to whir to life. These are usually standard DC motors and not their brushless relatives. Brushless motors require a bit more work since you are manually controlling things that are normally taken care of with the brushes. This article won’t teach you how, rather it will show you the mistakes one person made in his inaugural effort to use them. It is mildly amusing, but the project summary that he’s using them for seems even more interesting.

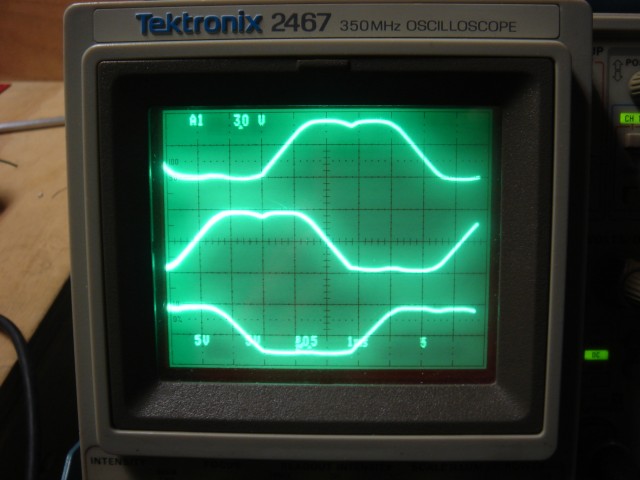
The job that’s been paying my bills and keeping me away from artsy-fartsy circuits for the past six months involves making a set of these enormous robot doors for a Certain Very Fancy Person’s house. Each door is 13 feet tall, around 7 feet wide, and weighs 1500 pounds. There are 66 of them in said house, and more in the servant quarters(!?!). The circuits on board each door have to handle running an onboard air compressor (which regulates a pneumatic weatherseal) as well as keeping track of temperature to linearize the pressure sensors when the weather gets cold. They also have to charge and maintain sealed lead acid batteries. They have commutated power rails. They have to communicate over said power rails, and do so using an capacitively-coupled data slicer and a proprietary protocol I wrote. This protocol has to be robust enough to bootload the processor over. It’s a proper embedded systems job.

Wow.

[via Adafruit]

Monitor Your Heartbeat With A Webcam And A Flashlight

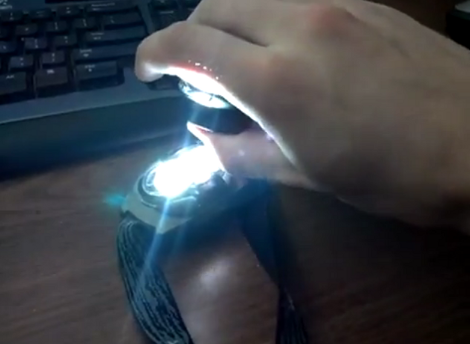
After seeing some heart rate monitor apps for Android which use the camera and flashlight features of the phones, [Tyson] took on the challenge of coding this for himself. But he’s not using a smart phone, instead he grabbed a headlamp and webcam for his heat rate monitor.

To start out he recorded a test video with his smart phone to see what it looks like to cover both the flash LED and camera module with his thumb. The picture is mainly pink, but there’s quite obviously a color gradient that pulses with each gush of blood through his skin. The next task was to write some filtering software that could make use of this type of image coming from a webcam. He used C# to write a GUI which shows the live feed, as well as a scrolling graph of the processed data. He took several tries at it, we’ve embedded one of the earlier efforts after the break.

Continue reading “Monitor Your Heartbeat With A Webcam And A Flashlight”

Morse Code Interpreter

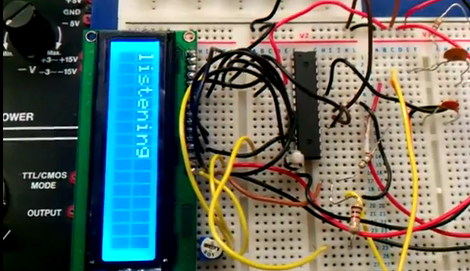
[Sulaiman Habsi] and two classmates put together a Morse Code interpreter as a class project at Sultan Qaboos University. The system listens to a morse code signal using a microphone, then translates that input to text which is displayed on this character LCD.

The breadboarded circuit feeds an audio signal from the microphone, through an OpAmp, to the ADC of an ATmega8 microcontroller. The captured signal is stored as a byte in a special way. The three least-significant bits signify how many total dots or dashes are contained in the character, the remaining bits represent those dots and dashes with zeros and ones. A full description of this process is included in a PDF linked in the article above. As you can see in the video after the break, the hardware waits to process all of the signals once the full message has been received.

This would be a great add-on for a Morse Code practice keyer.

Continue reading “Morse Code Interpreter”