3D-Printable Foaming Nozzle Shows How They Work

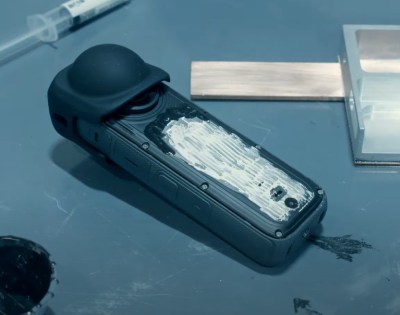
[Jack]’s design for a 3D-printable foaming nozzle works by mixing air with a fluid like liquid soap or hand sanitizer. This mixture gets forced through what looks like layers of fine-mesh sieve and eventually out the end by squeezing the bottle. The nozzle has no moving parts but does have an interesting structure to make this possible.

The fine meshes are formed by multiple layers of bridged filament.

Creating a foam with liquid soap requires roughly one part soap to nine parts air. The idea is that the resulting foam makes more efficient use of the liquid soap compared to dispensing an un-lathered goop directly onto one’s hands.

The really neat part is that the fine mesh structure inside the nozzle is created by having the printer stretch multiple layers of filament across the open span on the inside of the model. This is a technique similar to that used for creating bristles on 3D-printed brushes.

While this sort of thing may require a bit of expert tweaking to get the best results, it really showcases the way the fundamentals of how filament printers work. Once one knows the process, it can be exploited to get results that would be impossible elsewhere. Here are a few more examples of that: printing only a wall’s infill to allow airflow, manipulating “vase mode” to create volumes with structural ribs, and embedding a fine fabric mesh (like tulle) as either a fan filter or wearable and flexible armor. Everything’s got edge cases, and clever people can do some pretty neat things with them (when access isn’t restricted, that is.)

Timeframe: The Little Desk Calendar That Could

Usually, the problem comes before the solution, but for [Stavros], the opposite happened. A 4.7″ E-Ink screen with integrated battery management and ESP32 caught his eye, and he bought it and started thinking about what he wanted to do with it. The Timeframe is a sleek desk calendar based around the integrated e-ink screen.

[Stavros] found the device’s MicroPython support was a little lackluster, and often failed to draw. He found a Platform.io project that used an older but modified library for driving the e-ink display which worked quite well. However, the older library didn’t support portrait orientation or other niceties. Rather than try and create something complex in C, he moved the complexity to a server environment he knew more about. With the help of CoPilot, he got some code that would wake up the ESP32 every half hour, download an image from a server, and then display it. A Python script uses a headless browser to visit Google Calendar, resize the window, take a screenshot, and then upload it.

The hardest part of the exercise was getting authentication with Google working reliably. A white sleek 3D printed case wraps the whole affair in an aesthetically pleasing shell. So far, this has been a great story of someone building something for themselves and using their strengths. Where’s the hack?

The hack comes when [Stavros] tried squeezing his calendar into a case that was too tight and cracked the screen. Suddenly a large portion of the screen wouldn’t draw. He turned what was broken into something new by mapping out the area that didn’t draw and converting the Python to draw weather information with Pillow rather than screenshot a webpage: clever reuse and a way to make good out of a bad accident.

The code is up on GitLab, and the 3D files for the case are available on Printables. You can also find the project on Hackaday.io, as it was an entry into our recently concluded Low-Power Contest. Unfortunately, while the Timeframe is pretty power efficient, it doesn’t last as long as this calendar with a 50-year battery life.

Detecting Anti-Neutrinos From Distant Fission Reactors Using Pure Water At SNO+

Although neutrinos are exceedingly common, their near-massless configuration means that their presence is rather ephemeral. Despite billions of them radiating every second towards Earth from sources like our Sun, most of them zip through our bodies and this very planet without ever interacting with either. This property is also what makes studying these particles that are so fundamental to our understanding so complicated. Fortunately recently published results by researchers behind the SNO+ neutrino detector project shows that we may see a significant bump in our neutrino detection sensitivity.

The Sudbury Neutrino Detector (Courtesy of SNO)

In their paper (preprint) in APS Physical Review Letters, the researchers describe how during the initial run of the new SNO+ neutrino detector they were able to detect anti-neutrinos originating from nuclear fission reactors over 240 kilometers away, including Canadian CANDU and US LWR types. This demonstrated the low detection threshold of the  SNO+ detector even in its still incomplete state between 2017 and 2019. Filled with just heavy water and during the second run with the addition of nitrogen to keep out radioactive radon gas from the surrounding rock of the deep mine shaft, SNO+ as a Cherenkov detector accomplished a threshold of 1.4 MeV at its core, more than sufficient to detect the 2.2 MeV gamma radiation from the inverse beta decays (IBD) that the detector is set up for.

The SNO+ detector is the evolution of the original Sudbury Neutrino Observatory (SNO), located 2.1 km below the surface in the Creighton Mine. SNO ran from 1999 to 2006, and was part of the effort to solve the solar neutrino problem, which ultimately revealed the shifting nature of neutrinos via neutrino oscillation. Once fully filled with 780 tons of linear alkylbenzene as a scintillator, SNO+ will investigate a number of topics, including neutrinoless double beta decay (Majorana fermion), specifically the confounding question regarding whether neutrinos are its own antiparticle or not

The focus of SNO+ on nearby nuclear fission reactors is due to the constant beta decay that occurs in their nuclear fuel, which not only produces a lot of electron anti-neutrinos. This production happens in a very predictable manner due to the careful composition of nuclear fuel. As the researchers noted in their paper, SNO+ is accurate enough to detect when a specific reactor is due for refueling, on account of its change in anti-neutrino emissions. This is a property that does not however affect Canadian CANDU PHWRs, as these are constantly refueled, making their neutrino production highly constant.

Each experiment by SNO+ produces immense amounts of data (hundreds of terabytes per year) that takes a while to process, but if these early results are anything to judge by, then SNO+ may progress neutrino research as much as SNO and kin have previously.

[CuriousMarc] Repairs A Floppy

[CuriousMarc] has a pile of 8-inch drives, all marked bad. You can’t just pop over to the computer store and buy a new one these days, so it was off to the repair bench. Although the target drive would do a quick seek,  once it was in use, it just kind of shut down. So [Marc] started sending low-level commands to the device to see if he could isolate the fault. You can watch the whole adventure in the video below.

Using a breakout board, he was able to monitor and exercise all the pins going into the floppy. A quick study of the schematics, and connection to the scope were all [Marc] needed to build some theories of what was happening.

One of the theories was that the head amplifier was disabled, but it turned out to be fine. After several other dead ends, he finally found a broken spring and came up with a creative repair for it. But there was still no clear reason why the drive wouldn’t work. By process of elimination, he started to suspect an array of diodes used for switching, but again, it was another dead end.

Luckily, he had one working drive, so he could compare things between them. He found a strange voltage difference. Turns out the old advice of checking power first might have paid off here. One of the voltage regulator ICs was dead. In all fairness, there are two 12V power supplies and he had checked one of them but had missed the second supply.  This supply is only used for head bias which switches the diodes he had suspected earlier. There had also been a loose pin that might have been a contributor.

With a new power supply IC, the drive worked but needed an alignment. You may never need to repair an 8-inch floppy drive, but the logic in chasing down a problem like this will serve you well on any diagnostic task.

If you think the big drives won’t work with a modern PC, they will. On the other hand, if you need to read some badly enough, you could just use an oscilloscope.

Continue reading “[CuriousMarc] Repairs A Floppy”

Real Radar Scope CRT Shows Flights Using ADS-B

Real-time flight data used to be something that was only available to air traffic controllers, hunched over radar scopes in darkened rooms watching the comings and goings of flights as glowing phosphor traces on their screens. But that was then; now, flight tracking is as simple as pulling up a web page. But where’s the fun in that?

To bring some of that old-school feel to his flight tracking, [Jarrett Cigainero] has been working on this ADS-B scope that uses a real radar CRT. As you can imagine, this project is pretty complex, starting with driving the 5FP7 CRT, a 5″ round-face tube with a long-persistence P7-type phosphor. The tube needs about 7 kV for the anode, which is delivered via a homebrew power supply complete with a custom flyback transformer. There’s also a lot going on with the X-Y deflection amps and beam intensity control.

The software side has a lot going on as well. ADS-B data comes from an SDR dongle using dump1090 running on a Raspberry Pi 3B. The latitude and longitude of each plane within range — about 5 nautical miles — is translated to vector coordinates, and as the “radar” sweeps past the location, a pip lights up on the scope. And no, you’re not seeing things if you see two colors in the video below; as [TubeTime] helpfully explains, P7 is a cascade phosphor that initially emits a bright-blue light with some UV in it, which then charges up a long-persistence green phosphor.

Even though multicolored icons and satellite imagery may be more useful for flight tracking, we really like the simple retro look [Jarrett] has managed to pull off here, not to mention the hackery needed to do it.

Continue reading “Real Radar Scope CRT Shows Flights Using ADS-B”

Relive The Glory Days Of Sun Workstations

When the IBM PC first came out, it was little more than a toy. The serious people had Sun or Apollo workstations. These ran Unix, and had nice (for the day) displays and network connections. They were also expensive, especially considering what you got. But now, QEMU can let you relive the glory days of the old Sun workstations by booting SunOS 4 (AKA Solaris 1.1.2) on your PC today. [John Millikin] shows you how in step-by-step detail.

There’s little doubt your PC has enough power to pull it off. The SUN-3 introduced in 1985 might have 8MB or 16MB of RAM and a 16.67 MHz CPU. In 1985, an 3/75 (which, admittedly, had a Motorola CPU and not a SPARC CPU) with 4MB of RAM and a monochrome monitor cost almost $16,000, and that didn’t include software or the network adapter. You’d need that network adapter to boot off the network, too, unless you sprung another $6,000 for a 71 MB disk.  The SPARCstation 1 showed up around 1989 and ran from $9,000 to $20,000, depending on what you needed.

Continue reading “Relive The Glory Days Of Sun Workstations”

3D Printed Tool Lets You Measure Component Reels Easily

Component reels are a highly-0ptimized packaging format. They deliver components to pick and place machines for effective high-speed assembly. As more of us get into working with SMD components, we’re exposed to them as well. [MG] wanted a way to easily measure tape from component reels, which is difficult because they’re often curled up. Thus, they whipped up a nifty little tool for the job.

The device consists of a 3D printed bracket which is designed to fit on a cheap electronic tape measure from Amazon. The bracket holds an 8mm wide component tape against the measuring wheel. As the component tape is fed through the device, it turns the wheel, and the measurement appears on the screen. No more must you try and flatten out a tape and measure it section by section. Instead, you just feed it in, yank it through, and you’re done!

[MG] notes that the tape measure itself runs on an STM32 microcontroller. As an extra-credit assignment, they suggest that the device could be reprogrammed to display component count instead of distance if that’s more suitable for your application. If you happen to make that mod, be sure to notify us on the tipline!