Build An 8-bit TTL Computer

Very rarely do we see an Instructable so complete, and so informative, that it’s a paragon of tutorials that all Instructables should aspire to. [8 Bit Spaghetti]’s How to Build an 8-bit computer is one of those tutorials.

[8 Bit Spaghetti]’s build began on his blog. He originally planned to build a 4-bit computer but decided a computer that could only count to 15 would be too limiting. The build continued by programming an NVRAM as the ROM on a breadboard and finally testing his bundle of wires.

What really makes [8 Bit Spaghetti]’s special is the Instructable – he covers just about all the background information like the definition of a Turing machine, a brief introduction to electronics and logic chips, and binary numbers. Even though he’s doing some fairly complicated work, [8 Bit Spaghetti]’s tutorial makes everything very clear.

The computer isn’t quite done yet – there’s still a few nixie tubes to add – but we couldn’t imagine a better project for the budding electronic hacker.
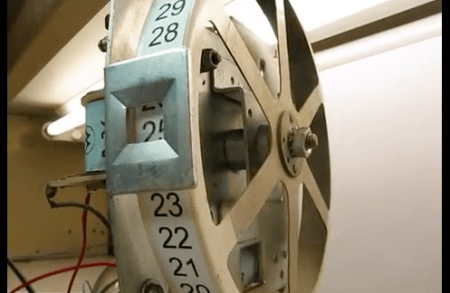
Building Giant Temperature Displays From Gottlieb Display Wheels

On Saturday, we found a cool article where pinball machine display wheels were being used as a display. In that article, one of the listed inspirations was this giant Gottlieb wheel being used to display the water temperature of a pool.  Before we go further, we’d like to mention that this project is hosted on a magazine’s website that requires you to register to get 1 free download. We did, and no financial information was required.

[Ludovic], they author of the project, was looking for an efficient and highly visible way to display the temperature in his pool. He wanted something he could see from 30 yards away, that had minimal power usage. These pinball reels were perfect, being easy to read and having virtually zero power draw when not updating.

Keep reading for a video and some more information.

Continue reading “Building Giant Temperature Displays From Gottlieb Display Wheels”

Automatic Cat Feeder Made With Recycled Laminator Parts

automatic-cat-feeder

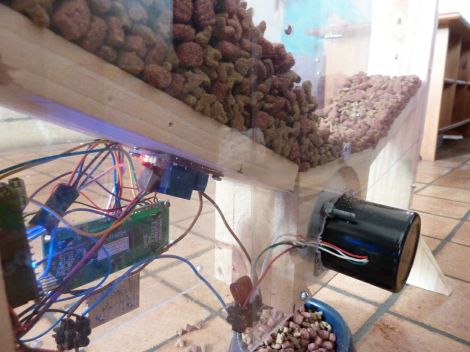
When [Antoine] and his family leave home for a few days, they usually have to find a neighbor who is willing to care for their cats while they are away. Instead of bothering the people who live next door, he decided it would be best to build an automatic cat feeder (Translation) instead.

[Antoine] originally tried building an auger to distribute the food, but it didn’t work as well as he had hoped. He opted to build a dispenser out of wood instead, driving the feeding wheel with an old microwave platter motor. The motor did not have enough torque to do the job, so he dismantled an old laminator, which had a more suitable motor inside.

He built a large hopper (Translation) out of wood and left over acrylic sheeting, which stores the cat food and houses all of the electronics used in the feeder. He controls the amount of food and feeding intervals using a pair of buttons and a small LCD display, all of which are controlled by an Arduino Nano.

While [Antoine] has not yet shared the source code that drives the feeder, he does have a demo video which you can watch below.

Continue reading “Automatic Cat Feeder Made With Recycled Laminator Parts”

Using Arduino Shields With The Raspberry Pi

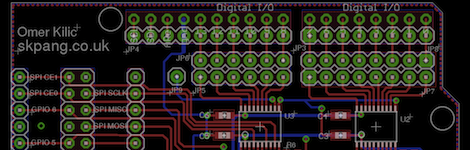
Since the Arduino was launched years ago, many ‘shields’ or add-on boards providing additional functionality have been released. There are hundreds of different shields, from video capture shields to touch screen shields. Now that the Raspberry Pi is out in the wild, it was only a matter of time before a RasPi to Arduino shield bridge was created.

[Omer] calls his bridge ‘Ponte’ and it allows Arduino shields to be used with the incredible  horsepower of an embedded Linux system. While [Omer] originally expected to write the RasPi to Arduino software converter himself, but found WiringPi halfway through the build. Of course this build comes just a day after we saw a tutorial on controlling the GPIO pins on the RasPi, and we expect to see similar GPIO-hacking builds in the future.

Right now, the Ponte only supports Arduino Uno-sized shield, so the possibility of an all-in-one RepRap controller using the RAMPS motor driver is impossible for now. We expect that to change very quickly as more people get their RasPis delivered.

Monitoring The Status Of A Unisex Bathroom

Years ago, someone at [Chuck]’s job came up with the brilliant solution of an indicator to display if the unisex bathroom is currently vacant, a men’s bathroom, or a women’s bathroom. The old system worked well, but [Chuck] thought it would be a great idea to display the current status of the bathroom on the large TV in the office, saving his coworkers from getting up only to wait in line until the bathroom became vacant.

Like the previous paper sign, [Chuck]’s build has three statuses: a men’s room, a women’s room, and vacant with a manual dial that is turned whenever someone is entering or leaving. The new build vastly improves on the paper-based indicator by using a laser cut indicator on a rotary switch.

The electronics are dead simple; just an XBee and a Explorer USB board. Whenever the switch state is changed, the XBee sends a bit of data off to a mac mini and displays the status on the office TV. It may be funny to our immature sense of humor, but it’s still a very nice project.

Simple Mod To Keep Your Downstairs Neighbors From Hearing You Pound The Keys

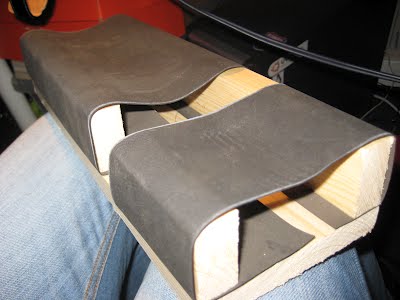
[Mesoiam] managed to pick up a Viscount hammer weighted keyboard for pretty cheap. For those who are unfamiliar, Viscount makes keyboards that feel like you’re playing a piano, hammers and all. The only problem with this, as [Mesoiam] discovered, is that even when he’s jamming with headphones in, his friends down stairs can still hear the keyboard banging due to the vibration going through the stand to the floor. His resolution to this problem was to build some custom dampers to reduce the vibration. He built two brackets that fit over the stand and suspend the keyboard on two strips of flexible rubber. Quite a simple solution to a possibly annoying problem.

Converting A Manual Camera Lens To Use Motorized Zoom And Focus

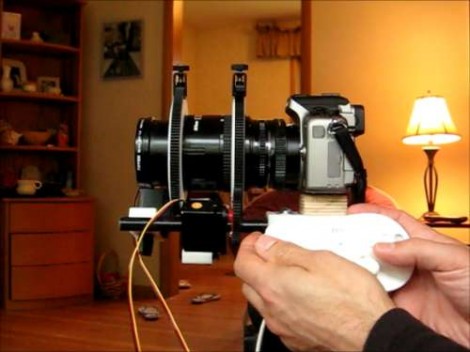
[Guy] wrote in to share this motorized camera lens project he recently finished. He really loved the zoom lens, but since both zoom and focus are manually controlled, he sometimes had trouble getting both set to the right place in time to take the shot. With modern DSLR cameras which allow video capture, he also wants to have the option of a smooth zoom that is always in focus. The solution was to add motors to the rings and control them with a Wii classic controller.

This hack really shines when it comes to the add-on hardware. He has some beautifully made rings which wrap around the focus and zoom rings on the lens. They are then held in place by a timing belt. These belts have teeth which key into the gears on a pair of servo motors. From there it’s a snap to drive the motors with an Arduino, connecting to the Wii controller with a breakout connector. You can see [Guy] showing off the build in the clip after the break.

Continue reading “Converting A Manual Camera Lens To Use Motorized Zoom And Focus”