DIY Clapper Is The Ideal Gift For The Laziest Person In Your Life

diy-clapper

If you haven’t yet wrapped up your Christmas shopping, you may want to consider building [AlanFromJapan’s] implementation of the ever-classic “Clapper”. With its theme song burned into the brain of anyone old enough to remember the 80s, the clapper was a wonderful device that certainly put the “L” in laziness.

Looking for an excuse to play around with an opamp and microphone [Alan] decided to build his own version of the Clapper based off this similar circuit, which he calls the ClapClap. He built the device using an electret mic that feeds a signal through a small amplifier on the way to the ADC of an ATmega328 microcontroller. The mcu constantly polls the ADC looking for the sound of clapping hands, a solution that works, but isn’t as clean as [Alan] wanted.

He went back to the drawing board, this time building a circuit around an ATtiny2313 microcontroller. Most of the other components remained the same, though the new, smaller design sports some nice PCBs he had made at Seeedstudio. Rather than constantly polling the ADC, this version of the ClapClap looks for peaks in the signal coming from the mic to identify the clapping of hands.

He says that the newer version works great, though he still has a software bug or two that need fixing before he parks himself on the couch for all eternity.

Prank Gift Keeps Curious Hands At Bay

gift-prank

You all know that person.

The one who picks up every present with their name on it, shaking it before busting into their best Carnac the Magnificent impression. Heck, you might even be that person.

[Jason] was thinking about how to combat the gift shaker in his life and put together a simple prank that’s sure to provide him some enjoyment when the shaking and guessing commences.

He bought a premade audio module that stores about 20 seconds of sound, replacing the pushbutton trigger with a pair of wires that can easily make contact when the box is vigorously moved. Everything was carefully mounted in a gift box before being wrapped and set under the tree to surprise the eager gift shaker.

We definitely like the idea, since there are a plethora of ways to customize/enhance [Jason’s] work to fit your specific needs. Whether you go with the kitten/puppy in a box theme, or wire in an incredibly loud alarm, your resident gift inspector will never look at presents the same way again!

Continue reading to see [Jason] explain his gift prank in more detail.

Continue reading “Prank Gift Keeps Curious Hands At Bay”

Retrofitting Modern LEGO Train Tracks For Use With Older Version

So you’re really looking for that [Norman Rockwell] Christmas and want to set up your train to encircle the Christmas tree this year. The problem is that all you’ve got is an old LEGO train set and not enough track for it. You can’t just buy some more, because the technology has changed; or can you?

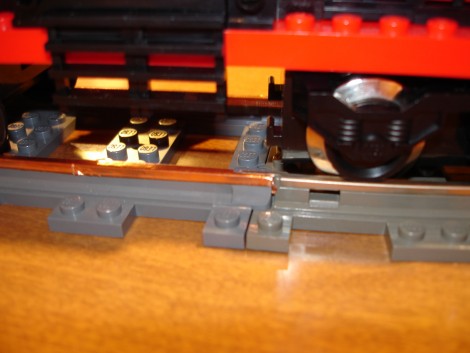
[Chris] was dismayed to find that newer LEGO train sets have gone to battery operation rather than drawing power through metal tracks. The new tracks are plastic, and buying extra segments of the older version is cost prohibitive. He figured out a way to add power conductors to the new track pieces.

It turns out the design of the new tracks matches the old, except they’re all in plastic instead of having metal rails. He bought a plastic add-on set, then picked up some copper foil from the hobby store which is meant for stained-glass work. It’s adhesive backed, and after working out the best way to apply it, he coated the rails with the stuff. As you can see above, the new mates perfectly with the old, and keeps that locomotive chugging along.

If you’ve got copper foil left over after this hack, there’s tons of other uses for it. Perhaps building your own flex sensors is worth a try.

Smelting Metal In Your Microwave Oven

Grab some scrap metal and a microwave oven and you’ll be casting your own metal parts in no time. [Mikeasaurus], who is known for doing strange things like making Silly Putty magnetic or building his own spray paint bottles, doesn’t disappoint this time around. He read about microwave smelting in Popular Science and is giving it a shot himself.

The image above shows him pouring an ingot. He build an insulated brick enclosure inside of the microwave oven, then set it to go ten minutes for a 50/50 lead/tin mixture, or fifteen minutes for silver. This will vary based on the power rating of your microwave. You can see in the video after the break that the setup gave him some trouble shortly after pouring. It wasn’t a problem with the molten metal, but spontaneous combustion of the rigid foam insulation that did him in. We shouldn’t say ‘I told you so’, but that insulation says right on it that it’s flammable!

This isn’t the first time we’ve looked at casting metal melted in a microwave. Check out this other version posted back in 2005. Continue reading “Smelting Metal In Your Microwave Oven”

Hacking Old Server Hardware For New Home Use

[Arnuschky] was looking for a network storage solution that included redundancy. He could have gone with a new NAS box, but didn’t want to shell out full price. Instead, he picked up a Dell PowerEdge 2800 and hacked it for SATA drives and quiet operation.

It’s not surprising that this hardware can be had second-hand at a low price. The backplane for it requires SCSI drives, and it’s cheaper to upgrade to new server hardware than it is to keep replacing those drives. This didn’t help out [Arnuschky’s] any, so he started out by removing the SCSI connectors. While he was at it, he soldered wires to the HDD activity light pads on the PCB. These will be connected to the RAID controller for status indication. The image above shows the server with eight SATA drives installed (but no backplane); note that all of the power connectors in each column are chained together for a total of two drive power connectors. He then applied glue to each of these connectors, then screwed the backplane in place until the glue dried. Now the device has swappable SATA drives!

His server conversion spans several posts. The link at the top is a round-up so make sure you click through to see how he did the fan speed hack in addition to the SATA conversion.

If your tolerances don’t allow you to glue the connectors like this, check out this other hack that uses shims for spacing.

Ask Hackaday: Troll Physics Edition

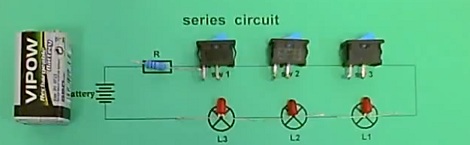
[Martin] sent in two videos he found while cruising the tubes. The first video is a simple circuit with a resistor, three switches, and three LEDs. All the components are soldered together right in front of the camera. When a battery is connected, turning the first switch on makes the first LED light up. Turning the second switch on makes the second LED light up, and the same thing goes for the third switch and LED. Obviously we’re dealing with powers that are incomprehensible with even several cups of coffee.

The second video features the same resistor/switches/LEDs, this time in a parallel circuit. Turning on the first switch makes the first LED light up, and the second switch makes the second LED light up. Truly we are dealing with an expert in troll physics.

This is probably something really benign and uninteresting, but it sure is enough to wake up enough brain cells on a Monday morning. We’re not going to hypothesize, so check out the comments where we expect the correct answer to be.

Continue reading “Ask Hackaday: Troll Physics Edition”

[Jack]’s Solar-powered Clock

Hack A Day’s own [Jack Buffington] finally finished the solar clock he built for the buildlounge.com laser cutter giveaway.

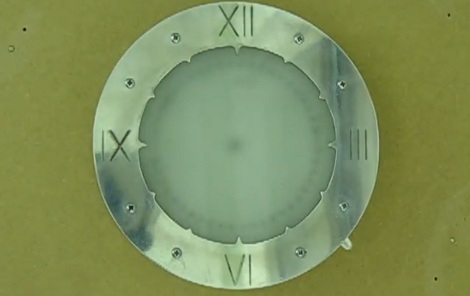
[Jack] has been putting up the build log on his blog, and now the project is finally complete. The clock operates entirely on solar power. Instead of fancy-smanchy electronics, this clock puts a new spin on the very old school sundial. A box outside [Jack]’s house captures sunlight and focuses it onto an array of optical fibers. These fibers transmit the sunlight though the wall and to the face of the clock. Only a portion of the fibers are lit at any one time, and these correspond to the time of day. With a lot of confusing fiber routing, the clock can indicate the time of day by lighting up the clock face.

We covered the nascent beginnings of this project when it was still a glimmer in [Jack]’s eye, and we’ve got to hand it to him. This is a really creative project, and the addition of the ‘daylight savings time lever’ is the icing on the cake. Check out the video after the break for a great explanation of how the clock actually works, and be sure to check out the project on BuildLounge.

Continue reading “[Jack]’s Solar-powered Clock”