Replacing A Phantom Limb With A Kinect

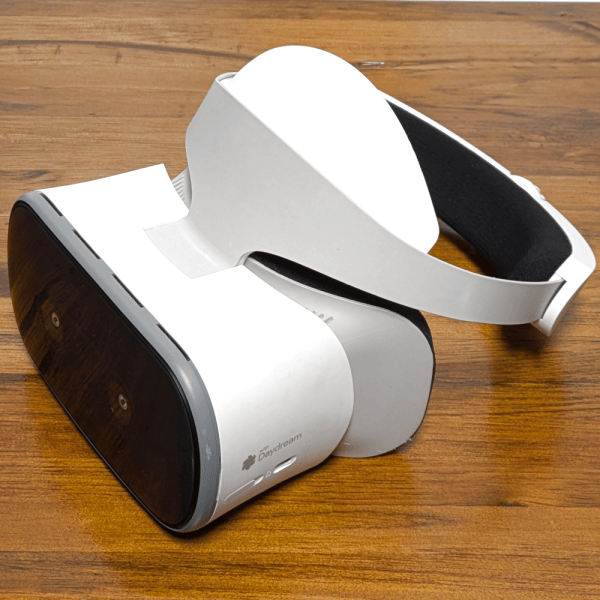
Nearly everyone has heard of phantom limb syndrome. It occurs sometimes after a limb is amputated, but the mind of the patient still thinks that the limb is attached. Generally regarded as a mix-up in the wiring of the damaged nerves, a phantom limb can be very painful. [Ben] has been working on a way to alleviate some of the pain and frustration associated with a phantom limb and fortunately for us he went for a Kinect, VR goggles, and gyroscope build.

Today, most therapies for phantom limb syndrome use a Ramachandran Mirror Box. The theory behind the mirror box is pretty simple – if someone recently lost a hand, just insert one hand in one side of the box and the arm stump on the other side. Looking into the box from the side with the good hand will trick the patient’s brain into thinking the amputated hand is still there. It’s a good therapy that has been very successful, but [Ben] thought he could do something that is a little more immersive.

[Ben]’s project uses a Kinect and VR goggles to put the patient in a virtual environment. With the help of a few gyroscopes, the patient gets a virtual representation of their whole self projected into their goggles. The technique isn’t terribly different from VR phobia treatment, although there’s much more electronics and math involved in [Ben]’s build. The first test subject said his pain was going down, so it looks like he might have a success on his hand (no pun intended).

Check out the demos of [Ben]’s treatment plan after the break.
Continue reading “Replacing A Phantom Limb With A Kinect” →

Electronic Candle Protects Sleeping Infant

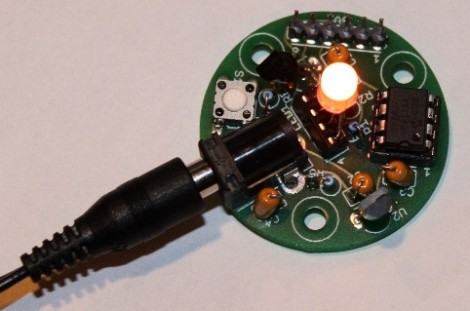
[William] developed this temperature candle as a tool to help keep babies safe as they sleep. It seems that ambient temperature has an effect on Sudden Infant Death Syndrome (SIDS). This device is meant to alert you when room temperature is outside of the recommended envelope.

The board hosts an eight-pin PIC microcontroller (12F683P), a temperature sensor, RGB LED, and a push button. The round PCB is the same size as a votive candle, which is nice except that you’re going to have to drill a hole in your candle holder to accommodate that barrel jack.

The temperature sensor is read by the microcontroller and used to determine the color of the LED. Red is hot, blue is cold, and just right is somewhere in between. But if you’d rather know the exact current temperature you can press the button and it’ll blink out the Celsius reading using blue for 10 degree increments (three blinks is 30 degrees, etc.) and red for single degrees. Don’t miss the demo of the candle in the video after the break.

Continue reading “Electronic Candle Protects Sleeping Infant” →

Speedier Hard Disk Option For Your Mac Mini

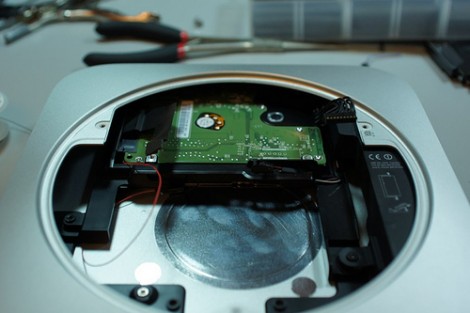
[Andrew] was left wanting by the slow hard drive in his 2011 Mac Mini. He set out to add a 10,000 RPM drive and we think he did a great job of pulling it off. Luckily he also took the time to document the process so you can try it yourself.

As with a lot of Apple products, a big part of this hack is just getting the darn thing apart without breaking something. Once that’s done, you’re got to do a little bit of interface hacking. To save space Apple uses a non-standard SATA breakout cable so [Andrew] starts by ordering a second hard drive cable from the company. He then soldered a thin wire connecting 12V from the motherboard to the 12V pin on a SATA connector. From there it’s just a matter of altering the original hard drive sled to make room for the 500 GB WD Velociraptor drive. It fits below the original and serves as additional space instead of as a replacement.

Robotic Etch-a-Sketch Draws Grayscale Images

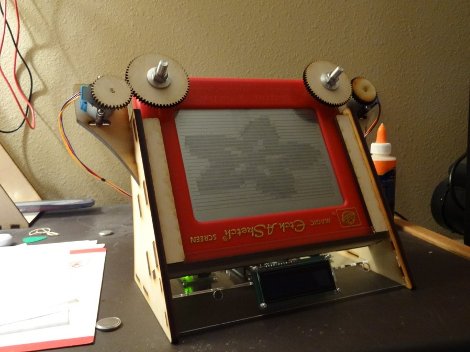
[Patrick] decided to make a computer controlled etch-a-sketch. While the idea is not that new, there is always a different way to accomplish a goal. An Arduino is used to control a pair of stepper motors which were sourced for pretty cheap, and even came with their own driver. Next a stand was mocked up using foam board, which helps determine where all the parts should live.

Next was a way to attach the steppers to the knobs, gears would be used and a collet meant for model airplanes was sourced to make the mechanical connection between gear and shaft. With everything set in place via foam board and paper printouts, it is off to get some thin plywood. The plywood is sent though a laser cutter creating most of the stand and gears. Now its all software, a program was whipped up for OSX which converts low res pictures into squiggly lines perfect for the etch-a-sketch to draw on its screen.

The results are quite impressive, join us after the break for a quick video.

Continue reading “Robotic Etch-a-Sketch Draws Grayscale Images” →

DIY Windows 8 Tablet

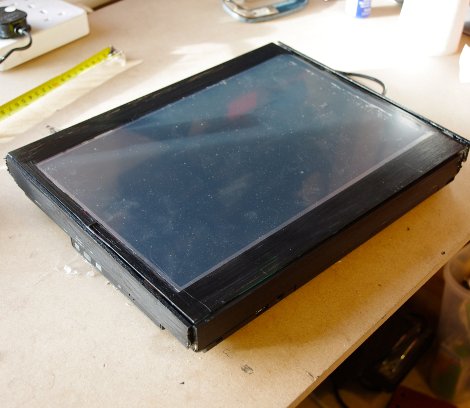
[hackitbuildit], from instructables, has brought us a a DIY windows 8 tablet. To make the tablet, an old laptop is used that meets the minimum requirements of windows 8 preview, a touch screen conversion kit, and of course the software itself. The laptop is first prepared by removing the casing around the screen, and if you just go by the pictures it kind of looks like he is ripping it apart! Though if you look at the video screws are being removed.

The screen is flipped around and laid on the keyboard with a couple spacers between them, as many laptops use the keyboard area as heat sinking. The touch screen is installed, and some wood strips are hot-glued to the outside to fill in the gap between the screen and base. With a little paint you’re left with a large, but functional windows 8 tablet to get started developing for.

Improving Headphones By Voiding Warranties

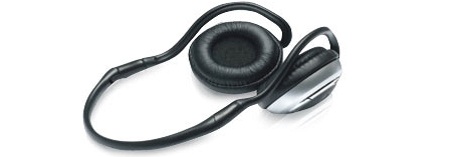
[Dan] had been wanting a pair of Bluetooth headphones for quite a while. Most of the reviews for wireless headphones in the $50-$80 range complained of tinny sound and dropped bass. Nevertheless, he stumbled upon a $20 pair of headphones with similar reviews and realized that he could switch out the driver and make a decent pair of cans.

The donor drivers came from a pair of Sennheiser HD 540 headphones. These are very respectable headphone speakers that cost about what you would expect for pro audio gear. To to get Bluetooth working with the Sennheisers, [Dan] removed the PCB and battery enclosure and attached them to the headband with velcro.

For his build, he had to cut the cable on the Sennheisers and solder them to the Bluetooth board. There was never any danger of ruining a good pair of headphones, though. If he screwed up he was only out a headphone cable. Now [Dan] has a nice pair of Bluetooth headphones that can reproduce bass. Not a bad deal for a $20 pair of headphones.

Self-tuning Piano Can Tune Itself, Can’t Tuna Fish

At Hack a Day, we don’t throw the term genius around lightly. We’re obligated to bestow that title on [Don Gilmore] for his amazingly simple self-tuning piano. To appreciate [Don]’s build, you need to realize that just because a piano has 88 keys, that doesn’t mean it has 88 strings. Treble notes have three strings per key while tenor and bass notes have one or two strings each. This usually comes out to more than 200 strings per piano, and [Don] can bring them all up to tune in under a minute.

[Don]’s system needs to perform two functions. The first one is sustaining the strings so the computer can ‘hear’ the strings. He does this with a magnetic sustainer that is a lot like an E-Bow. To bring the strings up to the right pitch, there are small heaters underneath the pin block. Running a little bit of current through these heaters allows [Don] to decrease the tension of each string and lower the pitch.

This tech reminds us of the Gibson Robot Guitar, a self-tuning guitar that does it’s trick with motors in the tuners. The Gibson didn’t do well on the sales floor, given that everybody and their mom can tune a guitar. Pianos, though, are another story. [Don] is looking for investors to bring his idea to market, and we hope to see it on the floor of a music shop sometime in the future.

Continue reading “Self-tuning Piano Can Tune Itself, Can’t Tuna Fish” →