Ikea Wine Rack Originally Sold As A Mattress Holder

[Jeremy Walworth] has been dumpster diving again. He noticed that his neighbor had a bucked of nice-looking wood out at the curb for garbage collection. He inquired about it and learned that it was an Ikea bed that had broken, and that the original hardware was still there in a separate bag. He dragged it to his lair and built this wine rack out of the parts.

The reused rails and hardware provide five shelves for the bottles. [Jeremy] wanted each vessel to stay in place if the shelf wasn’t full, so he grabbed a piece of mill work from the home store and cut dividers which were glued in place. Now he’s able to show off up to sixty bottles for just a couple of bucks in material expense.

It seems like Ikea is able to sell furniture for less than the cost of the materials sourced locally. We think this is a fantastic way to find parts for your own hacks, as the components that break can often be cut down to undamaged pieces. We also make sure to check the As-Is section on each visit for the ‘leftovers’ that are usually sold for pennies. Who know’s maybe you’ll find the parts you need to build a camera mount for documenting projects.

HEX Out Reveals The Secrets Your Data Bus Holds

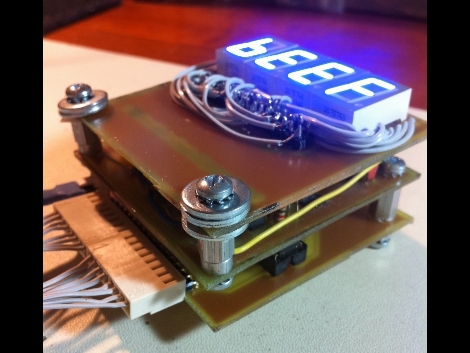
[Quinn Dunki] is looking to augment the tools she has available at her electronics bench and built the HEX Out as a mock-logic sniffer. The device reads 8 or 16-bit inputs, showing the current state of those connections on a 7-segment display. This requires that you’re comfortable reading Hex codes, but if you’re not it’s almost like studying flash cards; before long you’ll be able to read them without thinking about it.

She’s blogging about the design and build process in three parts. The link above is the first installment where she shares the development process for the top layer which hosts the display hardware. The other two parts should be up for your enjoyment in the next couple of weeks.

You’ll notice her design on this portion of the project still requires a lot of point-to-point soldering, even though she etched her own circuit boards. We didn’t look too closely, but it seems this would be worth going to the trouble of etching a double-sided board if you can.

UPDATE: Part Two is now available

DO NOT Build A Fully Automatic Battery-launching Air Gun

There’s nothing quite like [Elliot]’s cherubic sense of wonder and maniacal laughter after he tests his fully automatic AA battery-launching air gun. That fires 600 rounds a minute. At 200 feet per second.

We need to take a minute and say [Elliot]’s gun is stupidly unsafe. He used PVC pipe to hold air pressure, so that may… explode one of these days. Also, the AA batteries coming out of the end of the barrel have the same kinetic energy as a .22 rifle bullet.

The mechanics of the gun is a simple blow forward bolt. When he pulls the trigger, the bolt – and battery – are forced forward due to air pressure. After the bolt has cleared a plug, air is allowed to flow through the bolt pushing the battery along with it. Once the pressure in the barrel is back down to normal, a spring forces the bolt back into place and the 23 round magazine loads another battery. Simple, really. [Elliot] posted some pics of his gun on the spudfiles.com forum.

The gun is accurate to about 100 yards. It’s a very impressive piece of engineering for a bit of PVC pipe, but we don’t feel the need to copy this one. Check out the videos after the break to see this thing in action.

Continue reading “DO NOT Build A Fully Automatic Battery-launching Air Gun”

Google Hangout Laser Turret

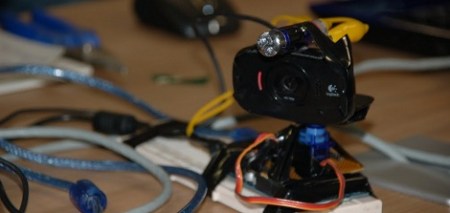
The guys from the House4Hack hackerspace in Johannesburg won the 2011 Google+ Hackathon with their Friggin’ Laser Turret. The build started off as a remote-controlled webcam that can be controlled by anyone in a Google+ hangout. On a whim, the team decided to add a laser to the build because lasers are awesome.

The inspiration for the build was to have a Google+ hangout available whenever someone is at the hackerspace. If a guest can’t grace the team with their physical presence, at least they can be there virtually. The camera is controlled by an Arduino running a bog-standard servo library implementation. The Arduino is connected to a laptop over a serial connection and is able to move left and right. To spice things up a little, the team added a 25mA laser diode to the build controlled from a digital output on the Arduino.

For winning the Jo’burg Google+ Hackathon, the guys scored themselves a Samsung Galaxy S II phone. Not a bad prize for building something cool. Check out the demo of the friggin’ laser turret after the break.

Continue reading “Google Hangout Laser Turret”

Wireless MIDI Piano Glove

Sometimes you just don’t have space for a baby grand. [Abdullah] got around this problem and built a virtual wireless MIDI piano. Unlike it’s inspiration, it’s not bad but we still love it.

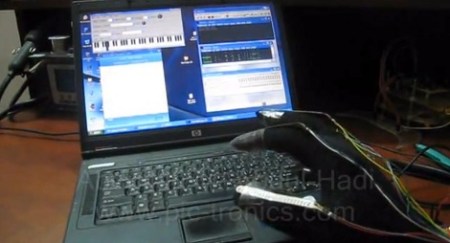
[Abdullah] got his hands on some flex sensors and attached them to a glove. These resistive sensors are put through a voltage divider and sent to a microcontroller (a PIC16F778, we believe) and corresponding MIDI notes are chosen. These MIDI notes are sent to a computer and played over a speaker.

Right now, only a single arpeggio is coded into the microcontroller. Depending on which finger is bent shifts this arpeggio up and down the keyboard. That being said, the firmware can be easily modified to recognize standard piano fingering so chords can be played. The only issue is moving the hand up and down the keyboard.

[Abdullah] is planning on making his glove completely wireless with a microcontroller and battery sewn into the glove. Here’s to hoping he’ll keep us posted.

Check out [Abdullah]’s demo after the break.

Continue reading “Wireless MIDI Piano Glove”

magic-wand

Hacking A “magic Wand” To Remotely Control Light Displays

Hackaday reader [Kieran] volunteers at an outdoor haunted house attraction called the “Disenchanted Forest”. Attendees are lead through the haunted forest by a volunteer, who helps keep everyone on the predetermined trail. The trail is usually lit by small LED fixtures that the group constructed, but the organizers wanted to make the lights more interactive this time around.

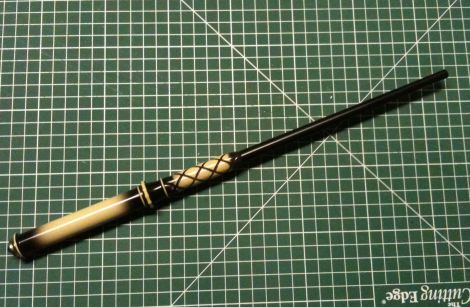
A fellow organizer gave [Kieran] a [Harry Potter] Magic Candle, which allows him to light the toy with the wave of his IR-enabled wand. He was told to “make it do something cool”, so he took a closer look at it to determine how everything worked.

Using an Arduino clone and some borrowed IR code he was able to get the wand to work with the forest’s trail lighting, but there was a lot of lag between waving the wand and triggering the light. Taking a second stab at it, [Kieran] was able to replicate the IR protocol used by the toy, speeding things up and increasing the wand’s range considerably. Now, the tour guides can light and extinguish the trail lighting with a simple flick of the wrist.

Take a look at the video below to see how things worked out for [Kieran], and be sure to swing by his site for more details if you have the urge to modify your Magic Candle.

Continue reading “Hacking A “magic Wand” To Remotely Control Light Displays”

Canon FD Lenses On An EOS Mount

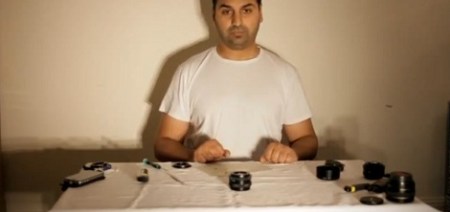
Camera lenses are expensive and if you’re like us, you can easily find really cheap lenses that your camera can’t use. [Sam] has a Canon EOS and a bunch of old-school FD lenses at his disposal. There’s one problem though: using these old lenses with an adapter means focusing at infinity is out of the question. Thankfully, he put up a few videos (part 1, part 2, and part 3) walking through the process of modifying an FD lens for his new camera.

To do the modification for the FD lens, all that’s needed is some epoxy, a screw driver, and an M42 to EF adapter. After disassembling the back of the FD lens, [Sam] mounted the M42 adapter on his camera and held the lens up to check the minimum focusing distance. A bit of grinding or a few metal shims ensure that the lens is in the right position.

The next step is making sure the aperture can still be controlled. [Sam] goes through this in part two of his video. A little bit of dremeling takes care of all the hard work. The lens is finally attached to the M42 adapter with a tiny bit of epoxy, and the conversion is complete.

While [Sam] could have put up a few close up pics of his build, he goes through every step of the process very well. Check out the embedded videos after the break.

Continue reading “Canon FD Lenses On An EOS Mount”