Recreating The First PC

If you’re looking for a simple Ardunio project, why not replicate the first personal computer?

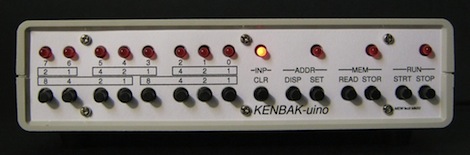
After discovering the Arduino, [Mark] realized recreating really old computers would be a fun project. An Altair 8800 was on the table, but the sheer number of blinkenlights, switches and the Intel 8080 CPU made that a fairly difficult project. After a bit of searching, [Mark] discovered the Kenbak-1, widely regarded as the first personal computer. The Kenbak also had the added bonus of having a very minimal I/O compliment and was built entirely with TTL components.

Since the Kenbak-1 is an extremely simple computer, [Mark]’s build ended up being fairly minimal. The schematic is only an ATmega328, a few shift registers and a real-time clock for a few added features the OG computer didn’t have. The completed build is programmed by pushing buttons to enter machine code into the mega’s RAM and then executed. [Mark] has a few programs already figured out – a program that counts in binary, a ‘Cylon eye’ and a BCD and binary clock. While the Kenbak-uno doesn’t have the awesome vintage case of the original, it’s still a remarkable build.

Check out the videos after the break for a walk through.
Continue reading “Recreating The First PC”

Using Polycarbonate Filament With A RepRap

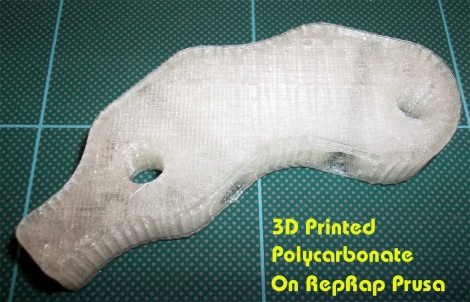
[Rich] couldn’t find any instances where RepRap owners had used polycarbonate as a 3D printing source material. He’s filled that knowledge gap by running multiple polycarbonate printing tests. Polycarbonate is a plastic that is highly resistant to shattering yet it’s still rather soft. With enough effort it can be bent and stretched, but it’s fairly difficult to break the material.

The test spool of polycarbonate was special ordered for this project. [Rich] sourced 1.6mm filament since 3mm material would have been difficult to spool. It melts at a temperature range of 280-300 degrees Celsius, which he reaches with a hot-end extruder design. The printed material comes out a bit cloudy, which may be due to the heating process itself, or due to extruder reversals (he’s not quite sure what’s causing it). But as you can see above and in the video after the break, it’s certainly a viable printing medium.

Continue reading “Using Polycarbonate Filament With A RepRap”

Video: Soldering Our PIC Development Board

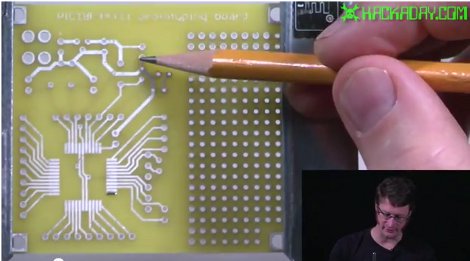
For those of you who followed along with our Eagle CAD series, here is the final payoff where we assemble the circuit board that was designed. In this video, [Jack] explains where things will go on the board and then shows you how to solder the parts. For the advanced folks out there who haven’t moved to solely surface mount parts when you can get away with it, he shows an easy way to solder the processor, which is a TQFP-44 part. This can seem like a daunting task but it really isn’t.

If you would like to make your own board like this, you can find the files here. Please note that although this board shouldn’t have any issues, we haven’t tested it ourselves yet. [Jack] is going to do some videos about a different topic for a few weeks but will pick back up with this board again when they are done.

Video is after the break. Continue reading “Video: Soldering Our PIC Development Board”

Workshop 88 Hosts A Near Space Balloon Contest

hackerspaces_in_space

Launching high-altitude balloons to take pictures of the Earth from space is great fun. Heck, even credit card commercials are now suggesting you cash in your rewards points to organize a space balloon adventure for you and your friends.

Capturing snapshots of the Earth from space is such a good time that Workshop 88, a hackerspace located in the Western suburbs of Chicago, is making a contest out of it. They recently kicked off their second annual “Hackerspaces in Space” competition, a contest to see who can build the best near space balloon for under $250. The contest pits individuals, groups, and hackerspaces against one another, assigning each team a score based on the performance of their high-flying rig.

The winner of the contest will have their design replicated by the crew at Workshop 88, who will then hand out the space balloon kits to randomly selected K-12 schools around the country.

If this sounds interesting, but a contest entry just isn’t in the cards, you can always support the kit distribution by funding their Kickstarter project here.

Sustainability Hacks: Heliostats

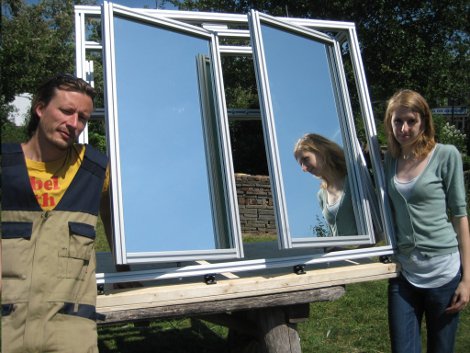
Solar panels are a popular item among people who are trying to do more with less but, at least in the past, they have been pretty expensive to install. For some uses, you can forget using solar panels and use the sunlight directly with very little efficiency loss. A device that lets you do that is called a heliostat, which is really just a fancy mirror that you can set to reflect sunlight to wherever you might want it. You could aim it through a window so that it hits your ceiling and diffuses throughout the room or you could point it towards a location where you could collect the sun’s energy to heat something directly.

For a really good rundown on how heliostats work and how you can build one, check out this page where you can find all sorts of information. Heck, they even have an Arduino controlling some of them!

Repairing The Blue Canary In The Outlet By The Light Switch

blue_canary_in_the_outlet_by_the_lightswitch

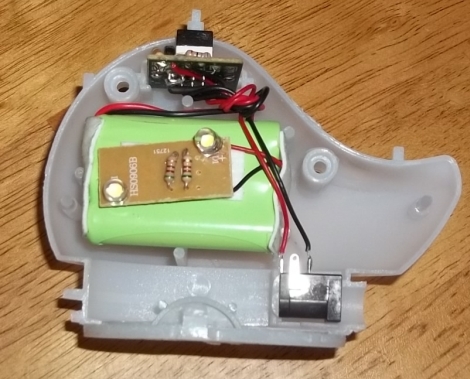
[Vince] and his wife are big fans of [They Might be Giants], so when they were perusing their local Target one evening and stumbled upon a blue canary nightlight, they bought it immediately. While the nightlight was easy for his toddler to use, the LEDs inside started to dim after about a month, and eventually they started flickering like mad as you can see in the video below. A battery swap didn’t remedy the problem, and instead of returning it, [Vince] decided to try fixing it himself.

After poring over the device’s simple circuit, he couldn’t figure out any reason why the nightlight would start behaving like it did. He did notice that a resistor was left out of the device, likely as a cost-cutting measure, so he added one in before replacing both of the nightlight’s LEDs.

With his simple tweak, the nightlight was better than new, saving him from what would likely be a string of annoying merchandise exchanges.

Continue reading “Repairing The Blue Canary In The Outlet By The Light Switch”

Booting A 1989 Mac With Mario

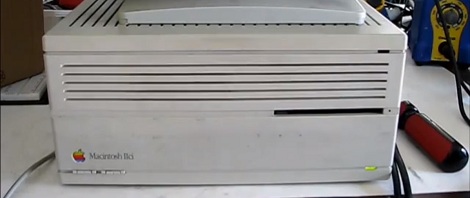
As a new recruit to the 68k Macintosh Liberation Army, [dougg3] is really showing off his hardware hacking ability. He came up with a replacement ROM SIMM for his Mac IIci and made it play the Mario theme on boot instead of the normal chimes.

Swapping out the ROM in these old macs isn’t an uncommon procedure. On some 68k machines, there’s a SIMM slot to either replace or expand the soldered ROM. In fact, it’s fairly common to take the ROM SIMM out of a IIsi and put it in the king of kings computer to make an SE/30 32-bit clean. We’ve never seen a re-writable ROM SIMM for these old macs, so we’re pretty sure [dougg3] just spared a Mac IIsi from the dumpster.

Now that the entire 68k Liberation Army is clamoring for one of [dougg3]’s re-writable ROMs (we’ve got cash), the question of what to do with it comes up. Of course, SE/30s can now be 32-bit clean without installing MODE32 and new startup chimes can be added. We’d really like to see some hard-core ROM hacking going on, like installing a 68060 in a Quadra 950.

Continue reading “Booting A 1989 Mac With Mario”