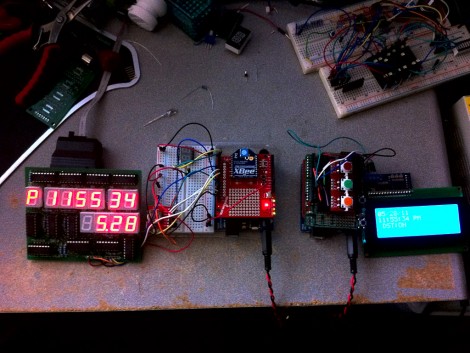
Prototyping The New Office Clock

[Damage] was tapped to build a new clock to hang on the wall at the office. He got a hold of some 6.5 inch seven segment displays for the hours and minutes, as well as some 4.5 inch modules for the date and month. Rather than jump right in with the large hardware (especially because he’s waiting for the PCB order to arrive)  he built this prototype with more commonly sized displays.

His build is Arduino powered. In the video after the break he mentions the temperature compensated crystal oscillator that keeps the time. We’d wager that’s the DS3234 based RTC module that Sparkfun sells. This is the same chip family as the Chronodot and it was our choice for the Ping Pong Clock.

The finished clock will hang high on wall, out of reach when you need to set the time. This shouldn’t need to be done much – if ever – since that RTC includes a backup battery. But [Damage] took the time to develop a remote programming device anyway. Using another Arduino, an LCD display, and an Xbee pair he whipped up a remote that can be used to navigate and change the main unit’s settings.


Continue reading “Prototyping The New Office Clock”

Devil Horns Adorn The Hood Of My Truck

When you’re hunting zombies you’ve got to give them something to fear. [Shannon Larratt] is getting ready for that eventuality by adding devil horns as his hood ornament. It looks awesome from afar, but when you see the close-up images you realize how lifelike this is. That’s because it’s not a sculpture. [Shannon] cast the ornament in a mold made from his own hand.

The process started with some dental alginate which he slobbered all over his hand as he held the devil horns pose. After the mold had hardened he cast the ornament using fast-curing black plastic resin.

With the ornament now in hand he needed a way to secure it to the hood of his vehicle. He picked up a threaded U-bolt. A hole and a slot were carved in the base of the ornament to receive the U-bold and a straight bolt for a trio of anchor points. More of the black resin fills the holes, securing the bolts and making it a snap to mount the ornament by drilling through the hood.

We also find it awesome that during this process [Shannon] took the time to cast his daughter’s fist for use as a door knob at home.

Radio Packets…from Spaaaace!

space_radio

[Bill Meara] was watching the International Space Station and the Shuttle Discovery pass overhead a few weeks ago, which rekindled an interest he gave up long ago – sending and receiving radio packets from space.

Years ago, he used to send APRS packets into space with a small rig powered by a 286 computer and HandiTalkie. These packets would drift off into space most of the time, but occasionally they would bounce back to Earth whenever the space station or PC Sat would fly by. The packets were often captured by other ham operators across the globe, who happened to be tuned to 145.825 MHz.

His interest renewed, he dug out his old HandieTalkie and Kantronics Terminal Node, aiming them towards the sky via an antenna situated in his back yard. When he returned 10 hours later, he found that he had collected all sorts of “space packets” from across the globe.

While not exactly a hack, it is definitely a neat exercise in ham radio operation. We can imagine slinging data packets off the space station would be an exciting experience for any budding operator (and OMs as well!)

A Keygen For The Real World

key_generator

[Nirav] found that he rarely printed anything useful with his RepRap, so to shake things up, he decided he needed to work on a project that didn’t involve printing yet more RepRap parts.

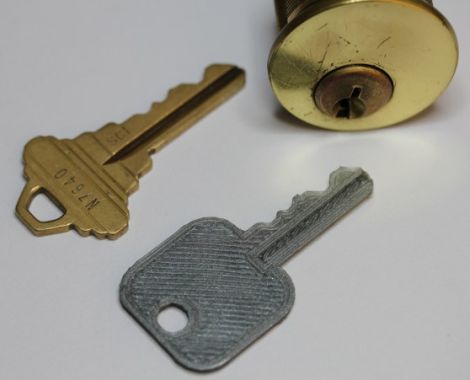
The goal of his project was to create working replicas of house keys by simply using the code imprinted at the factory. He purchased a handful of used lock sets from eBay, then carefully measured the keys with a ruler and calipers to get the blank dimensions just right. After that was done, he looked around online and was eventually able to create an OpenSCAD model using a chart of pin depth specifications he located. By changing the last line in the model’s code he can print any coded key. For keys lacking a code, he can manually measure the height of each bit and print replicas that way as well. Once printed, he says that they keys are strong enough to turn most locks he has come across, including deadbolts.

This is undoubtedly a neat project in its own right, though we would be interested to see if someone could get it paired with a program like SNEAKEY to generate bit measurements by sight alone.

Electronic Bird House Monitoring Goes A Few Steps Further

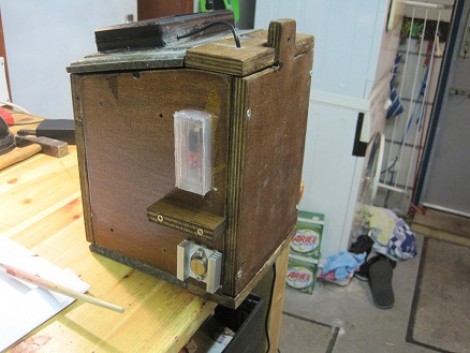
[Stephen Albers] offers his avian friends a lot of extras with this electronically monitored bird house. This will not only give you a look at what’s going on inside, but provide a source for several other bits of data as well.

First off, a camera has been mounted to the underside of the roof. This looks down on the nesting area and features night vision so that you can peek in any time day or night. He used a WiFi webcam that operates separately from the other electronics.

With the remainder of the setup he is able to harvest temperature and humidity data inside, temperature outside, force on the bottom of the house (although this turned out to be less useful than anticipated), and a in-and-out count for the doorway provided by an IR transmitter/receiver pair.

This offers quite a bit more than the last bird house project we saw. That one also left a lot to be desired as far as protecting the electronics. [Stephen] didn’t skip on that kind of protection. Most of the electronics are housed in an acrylic chamber in the base of the house. The sensors find themselves nestled in plastic enclosures, although some work needs to be done to ensure that the temperature and humidity sensors will still function correctly with this setup.

Modular Synthesizer Is Rack-mounted And Reconfigurable

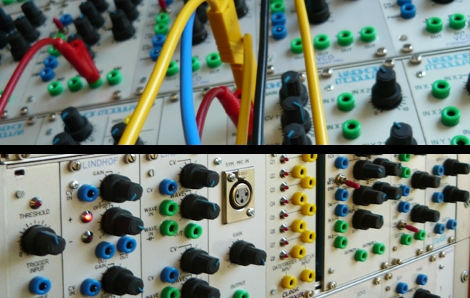
[Dirk] let us know about this fantastic music synthesis experimentation setup (translated). Turn your computer speakers off (to avoid the auto-playing music when every page loads) and dig into the wealth of information in this repository. Literally dozens of modules have been built and superbly mounted on a rack system. Each can be connected with other modules into an incredible number of different setups using patch wires that terminate with banana plugs.

The module enclosures themselves are made to fit in a standard 19″ rack. The front bezels were designed in CAD, with the rest of the housing made mostly of aluminum. Since each module tends to be quite small several are ganged into one rack skeleton to save space. You can see in the images above that there are as many as eight modules per rack slice.

You’ll enjoy reading about the many different sound chips that are in use here. But it doesn’t have to end there. If this has whet your appetite for your own rack-mounted system you’re in luck. The download area has schematics, board artwork, and build information for most of the modules.

easytransfer_serial_arduino_communications_library

Library Makes Arduino To Arduino Serial Communications Dead Simple

When [Bill Porter] works on a project, he says that he typically writes his own NMEA standard communications protocols to fit the job at hand. While it makes things easy to troubleshoot, he admits that his custom protocols are wasteful of both processor time and bandwidth. Binary communications on the other hand are more efficient, but a bit trickier to manage.

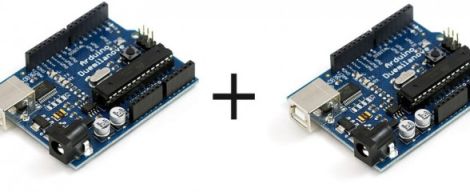
To make things easy for the common user, he wrote a library called EasyTransfer which abstracts packetized serial communications between two Arduino boards. The process is pretty simple – all one has to do is define a data structure on both Arduino boards so that they know what sort of data is coming over the wire, and EasyTransfer handles the rest. This allows users to worry less about communications protocols or transmission errors, and focus on their projects instead.

If you’re working on a project and searching for an easy way to get a pair of Arduinos talking, swing by his site and grab the library. It doesn’t get much easier.