Modular Synthesizer Is Rack-mounted And Reconfigurable

[Dirk] let us know about this fantastic music synthesis experimentation setup (translated). Turn your computer speakers off (to avoid the auto-playing music when every page loads) and dig into the wealth of information in this repository. Literally dozens of modules have been built and superbly mounted on a rack system. Each can be connected with other modules into an incredible number of different setups using patch wires that terminate with banana plugs.

The module enclosures themselves are made to fit in a standard 19″ rack. The front bezels were designed in CAD, with the rest of the housing made mostly of aluminum. Since each module tends to be quite small several are ganged into one rack skeleton to save space. You can see in the images above that there are as many as eight modules per rack slice.

You’ll enjoy reading about the many different sound chips that are in use here. But it doesn’t have to end there. If this has whet your appetite for your own rack-mounted system you’re in luck. The download area has schematics, board artwork, and build information for most of the modules.

easytransfer_serial_arduino_communications_library

Library Makes Arduino To Arduino Serial Communications Dead Simple

When [Bill Porter] works on a project, he says that he typically writes his own NMEA standard communications protocols to fit the job at hand. While it makes things easy to troubleshoot, he admits that his custom protocols are wasteful of both processor time and bandwidth. Binary communications on the other hand are more efficient, but a bit trickier to manage.

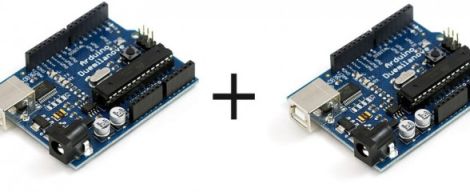
To make things easy for the common user, he wrote a library called EasyTransfer which abstracts packetized serial communications between two Arduino boards. The process is pretty simple – all one has to do is define a data structure on both Arduino boards so that they know what sort of data is coming over the wire, and EasyTransfer handles the rest. This allows users to worry less about communications protocols or transmission errors, and focus on their projects instead.

If you’re working on a project and searching for an easy way to get a pair of Arduinos talking, swing by his site and grab the library. It doesn’t get much easier.

Run Kindle 3 Firmware On Kindle 2 Hardware

After about six weeks of testing [Yifanlu] has released a stable version of the Kindle 3 firmware for use with Kindle 2 hardware. Everything seems to be working just fine with the patched firmware. We immediately jumped to the conclusion that the upgrade must run pretty slow on the older hardware. [Yifanlu] addresses that assumption in his post. The Kindle 2 hardware is not as fast as the Kindle 3, but it sounds like the upgraded firmware is no slower than the stock firmware was on the older units.

Since the firmware is proprietary, the upgrade method requires that you own both Kindle 2 and Kindle 3. Three scripts will pull the firmware image from the older hardware, copy it over to the new hardware and patch it at the same time, then copy the fully patched package back to the old hardware for use.

After the break you can see a video of a Kindle DX running 3.1 firmware. There’s also a link to the Reddit post where commenters have linked to pre-compiled versions of the patched package.

Continue reading “Run Kindle 3 Firmware On Kindle 2 Hardware”

Laser-powered DSLR Auto Focus Assist Light

laser_af_assist

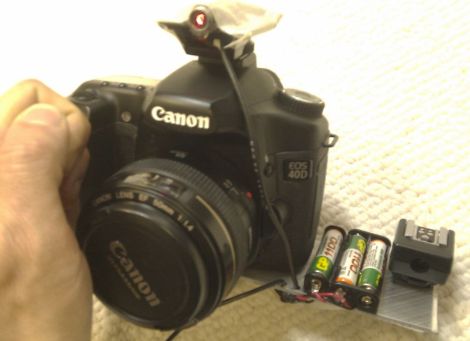
[Adrian] uses his Canon 40D quite often in dark or low-light situations, and found the onboard auto focus assist functionality to be a bit frustrating. In certain focus modes, the auto focus assist light is programmed to turn off once focus has been achieved. He noticed that if his subject moves or the focus point changes before he snaps the picture, the AF light does not come back on to assist in refocusing the image.

To work around this problem, he decided to build a supplemental auto focus assist light that could be triggered at will. He purchased a cheap laser pointer with an adjustable lens, then cut it open to get at the good parts. He mounted it on top of his camera and tweaked the lens to produce an unfocused beam of light that measures about 6” x 12” at five feet.

The laser pointer did the trick – his images are coming out much nicer now that he can easily recompose his shots in low light. While it works great, he’s not completely satisfied with the build, especially with the fact that he has to manually trigger the laser pointer.

Version 2 is in the works however, which employs an old hot shoe to trigger the laser whenever he pushes the shutter release halfway down. According to his blog he is having some timing issues, causing him to capture the laser in most of the pictures he takes. [Adrian] is working hard to correct the problem, and we’re sure he’d appreciate any tips you might have.

Guitar Pickup 101

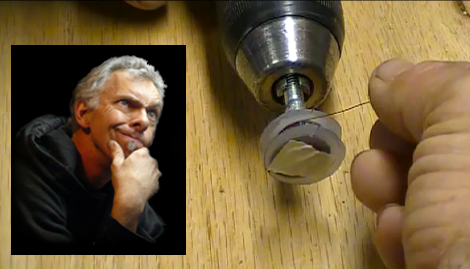
[Dino Segovis] is at it again!  For this week’s installment of his “Hack A Week” series [Dino] is holding a guitar pickup winding 101.  Professional guitar pickups can cost hundreds of dollars, but are all essentially a permanent magnet wrapped in a bunch of wire. Using some cheap headphones, magnet wire, and a spare bolt [Dino] produces his own pickup and throws it in a one string blues guitar. This is a great beginner’s project as it involves only a few very easy to find parts and touches on some interesting concepts such as inductance and magnetic flux.

The premise is really simple:  Sandwich the headphone magnet between two plastic discs to make a spindle, hot glue a 1/4″ bolt to the spindle, connect to a power drill, and wind a few thousand loops of magnet wire onto the thing.  Hook your coil up to an amp and lay down a jam.

We might be tempted to add a counter to the rig using a reed switch connected to the “=” key of a cheap pocket calculator, and a magnet glued to the bolt.  We have also seen a more complicated automated spool winder but [Dino] is keeping it nice and simple.

Check out the video after the jump to hear [Dino] go all Seasick Steve on us.

Continue reading “Guitar Pickup 101”

VGA Testers For The Children

Recently on our Hack A Day forums a member asked about getting some VGA testers made in our “Request and Commissions” forum for a charity called the World Computer Exchange, who take old office PC’s and freshens them up to be used by children in developing countries for their education.

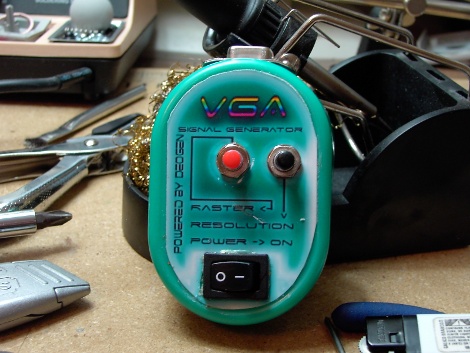
I sort of wanted to do a no brainier electronics build as I had been working on that Apple II weather display for quite a while at that point. I say no brainier because I decided to use one of the many already designed vga testers out there and all I really had to do was get it to fit in whatever box we ended up with.

I choose the deogen because it was already featured on Hack A Day, supports multiple raster patterns and resolutions (640×480 through 1280×1024), is already pretty darn small, and uses an ATTiny 2313 which is good because I am already set up for AVR micro controllers. For a case I choose to use some plastic “Ice Breakers” mint boxes, which due to their oval shape makes it quite a bit smaller than an altoids tin. The challenge is on to shove a PCB, switch, 9V battery, 2 buttons and a vga connector in the cramped space.

Join us after the break for a pile of pictures and some build notes.

Continue reading “VGA Testers For The Children”

LCD: Replacing CCFL With LEDs

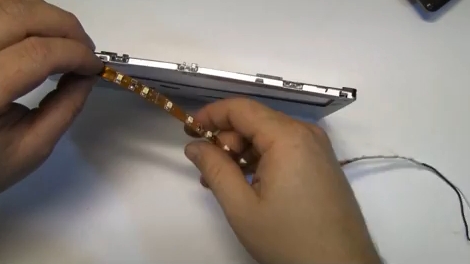
[Fileark] had the backlight on his digital picture frame go out one day. These are generally Cold Cathode Fluorescent Lamps which require an inverter to source the voltage necessary for proper operation. When they stop working, the inverter is usually to blame. Since that circuit is made up of pretty small surface mount circuitry, he decided to replace the backlight with LEDs rather than repair the inverter.

In the video after the break [Fileark] will walk through the entire project. After snooping around inside the picture frame he sizes up a strip of LEDs on a flexible substrate. The metal retaining bracket that hosts the LCD must be altered to fit the new light source and for that, he’s included a hacking montage in his video. The final result looks stock and he estimates the screen is around 97% as bright as with the original backlight.

This isn’t the first time we’ve seen an LED edge-lit upgrade. The last one we saw even used a custom PCB to host the LEDs.

Continue reading “LCD: Replacing CCFL With LEDs”