Robot Band Covers [Marilyn Manson]

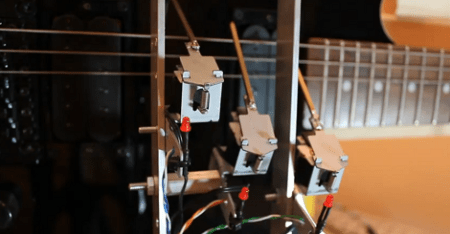
[James] built himself a robotic band from obsolete computer parts. The band needed something to play, and [Marilyn Manson]’s Beautiful People fit the bill. While it’s not the Rock-fire Explosion, having the [James]’ band cover [Marilyn Manson] is nearly as terrifying.

[James]’ original plan was to cover Mad World, but the stepper motors were drowning out the music for that song. While trying fix the cello problem the servos started acting up and reminded him of a certain song. While it’s not faithful to the original, we really like the arrangement on this version.

Continue reading “Robot Band Covers [Marilyn Manson]”

DIY Robot Remote Control

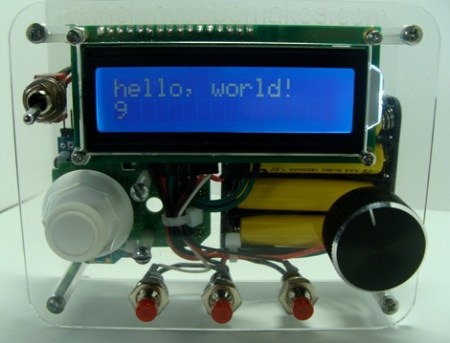
[Patrick] wanted a remote control to control some of the robots he’s built. He also wanted to get some data back from his robots, so an inexpensive off-the-shelf solution wouldn’t be up to the task. Like all good geeks, [Patrick] decided to build what he needed.

For analog control, [Patrick] decided to use a Wiimote nunchuck. This turned out to be a very good choice – the nunchuck has a 2-axis joystick and 3-axis accelerometer in one small, easy to interface package . The wireless radio is taken care of with an XBee module. For the microcontroller, custom “lcd backpack” was created that provides an I2C port for the nunchuck, inputs for the buttons and the single pot, and 2 serial ports for the FTDI and XBee.

Continue reading “DIY Robot Remote Control”

Hacking Your NES/Famicom Console For Better Video And Audio

famicom_playchoice_ppu_mod

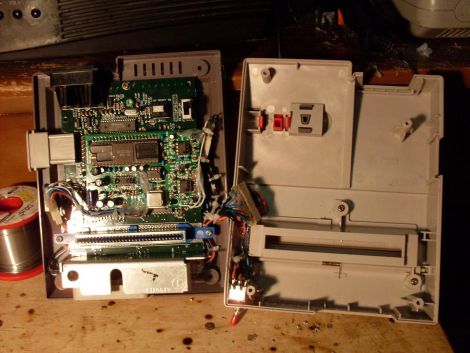
[Dominic] wrote in to share a pretty neat Famicom console mod that improves both the video and audio output of the system. While some of you may be familiar with the PlayChoice 10, we’re guessing that many of you are not. The PlayChoice 10 was an arcade-style machine that allowed you to play up to 10 different NES games. The system’s hardware was quite similar to the Famicom/NES consoles, but the graphics and sound performance was superior to either console.

[Dominic] decided to tweak his Famicom system, and ended up replacing its native Picture Processing Unit (PPU) with one from a PlayChoice 10. This allows the console to output RGB video natively, resulting in a crisper picture with brighter coloring. He didn’t stop there however. His Famicom system also sports an upgraded audio circuit that boasts psuedo-stereo sound as well as increased bass response and better overall audio clarity.

The console looks nearly stock, and performs quite well according to [Dominic]. Be sure to check out the video comparison embedded below to see how the modifications improved his system’s performance.

Continue reading “Hacking Your NES/Famicom Console For Better Video And Audio”

Cheap And Easy PCB Agitator From An Old CD-ROM

cdrom_pcb_agitator

Instructables user [mzsolt] enjoyed making his own PCBs, but he wanted to speed up the etching process just a bit. While some people put together elaborate bubble tanks and agitators, he wanted to keep his simple and more importantly, cheap.

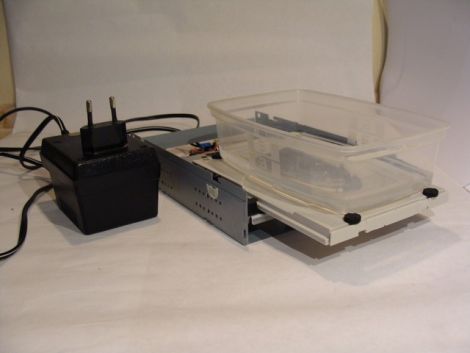
He looked around the house and discovered an ancient CD-ROM drive that was collecting dust, which he figured would make a great agitator for smaller projects. He picked up a decade counter and a handful of other cheap components, then got busy pulling the drive apart. He connected the motor and the drive’s limit switches to the decade counter, which controls the entire setup.

When powered on, the drive ejects, taking his container full of etchant with it. When the drive hits the outer limit switch, the decade counter reverses the motor until it hits the inner switch, reversing the motor once again.

As you can see in the video below, it works reasonably well. He suggests using a variable power supply to regulate the motor’s speed, but a variable pot would probably work just as well. Obviously the agitator is best suited for smaller projects, but since it was so cheap to put together, you won’t hear us complaining.

Continue reading “Cheap And Easy PCB Agitator From An Old CD-ROM”

Impressive Steampunk Keyboard

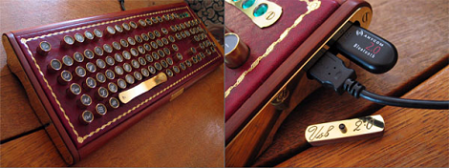
This amazing steam punk keyboard was sent in to the tip line, and while it’s not necessarily a ‘hack’ in the purest sense, the level of quality in the build is incredible.

Each key was crafted from brass tubing that was later filled with a wooden dowel and covered with the key cap label. While there’s no mention of how the key caps were made, we do especially like the abstract Windows Key label. After the PCB for the keyboard matrix was enclosed in a bit of plywood, the hand tooled leather was applied to the front. The name plaque that was hand engraved with a modified screwdriver is especially nice.

The build is based around the amazing Das Keyboard with Cherry Blue switches, one of the only keyboards currently being manufactured that comes close to the feel of the One True Keyboard. While it’s not a keyboard built from scratch, it’s still one of the best steampunk builds we’ve seen, most likely because not a single gear was glued to the project.

LED Headgear Is Marvel Of Free-formed Circuitry

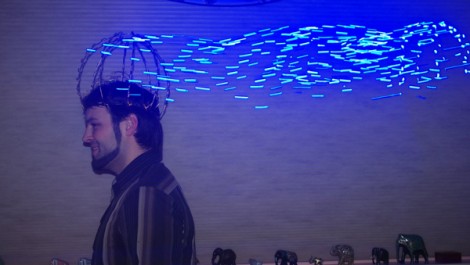
Hackaday contributor [Nick Schulze] popped out an impressive set of LED headgear for a hat-themed party.

[Nick] is no stranger to working with LEDs. Previously he built a blue 8x8x8 cube something like this other 512 node full color version. He had a bunch of LEDs left over from that project and decided to put them to good use.

The first part of the build is the frame itself, made from thick fencing wire. He just started bending it around his head and got an uncomfortable head-shaped hoop to which he could solder. From there, enameled copper wire wraps its way through the system, supplying logic levels to all of the LEDs. Everything is done without a circuit board of any kind. The LED drivers themselves are attached by first using a zip tie to affix a resistor to the frame, then by soldering the TLC5916 chip to that resistor. Even the ATmega8 is included dead-bug style by soldering it to the frame which we think servers as ground. Program it with the free-floating female pin header and you’ll get the fantastic animations seen in the video after the break.

Continue reading “LED Headgear Is Marvel Of Free-formed Circuitry”

FPGA Arduino Shield Uses Kickstarter As A Preorder System

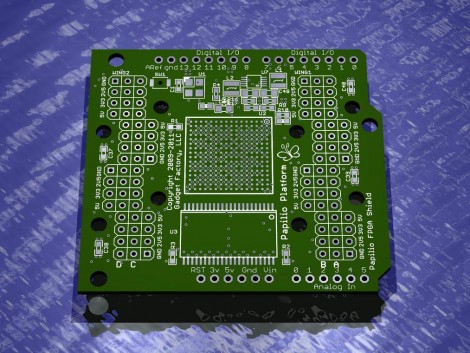
[ Jack Gassett] is working on an FPGA shield for the Arduino. At first the idea of this expansion board seemed a little silly. But [Jack] mentions that the FPGA board can be quite useful for adding higher-order electronic complexity like HDMI capabilities to an Arduino. We’re not totally sold on the idea, but he’s not making the board solely for use with an Arduino either.

The plan is to use a Xilinx Spartan 3A FPGA which comes in a ball-grid array package. And that is the reason [Jack] decided to use Kickstarter for this project. He shared some of his issues with BGA components in a home manufacturing process a while back. To get these working reliably you need to have them professionally assembled, and that requires a sizable upfront investment. But as we read through his proposal it struck us that he’s actually using Kickstarter as a preorder system. You can get a base model with just the FPGA soldered on the board for $55. Not bad considering the chip will cost you at least $20 without assembly. Each level up includes a few more components like SRAM or add-on PCBs.

We get a lot of tips pointing to Kickstarter proposals but this is one of the few that seems right on the mark for supporting open and innovative development. Great work [Jack]!

[Thanks Simon]