Beginner Concepts: Designing Transistor Control Circuits

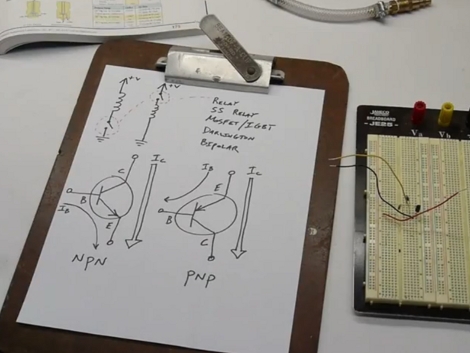
Need to switch something on or off using a microcontroller? Using a transistor is one of the best ways to do this, but how exactly do you design properly for transistor switching? [Ben Krasnow] put together a tutorial in which he does an excellent job of explaining the ins and outs of designing transistor control circuits.

We’ve embedded his twenty-minute video after the break. In it he talks about the use of transistors, the difference between NPN and PNP transistors, and the design specifics you need to know when working with them. We think that beginners will find [Ben’s] demonstration of how to calculates Hfe, which is the base current necessary to fully switch the transistor. If this is gibberish to you, have no fear. [Ben’s] instruction is clear and easily understandable.

The one thing we missed in the video is clarification about base current protection for PNP transistors. [Ben] mentions that there’s no easy circuitry that can be used on the base of a PNP  to regulate flow from the emitter to the base, but he doesn’t elaborate. Otherwise, it’s everything we could have wanted on the topic.

Continue reading “Beginner Concepts: Designing Transistor Control Circuits”

Halloween Props: Trash Can Jack-in-the-box

Last year [Bob] didn’t let the little kids get some candy and continue on their way without giving them quite a fright first. His modified trashcan lures you in and then scares the bejesus out of you.

He calls it Oscar the Trash-bot. The image on the left shows a ghoulish-looking head peeking out of the partially opened lid of the trash can. It has some movement, but is slow and quiet. The small, slow movements catch your eye and seem safe enough. Until you get a bit closer. A range finder triggers when the unsuspecting victim draws near, causing a much bigger, faster, and bloodier beast to pop up and stick out a claw. Check out the two videos after the break. One of them shows the claw mechanism, which is made with the help of a brake cable and shows very realistic and blazingly fast movement. The other is an overview of how the entire setup works.

Continue reading “Halloween Props: Trash Can Jack-in-the-box”

LiveLight Is An Expertly Crafted Ambilight Clone

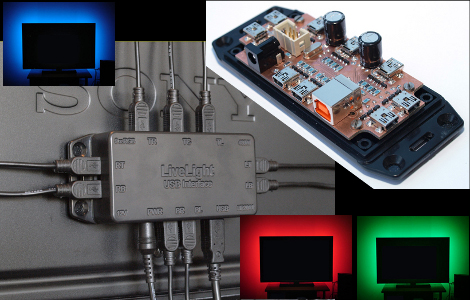
[SunWind] (Edit 2018: who now goes as [nerdaxic]) developed his own version of the Phillips Ambilight system which he is calling LiveLight. We’ve seen more than a few of these hacks, many of them are based around Arduino, and most use LED strip lighting. [Nerdaxic] is using strip lighting as well, but his design is clean and polished quite a bit more than anything else we’ve seen. In our minds this would be welcomed by even the most discriminating of A/V enthusiasts.

He found just the right size of project box and managed to fit everything in on a nicely milled PCB. The enclosure itself has also been milled to allow the mini USB B connectors for each of the nine RGB LED strips. But he didn’t stop there, the top of the enclosure has labels milled into it to help when hooking everything up.

An ATmega32 addresses the LED strips based on data pushed in from a computer. An on-board FTDI chip adds USB connectivity and [nerdaxic] used a hack to rewrite the EEPROM on that chip so that it enumerates with the name “LiveLight USB Interface”. A program called Boblight gathers the data from the currently playing video. You can see the final project in the video embedded after the break.

Continue reading “LiveLight Is An Expertly Crafted Ambilight Clone”

Washing Machine Mechanical Timer Replaced With Microcontroller

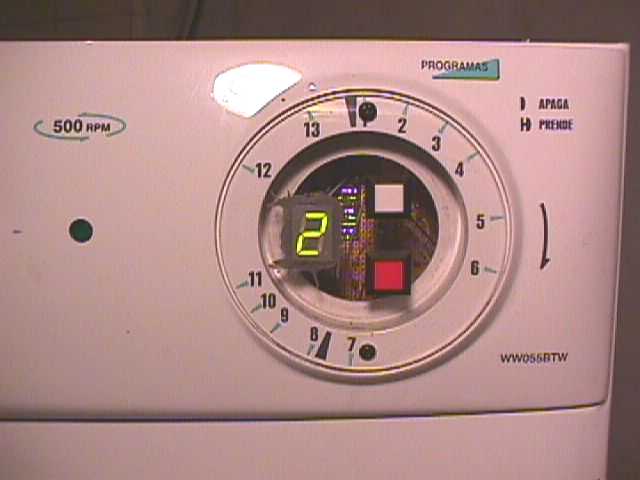
After the electromechanical timer on [Paul Canello’s] washing machine broke for the third time he decided he needed to stop repairing it and find a more permanent fix. He decided to build his own microcontroller-based system for washing his clothes (translated). Caution: The image links on [Paul’s] page seem to be broken and will unleash a never-ending storm of empty pop-up windows if you click on them. We’ve embedded all of the images after the break to save you some hassle.

The controller on a washing machine is nothing more than a mechanical alarm clock. It starts the cycle, then moves through various modes based on the passage of time. [Paul] started his hack by observing how long the delay between cycles was meant to be, and recording which parts of the machine were switched on and off at each stage.

It turns out that when the mechanical knob is turned, it reroutes how water flows through the detergent chamber. Since that knob won’t be in the new system [Paul] came up with a way for the microcontroller to handle this by using a servo motor. The rest of the control involves relays to control the motor, and solenoid valves for the water. There are also pressure switches that give feedback for the level of the water in the machine. A PIC 16F872 serves as the new controller, with the help of a 7 segment display, a buzzer, and a pair of buttons as the user interface.

This is an older project, but after reading about the Arduino controlled dishwasher [Ramiro] sent us a link. Thanks! Continue reading “Washing Machine Mechanical Timer Replaced With Microcontroller”

Faking High-speed Video Photography Of Repetitive Events

[Destin] has been doing some high-speed and high-resolution video photography using a standard DSLR. He accomplishes this using a bit of ingenuity to capture images of repetitive events at slightly different points in time.

The banner image above shows a bullet travelling through a set of matchsticks. [Destin] uses the sound of the gun firing to trigger the flash that captures the image. A piezeo transducer picks up the sound, triggering a precision pulse generator. That pulse generator then triggers the flash, adding a delay based on the settings. In this way, [Destin] can capture video by firing a bullet for each frame, but adjusting the delay period of the pulse generator to capture the image when the bullet is in a slightly different place from the previous frame. It’s an old technique, but after some post-processing it produces a high-quality output without sinking thousands of dollars into an actual high-speed camera. Check out the video we’ve embedded after the break.

We like this guy’s style. We saw him strapping a camera onto a chicken back in December and we hope to see a lot more from him in the future.

Continue reading “Faking High-speed Video Photography Of Repetitive Events”

A Big Transformer, Because It’s Cool!

[Grenadier] Had some spare wire, electrical tape, and a giant ferrite core laying about and decided to create a massive and pretty snappy looking disk shaped flyback transformer. Dubbed the Fryback, he claims that it will “revitalise your health and bring wondrous wealth and prosperity to your family”.

He chose a disk shaped transformer because they look cooler, fair enough.. (oh and they reduced inter-winding capacitance and the voltage difference between layers). The construction is fairly simple, but time consuming. Grenadier goes through the important steps on his website, but be prepared for 25 hours of winding wire if you decide to make your own.

Running at 48V the Fryback can output 8kV at a very high current, producing some nice thick 30cm long sparks. Check out the video after the break to see the Fryback in action.

Continue reading “A Big Transformer, Because It’s Cool!”

How To Make A Hand Drill Out Of A Pencil Sharpener

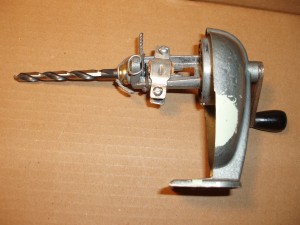
Necessity is the mother of invention, or so they say. [Jason] was in such a situation where he needed to install some safety railing at his grandmother’s house. He didn’t have the necessary tools available, like a drill, so he fashioned one himself out of a pencil sharpener and some fittings and wire that he was able to find.

Although crude, and probably not what one would choose to use if an actual drill was available, this “drill-pencil-sharpener” actually does a pretty decent job of cutting through plywood as seen in the video after the break. Continue reading “How To Make A Hand Drill Out Of A Pencil Sharpener”