Diving Into Starlink’s User Terminal Firmware

The average Starlink user probably doesn’t spend a lot of time thinking about their hardware after getting the dish aligned and wiring run. To security researchers, however, it’s another fascinating device to tinker with as they reverse-engineer the firmware and try to both find out what makes it tick, as well as how to break it. This is essentially the subject of [Carlo Ramponi]’s article over at Quarkslab as he digs into the firmware architecture and potential weaknesses in its internal communication.

The user terminal hardware itself is a quite standard AArch64 ARM-based SoC, along with the proprietary communication interface, all of which is controlled by the Linux-based firmware. Dumping the firmware itself was made easy thanks to existing work by researchers at the KU Leuven, involving dumping the contents of the onboard eMMC storage. After this the firmware architecture could be analyzed, which turned out to consist out of mostly C++-based binaries, but with a single big binary for the user front-end written in Go.

Communication between these processes is handled through a custom inter-process protocol called ‘Slate Sharing’, all of which is coordinated via the core User Terminal Control process. It are these Slate IPC messages which form the most likely attack surface for a fuzzing attack, with the SoftwareUpdateRequest command being an interesting target as it would seem to not require authentication since it doesn’t address a specific user. This work is part of [Carlo]’s master’s thesis, and should form the basis of further research on the Starlink User Terminal firmware.

Logic Analyzers: Tapping Into Raspberry Pi Secrets

Today, I’d like to highlight a tool that brings your hacking skills to a whole new level, and does that without breaking the bank – in fact, given just how much debugging time you can save, how many fun pursuits you can unlock, and the numerous features you can add, this might be one of the cheapest tools you will get. Whether it’s debugging weird problems, optimizing your code, probing around a gadget you’re reverse-engineering, or maybe trying to understand someone’s open-source library, you are likely missing out a lot if you don’t have a logic analyzer on hand!

It’s heartbreaking to me that some hackers still don’t know the value that a logic analyzer brings. Over and over again, tactical application of a logic analyzer has helped me see an entirely different perspective on something I was hacking on, and that’s just the thing I’d like to demonstrate today.

Diving In

A logic analyzer has a number of digital inputs, and it continuously reads the state of these digital inputs, sending them to your computer or showing them on a screen – it’s like a logic-level-only oscilloscope. If you have an I2C bus with one MCU controlling a sensor, connect a logic analyzer to the clock and data pins, wire up the ground, launch the logic analyzer software on your computer, and see what’s actually happening.

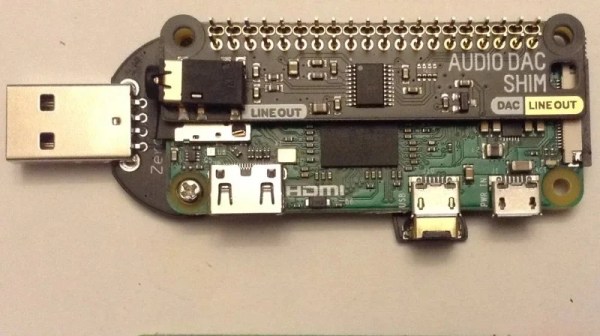
For instance, have you ever noticed the ID_SC and ID_SD pins on the Raspberry Pi GPIO connector? Are you wondering what they’re for? Don’t you want to check what actually happens on these pins? Let’s do that right now! Continue reading “Logic Analyzers: Tapping Into Raspberry Pi Secrets”

The Neo6502 Is A Credit-Card Sized Retro Computer

The venerable MOS Technology 6502 turned up in all kinds of computers and other digital equipment over the years. Typically, it was clocked fairly slow and had limited resources, but that was just how things used to be. Today, the 6502 can run at an altogether quicker pace, and the Neo6502 was the board built to take it there.

The Neo6502 from [Olimex] is a credit-card sized retro computer built around the W65C02. If you’re unfamiliar with that chip, it’s essentially a 6502 that can go fast. How fast? It can be readily overclocked to a blazing 16 MHz, if you’re so inclined!

Unlike some 6502 retro builds, the Neo6502 doesn’t live so firmly in the past. It’s outfitted with an HDMI video interface to make it easy to hook up to modern monitors, so you needn’t fuss around with old displays. Similarly, it has a USB host port to accept input from a keyboard, and audio out via a 3.5 mm jack. There’s also a tiny PCB-mount speaker, as well as I2C, SPI, and UART interfaces. Finally, there’s 2 MB of flash onboard, and a 40-pin connector hosting all the 6502 signals that you know and love. Which is all of them. Much of this lavish equipment comes courtesy of an RP2040 microcontroller onboard that handles all the bits and bobs that aren’t fit for the CPU itself.

It’s still a new project, with things like a BASIC interpreter currently in development and boards not yet openly available.  But, if you’ve always wanted to play with a hotshot 6502, this could be the board for you. Try out the emulator and see how you go.

Continue reading “The Neo6502 Is A Credit-Card Sized Retro Computer”

Copper Be Gone: The Chemistry Behind PCB Etching

For a lot of reasons, home etching of PCBs is somewhat of a dying art. The main reason is the rise of quick-turn PCB fabrication services, of course; when you can send your Gerbers off and receive back a box with a dozen or so professionally made PCBs for a couple of bucks, why would you want to mess with etching your own?

Convenience and cost aside, there are a ton of valid reasons to spin up your own boards, ranging from not having to wait for shipping to just wanting to control the process yourself. Whichever camp you’re in, though, it pays to know what’s going on when your plain copper-clad board, adorned with your precious artwork, slips into the etching tank and becomes a printed circuit board. What exactly is going on in there to remove the copper? And how does the etching method affect the final product? Let’s take a look at a few of the more popular etching methods to understand the chemistry behind your boards.

Continue reading “Copper Be Gone: The Chemistry Behind PCB Etching”

A Hacker-Friendly Software Package For Your Next AI Project

If you’re interested in using Large Language Models (LLM) in a project, but aren’t plugged directly into the fast-developing world of artificial intelligence (AI), knowing what tool or software to use can be daunting. Luckily, [Max Woolf] created simpleaichat, which is complete with examples and documentation and minimal code complexity.

As [Max] puts it, the main motivations behind the project are to provide useful tools while making it easier for non-engineers to peer through the breathless hyperbole and see just how AI-based apps actually work. This project was directly inspired by [Max]’s own real-world software experiences in this area, particularly his frustrations with popular and much-hyped frameworks in which “Hello World” feels a lot more like Hell World.

simpleaichat is a Python package that provides easy and powerful ways to interface with the OpenAI API, makers of ChatGPT. Now, it is true that OpenAI’s models are not open source and access is not free, but they are easily one of the most capable and cost-effective services of their kind.

Prefer something a little more open, and a lot more private? There’s always the option to run an LLM locally on your own machine, possibly with the help of a tool like text-generation-webui or gpt4all. Running an LLM locally will not have the quality of OpenAI’s offerings, but it can still do the job. It’s also possible to give these local LLMs an interface that mimics OpenAI’s API, so there are loads of possibilities.

Are you getting ideas yet? Share them in the comments, or keep them to yourselves and submit a tip once your project is off the ground!

Why Are We Only Just Now Hearing About LED Beaded Curtains

Beaded curtains are a pretty banal piece of home decor, unlikely to excite most interior design enthusiasts. Throw on some addressable LEDs, though, and you’ve got something eye-catching at the very least, as [Becky] demonstrates.

Joining the LED strands at the bottom made running the wiring easy but made walking through the blinds hard.

The project started with an existing beaded curtain as a base. A series of addressable LED strands were then carefully sewn to the beads using knots tied in plain sewing thread. The strands were configured as a single strand as far as the data lines were concerned, to make animation easy. Power was supplied to both ends of the strand to ensure nice and even brightness across the strands.

The brains of the system is a PixelBlaze controller, which makes it easy to wirelessly control the behavior of the strings. It’s the perfect tool for quickly whipping up fancy animations and pretty effects without hand-assembling a bunch of code yourself.

There was only a few problems with the project. [Becky] found a pretty passable LED beaded curtain from China midway through the project, which reduced her enthusiasm to finish the build. There were also issues walking through the curtain due to the wiring scheme she chose, where the bottom of one strand was connected to its neighbor.

Regardless, it’s a fun blinky build that brings some color to an otherwise drab doorway. It’s hard to complain about that! Video after the break.

Continue reading “Why Are We Only Just Now Hearing About LED Beaded Curtains”

Restoring A 45 Year Old Video Game

When we say vintage video game, some of you may think of the likes of Lemmings, Mario or maybe even Donkey Kong but the game that [Vintage Apparatus] restored is slightly older and much more minimalist, using an LED matrix and some 7-segment displays rather than this newfangled color CRT thing.

The front and back covers, buttons and screws of the game on the workbench.
The game is disassembled before cleaning.

[Vintage Apparatus] starts by removing the battery and cover from the 1977 Mattel electronics (American) football game, which uses rather uncommon 2mm triangular screws. To his and our surprise, the circuit board and its beautiful array of LEDs seem to be in excellent condition, so he moves on to cleaning the case itself.

The case, on the other hand, is a bit dirty on the outside, so [Vintage Apparatus] takes out the buttons and starts cleaning with the back cover a Q-tip. After a bit of scrubbing and some extra care to avoid removing any stickers, he moves on to the considerably dirtier and somewhat scratched front case. After some wrestling with the creases and speaker grill of the front cover, the outside of the front case looks nice and clean. Finally, he puts back the buttons and circuit board in the front cover before adding closing it all up with the back cover and screwing it back together.

The game, which immediately comes to life and was actually made by the Mattel calculator division, is a sort of evasion game where the player is a bright dot that can move forward, up or down. The player avoids the dimmer dots, the “tacklers”, in order to run as far as possible as fast as possible. When one of the tacklers tackles the player, the amount of downs is increased and the fifth down means game over. After either scoring or getting downed one too many times, the field is flipped and it’s now player 2’s turn.

Video after the break.
Continue reading “Restoring A 45 Year Old Video Game”