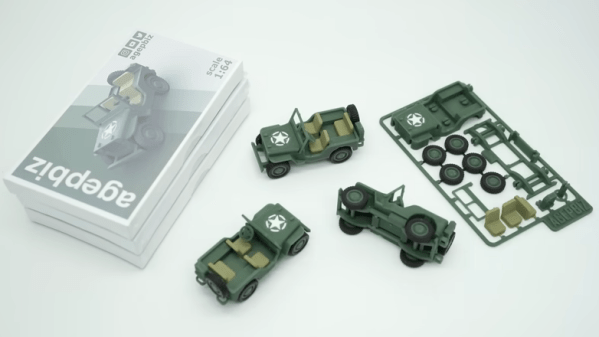
When finding work in product design and prototyping, two things are important to have at hand: a business card, and a sample of one’s work. If one can combine those, even better. Make it unique and eye-catching, and you’re really onto something. That seems to have been the idea behind [agepbiz]’s 1:64 scale micro Jeep model kit that serves as an “overcomplicated” business card.
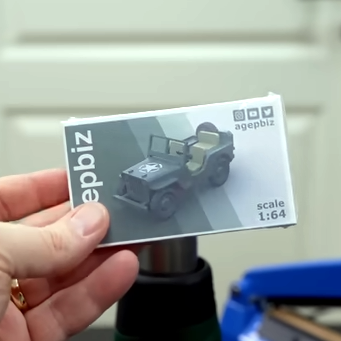
At its heart, the kit is a little print-in-place model kit that looks a lot like larger injection-molded model kits. Completing it is a custom-made box with custom labels, and it’s even shrink-wrapped. The whole thing fits easily in the palm of a hand.
There’s a lot of different tools effectively used to make the whole thing. The model card itself is 3D printed in multiple filament colors, and the box is constructed from carefully glued cardstock. The labels are custom printed, and a craft cutter (which has multiple uses for a hobbyist) takes care of all the precise cutting. It’s an awfully slick presentation, and the contents do not disappoint.
Get a closer look in the video, embedded just below. And if you like what you see, you’re in luck because we’ve seen [agepbiz]’s work before in this mini jet fighter, complete with blister pack.
Continue reading “Micro Jeep Model Kit Is Both Business Card And Portfolio”