Molding Rubber For A Pre-production Prototype Using A 3D Printed Model

molding-rubber-for-production-models

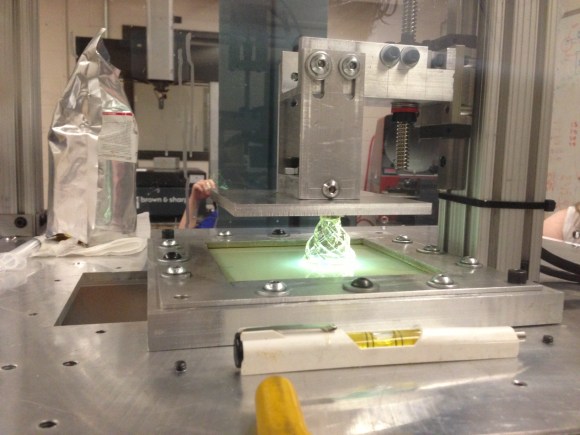
When you’re getting close to a production run the prototypes really need to hit the mark before pulling the trigger. [Bob’s] still hard at work getting his scoreboard off the ground and his most recent endeavor was to find a way to prototype the rubber gasket without blowing his shoestring budget. His solution was to harness the power of 3D printing to generate a model from which he could create the mold from which he cast the rubber part.

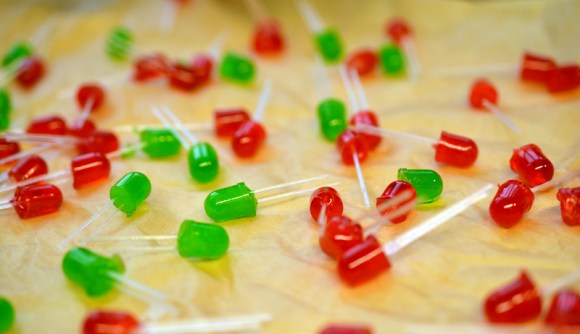
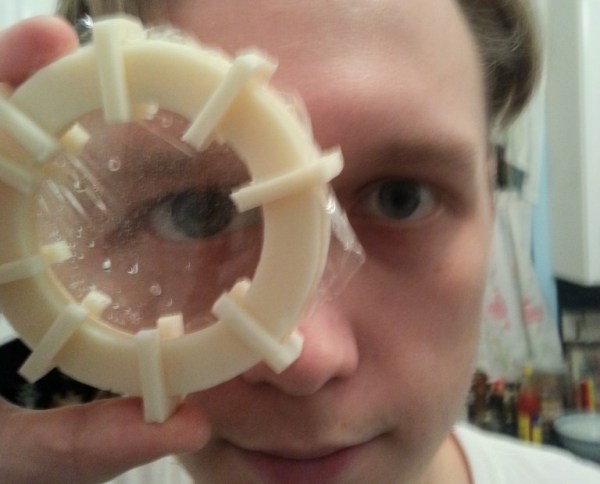
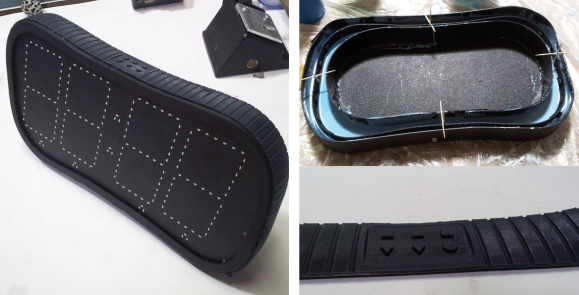
To make things a bit more difficult, the band isn’t just decorative, it doubles as the tactile part of the scoreboard buttons. You can see all six of them (before being painted to make them stand out) in the inset image above. Just above that image is a picture of the mold making process. The toothpicks are suspending the 3D printed model of the rubber band while the lower half of the silicone mold sets up. Once that had happened [Bob] sprayed release agent to ensure the top half of the mold wouldn’t stick while it cured.

The results turned out just great. Sure, this isn’t the way to go if you’re making a lot of these things. But we’re impressed at the quality he achieve for a one-off item.

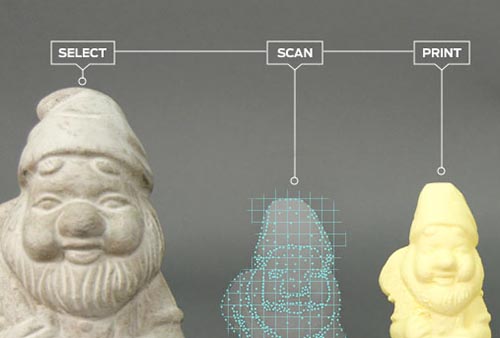
If the finished product on the left looks familiar it’s because we looked in on the project last June. [Bob] continues with improvements and plans to launch a crowd funding campaign this week.

One Piece, 3D Printed Crossbow

bow

Centuries ago, craftsmen and smiths of all sort spent hundreds of hours crafting a crossbow. From the fine craftsmanship that went into making the bow to the impeccable smithing a windlass requires, a lot of effort went into building a machine of war. Since [Chris] has a 3D printer, he figured he could do just as well as these long-dead craftsmen and fabricate a crossbow in under a day.

What’s really interesting about [Chris]’ crossbow is that it is only a single piece of plastic. The bow is integrated into the stock, and the trigger works by some creative CAD design that takes advantage of the bendability of plastic. The only thing required to shoot a bolt from this crossbow is a piece of string. That, and a few chopsticks.

He won’t be taking part in any sieges, but [Chris]’ weapon is more than capable of shooting a bolt across a room or launching a balsa wood airplane. You can see an example of this after the break.

Continue reading “One Piece, 3D Printed Crossbow”

Makerbot Shows Off 3D Scanner

scan

We’ve said our piece over Makerbot and their interpretation of what Open Source means, but the fact remains if you’re sourcing a 3D printer for a high school shop class or a hackerspace, you really can’t do much better than a Makerbot Replicator. Apparently Makerbot is looking to expand their 3D design and fabrication portfolio; they just announced an upcoming 3D scanner at SXSW. It’s called the Makerbot Digitizer, and it takes real, 3D objects and turns them into CAD files.

Since Makerbot and [Bre Pettis] didn’t give out much information about the 3D scanner they’re working on, the best information comes from Techcrunch. The Makerbot Digitizer uses two lasers to scan real objects and turns them into 3D CAD files. The hardware isn’t finalized, and the prototype is made of a few pieces of laser cut plywood. No details are available on how much the Digitizer will cost, when it will be available, or what its resolution is.

Of course 3D scanning of real objects to translate them into CAD files is nothing new for Hackaday readers. We’ve seen our fair share of desktop 3D scanners, including one that was built in a day out of junk. Even the Kickstarter crew has gotten into the action with a few desktop 3D scanners, some of which scan in full color.

Fabricating Edible LEDs

fabricating-edible-LEDs

They’re edible, yes. But they don’t light up. That’s fine with us, since the process [Becky Stern] used to make these gummy candy LEDs taps into several techniques handy to have under your belt.

The first part shown in her video (embedded after the jump) is to make a mold for the candies. You probably have a few bags of LEDs in your parts bin. Those along with a trough made of foam core come together to create the form for the silicone mold. After mixing, pouring, and hardening, [Becky] peels the silicone off of the LEDs and sends it through the oven to make it food-safe. Mixing up the candy uses simple ingredients (gelatin, water, and ascorbic acid) but you’ll need to follow the methodology closely to get the taste and clarity you’re used to. Syringes are used to fill the tiny voids in the mold before adding leads which were 3D printed using PLA.

These will be a huge hit at your next hackerspace meeting!

Continue reading “Fabricating Edible LEDs”

Print Your Own Adjustable Lenses

[Christopher] is really going the distance with his liquid-filled 3D printed lens project. The idea is to create a bladder out of two pieces of clear plastic. It can then be filled with liquid at a variable level of pressure to curve the plastic and create an adjustable lens. He was inspired by the TED talk (which we swear we already covered but couldn’t find the post) given by [Josh Silver] on adjustable eyeglass lenses.

Don’t miss the video after the break. [Christopher] shows off the assembly process for one lens. Two 3D printed frames are pressure fit together to hold one piece of plastic wrap. Two of those assemblies are then joined with JB weld and some 3D printed clips that help to hold it. A piece of shrink tubing is used as a hose to connect a syringe to the bladder. By filling the lens assembly with water he’s able to adjust how it refracts light.

Continue reading “Print Your Own Adjustable Lenses”

Everything You Need To Build A Light-cured Resin 3D Printer

dlp-projector-resin-printer

[Rachel Levine] was one of the mechanical engineers on the team at the Rochester Institute of Technology who built this resin-based 3D printer. She wrote in to show off the fantastic work they’ve been doing. Their project website is daunting to take in at first, which shouldn’t be all that surprising since the concepts used here are fairly advanced. But give yourself a few minutes of blind clicking and you’ll begin to grasp the scope of this fantastic piece of engineering. The bad news is you’re not going to whip the thing together in a weekend. The good news is that if you’re determined to build one this should give you the lion’s share of the background you’ll need to make it happen.

The rig pulls a printed object up from the ooze on the build platform. They’re using resin that is cured with visible light. That’s why you see the level in the foreground; the bath needs to be a uniformed thickness so that it solidifies correctly when the light hits it from the underside. The build table is made of glass sandwiched between gaskets where it comes in contact with the frame, keeping the liquid in place while letting the DLP projector shine through. Check out the fast-motion build video after the break to see how each layer is exposed to light, then pulled upward to make room for the next. We estimate the build was around two hours of real-time and you can see that a technician replaces the extracted resin at regular intervals during the process.

DLP Projector based printers have been gaining in popularity. Check out this roundup of several offerings from last year.

Continue reading “Everything You Need To Build A Light-cured Resin 3D Printer”

Finally, A Machine That Makes Cheap 3D Printer Filament.

If there’s one problem with the RepRap, it’s the cost of filament. Sure, there’s also the computationally difficult problem of slicing 3D models, but a 5 to 10 times markup on turning plastic pellets into filament is the biggest problem. It’s even a bigger problem than the problems of compatibility and interchangeable parts that comes with everyone forking a ‘standard’ printer design dozens of times. The cost of filament, though, is the biggest problem, right up there with RepRap developers focusing nearly entirely on different printer designs instead of the software, firmware, and electronics that are also vitally important to the RepRap project.

Nearly a year ago, we caught wind of a competition to create a home-based filament manufacturing station that takes cheap plastic pellets available for about $5/kg and turns them in to 3D printer filament that usually sells for $50/kg. A winner for this competion has finally been announced. The winner, [Hugh Lyman] just won $40,000 for his home filament creation station, the Lyman Filament Extruder

The goal of the Desktop Factory Competition was to create a machine that produces filament suitable for 3D printers with a total build cost of under $250 USD. [Lyman] met the goal by using a few motors, 3D printed parts, a PID controller, and off the shelf auger drill bit (that’s the actual model and supplier he used, by the way) that is able to reliably churn out plastic filament.

If you want to build your own Lyman Extruder, all the plans are up on Thingiverse, but LulzBot, the awesome people who gave us a 3D printer, hope to sell a pre-assembled version of this extruder sometime in the future, hopefully with a chain guard around that sprocket.