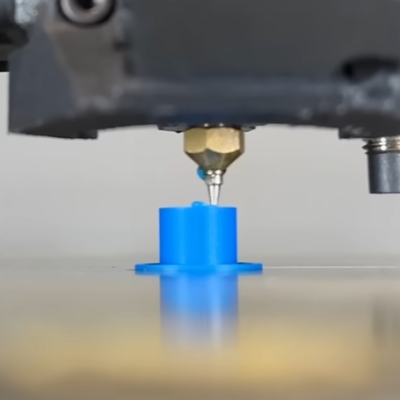
Bare Bones Vacuum Forming, Just Add Plastic Plates

Vacuum forming is a handy thing to be able to do, and [3DSage] demonstrates how to do a bare-bones system that can form anything smaller than a dinner plate with little more than a 3D printed fitting to a vacuum cleaner, a heat gun, and a trip to the dollar store.

Plastic plates from the dollar store make excellent forming sheets, and in a variety of colors.

The 3D printed piece is a perforated table that connects to a vacuum cleaner hose, and [3DSage] mentions elsewhere that he tried a few different designs and this one worked the best. A cardboard box makes an expedient stand. The object being molded goes on the table, and when the vacuum is turned on, air gets sucked down into the holes.

As for the thermoforming itself, all that takes is some cheap plastic plates and a heat gun. Heat the plastic until it begins to droop, then slap it down onto the vacuum table and watch the magic happen. Using plastic plates like this is brilliant. Not only are they economical, but their rim serves as a built-in handle and helps support the sagging plastic.

Thermoforming plastic on a 3D-printed vacuum table and using 3D-printed molds definitely isn’t a system that will be cranking parts out all day long, but as long as one allows time for everything to cool off in between activations, it’ll get the job done. Nylon will hold up best but even PLA can be serviceable.

Watch it in action in the video embedded below. The video is actually about [3DSage] making adorable Game Boy themed s’mores, but here’s a link to the exact moment the vacuum forming part happens.

Continue reading “Bare Bones Vacuum Forming, Just Add Plastic Plates”

3D Printing A Sock Knitting Machine

3D printing socks isn’t really a thing yet. You’d end up with scratchy plastic garments that irritate your feet no end. You can easily 3D print all kinds of nifty little mechanisms, though, so why not 3D print yourself a machien to knit some socks instead? That’s precisely what [Joshua De Lisle] did.

The sock knitting machine is a simple device, albeit one that takes up most of the build area on a common 3D printer. It’s properly known as a circular sock machine, and is capable of producing the comfortable tubular socks that we’re all familiar with. All it takes is a bit of yarn and a simple handcranking of the mechanism, and it’s capable of extruding a sock before your very eyes.

He steps through his various iterative design improvements, and shows us how to build the device using knitting machine hooks to handle the yarn directly. The device is also instrumented with a digital counter to keep track of how far along your given sock is.

Your friends at the pub might go running for the doors when you start explaining that you’re thinking about making your own socks. Don’t let them deter you; we’ve seen others tread this path before. Video after the break.

Continue reading “3D Printing A Sock Knitting Machine”

Homebrew Linear Actuators Improved

[Harrison Low] published some 3D-printed linear actuators, which generated a lot of interest. He got a lot of advice from people on the Internet, and he took it to heart. The result: an improved version that you can see in the video below.

The original design used carbon fiber and Kevlar and was quite stiff. The actuators could move very fast, which was important to [Harrison]. However, they were also prone to wear and had issues with the force required to assemble them. He also wanted the design to be more modular to facilitate repair. The new design removes the bowden tubes, and the resulting actuator is both easier to assemble and easier to service.

Continue reading “Homebrew Linear Actuators Improved”

Fitting 3D Prints In A Snap

The good news is that 3D printing lets you iterate on your design until it is just right. The bad news is that you often have to iterate your design over and over to get things to fit together. It is a little easier if you are designing both parts, but matching sizes and positions on a printed part that fits something that already exists can be a pain. Sure, you can grab the calipers and make fidgety measurements — but [Maker Tales] has a different approach. As you can see in the video below, he takes a photo, imports it into CAD, scales it, and then uses it as a reference.

If you have one, you could, of course, scan the existing part. However, if you’ve ever tried that, results vary wildly, especially with cheap hardware. [Maker Tales] just takes a picture with his phone, trying to get as straight as possible and from a distance. Once in CAD, he makes one measurement and scales the image to the correct size.

This is one of those things that should be obvious, but you don’t always think it through. Of course, it is possible to measure everything precisely or — even better — if you have the original CAD or drawing for the part that has exact measurements. But compared to making numerous precise measurements, this method is a lot less work and gives good results.

If you are creating mating parts, think about shadow lines. Many commercial parts now have CAD models as STEP files if you want to skip the scanning.

Continue reading “Fitting 3D Prints In A Snap”

[Thomas Sanladerer]’s YouTube Channel Goes In The Toilet

We like [Thomas Sanladerer], so when we say his channel has gone in the toilet, we mean that quite literally. He had a broken toilet and wanted to compare options for effecting a 3D printed repair. The mechanism is a wall-mounted flush mechanism with a small broken plastic part. Luckily, he had another identical unit that provided a part that wasn’t broken.

The first attempt was to 3D scan the good part. The first scanner’s software turned out to be finicky, and [Thomas] finally gave up on it. He finally used a handheld scanner which took about a half hour. It wasn’t, of course, perfect, so he also had to do some more post-processing.

The next step was to make measurements and draw the part in CAD. It took the same amount as the scan, and it is worth noting that the part had curves and angles — it wasn’t just a faceplate. The printed results were good, although a measurement error made the CAD model bind a bit instead of pivoting the way it should. The scan, of course, got it right.

A quick revision of the design solved that problem but, of course, it added some time to the process. At the end, he noticed that the scanned “good” part was also broken but in a different way. He added the additional part, which didn’t seem to bother the function. The scanned object required a little trimming but nothing tremendous.

In the end, the scanning was a bit quicker, partly because it didn’t suffer from the measurement error. However, [Thomas] noted that it was more fun to work in CAD. We thought the results looked better, anyway. [Thomas] thinks the scanners, at least the budget ones, are probably better for just getting reference objects into CAD to guide you when you create the actual objects to print.

It isn’t hard to make a cheap scanner. Some of the open designs are quite sophisticated.

Continue reading “[Thomas Sanladerer]’s YouTube Channel Goes In The Toilet”

Get A Fresh Build Plate At The Push Of A Button

For best results, a build sheet for a 3D printer’s print bed should be handled and stored by the edges only. To help make that easier, [Whity] created the Expandable Steel Sheet Holder system that can store sheets efficiently without touching their main surfaces, and has a clever mechanism for ejecting them at the push of a button.

Pushing the button (red, bottom left) pivots the section at the top right, ejecting the plate forward for easy retrieval.

The design is 3D printable and made to be screwed to the bottom of a shelf, which is great for space saving. It can also be extended to accommodate as many sheets as one wishes, and there’s a clever method for doing that.

Once the first unit is fastened to a shelf, adding additional units later is as simple as screwing them to the previous one with a few M3 bolts, thanks to captive nuts in the previously-mounted unit. It’s a thoughtful feature that makes it easy to expand after the fact. Since build sheets come in a variety of different textures and surfaces for different purposes, one’s collection does tends to grow.

Interested, but want it to fit some other manufacturer’s sheets? The design looks easy to modify, but before you do that, check out the many remixes and you’re likely to find what you’re looking for. After all, flexible magnetic build sheets are useful in both resin and filament-based 3D printing.

Clean Up Your Resin-Printing Rinse With Dialysis

There’s a lot to like about resin 3D printing. The detail, the smooth surface finish, the mechanical simplicity of the printer itself compared to an FDM printer. But there are downsides, too, not least of which is the toxic waste that resin printing generates. What’s one to do with all that resin-tainted alcohol left over from curing prints?

How about sending it through this homebrew filtering apparatus to make it ready for reuse? [Involute] likens this process to dialysis, and while we see the similarities, what’s going on here is a lot simpler than the process used to filter wastes from the blood in patients with failing kidneys — there are no semipermeable membranes used here. Not that the idea suffers from its simplicity, mind you; it just removes unpolymerized resin from the isopropyl alcohol rinse using the same photopolymerization process used during printing. Continue reading “Clean Up Your Resin-Printing Rinse With Dialysis”