Portal Turret Prop

3D Printed Portal Turret Searches And Destroys

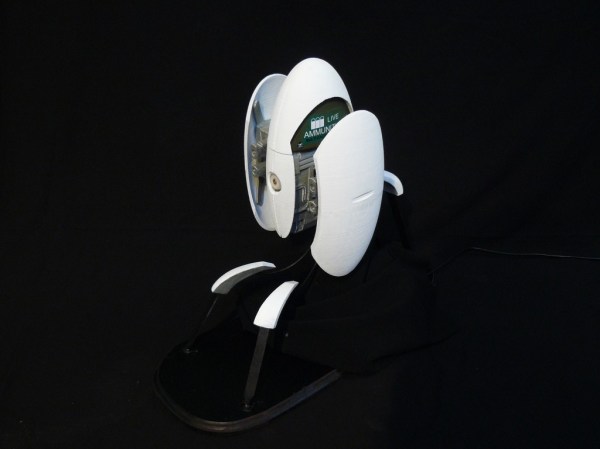
Ah yes, Portal — one of the most iconic puzzle games from this past decade by Valve. [Yvo] just put the finishing touches on his fully 3D printed, working, Portal Turret. Well — it doesn’t have guns — but it does just about everything else!

This intricate prop replica has attention to detail written all over it. [Yvo’s] carefully designed it to actuate as close to the video game model as possible. Its eye and arms move, has a targeting laser and even features a camera for color based object tracking. You can also play around with it using a joystick — but it’s much more fun to leave on autonomous mode.

Because the whole thing is 3D printed, [Yvo] has also made up an Instructable for making your own, and according to him, it’s not that hard to build! This isn’t his first rodeo either, if you remember the awesome GlaDOS we shared last year — that’s his too.

Continue reading “3D Printed Portal Turret Searches And Destroys”

3D Printed Trays For Your Pick And Place Machine

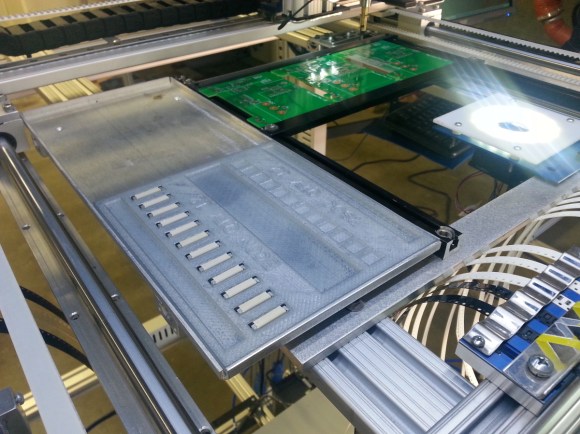
3dprintedPNPTray Pick and Place machines are one of the double-edged swords of electronics.They build your boards fast, but if you don’t have everything setup perfectly, they’ll quickly make a mess. A pick and place can’t grab a resistor from a pile and place it – so far only humans can pull that one off. They need parts organized and oriented in reels or trays.

[Parker Dillmann] had to load some parts, but didn’t have a tray for them, so he 3D printed his own. [Parker] works at a small assembly house in Texas. He’s working on a top secret design which includes FFC connectors. Unfortunately, the connectors shipped in pick and place unfriendly tubes rather than reels. If he couldn’t find a tray, [Parker] would have to hand place those connectors as a second operation, which would increase the time to build each board and leave more chances for mistakes.

Rather than place each part by hand, [Parker] got in touch with his friend [Chris Kraft] who is something of a 3D printing guru. [Chris] confirmed that a 3D printed tray would be possible, though the PLA he prints with was not static safe. That was fine for the connectors, but [Parker] was hoping to save some tray space by putting his PSOC4 chips in the printed tray as well.

[Parker] used SketchUp to design a tray that would fit his Madell DP2006-2 pick and place. He left .15mm clearance around the parts – just enough to cover any inaccuracies during printing, but not enough to throw off parts placement. He sent the STL file over to [Chris] who used Simplify3D to a create a Gcode file. [Chris] printed the tray at .2 mm layer height on his MakerGear M2 printer, and the results looked great. Would they be good enough for the pick and place machine?

[Parker] received the printed trays in the mail and loaded them with parts. The pick and place had no problem finding and placing the connectors, making this job a huge success. [Parker] even left room for the PSOC4 chips.He plans to paint the tray with anti-static paint before giving them at try.

We really like this story – it’s a perfect example of how 3D printers can speed up processes in manufacturing. Now that the basic design is done, creating new trays is a snap. Nice work [Parker] and [Chris]! Continue reading “3D Printed Trays For Your Pick And Place Machine”

DSLR Gives Exposure To 3D Light Traces

light lion

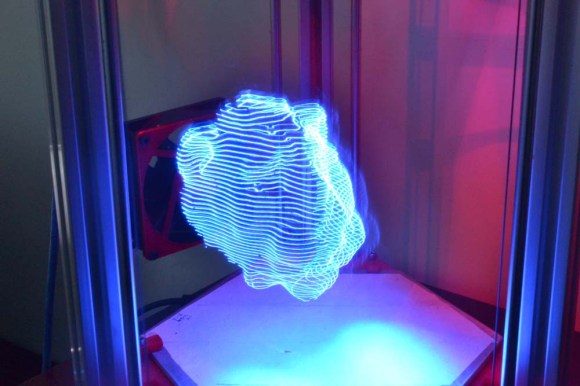
We’ve all twirled sparklers around in the darkness to write fleeting circles and figure eights with the light they give. Some of us have done it with the glowing end of a cigarette, too. Hackaday Projects user [ekaggrat] went a step further, painting with an LED mounted on the print head of his newly built 3DR Delta and capturing the LED’s path with a DSLR camera set for long exposure.

He started by creating a mesh model. From there, he converted it slices and G-code in Grasshopper. The LED is connected to pin D11/servo pin 1 on the RAMPS board. [ekaggrat] used the M42 G-code extension toggle the pin and write the slice lines with light. He has future plans to use an RGB LED, and we hope he shares that on the Projects site as well.

While this isn’t the most advanced light painting setup we’ve seen, it’s still pretty awesome and far more accessible. There is more information on his site, and you can grab the G-code from his repo. Stick around to see a video of the process.

Continue reading “DSLR Gives Exposure To 3D Light Traces”

Wind Powered Strandbeest Could Roam The Land Indefinitely

3d printed strandbeest

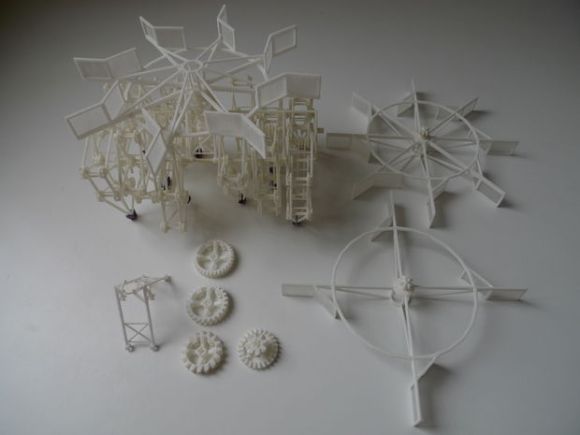
We have to admit, Strandbeests are one of our favorite mechanical inventions of recent years — many-legged, life-like mechanisms that walk around? Awesome. [Eric] wanted to design something really cool — so he decided to build a turbine attachment for [Theo Jansen’s] Strandbeest — the AG5 & AG7 models specifically.

If you’re not familiar, the Strandbeest is a mechanical contraption that actually walks around. It’s been developed by [Theo Jansen] for years and has been built in many variations by other people over the years. [Theo] even gave a TED talk on it back in 2007.

The very idea of the Strandbeest is to have it move by itself with autonomy — no electronics allowed! [Theo] has designed a propeller attachment for one of his 3D printable Strandbeests to do this, but [Eric] wanted to take it a step further. He’s designed a more functional wind turbine that sits on top of the Strandbeest, allowing wind from any direction to cause it to walk.

Continue reading “Wind Powered Strandbeest Could Roam The Land Indefinitely”

Mechanical Clock Designed For A CNC Router Gets New Life Using A 3D Printer

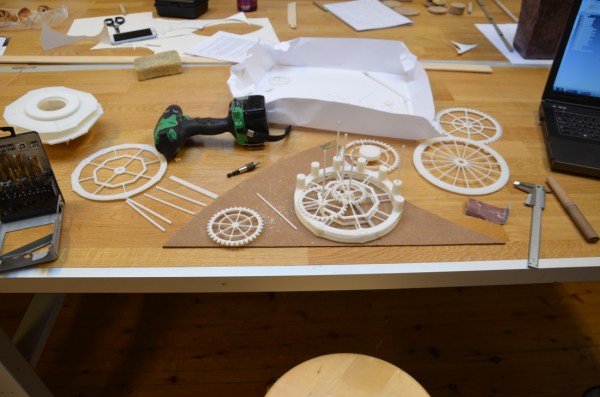
[Madis Kaasik] designed a clock a while back using Solid Edge (3D CAD) — but never got a chance to build it — until he became an exchange student at a university in Norway with access to a big industrial 3D printer!

He had originally intended for it to be cut out using a CNC router or with a laser cutter, but when discovered he could use the university’s 3D printer he decided to give it a shot — it’s actually the very first thing he’s ever printed! The designs had to be modified a little bit for 3D printing, but now that it’s done he’s also uploaded them to Thingiverse for anyone to use.

It took quite a bit of fine tuning with the pendulum, weights, and gears to get it ticking properly, but what [Madis] enjoyed most about this project was the realization of just how vast the possibilities of 3D printing are — he’s excited to begin his next big 3D printing endeavor!

Continue reading “Mechanical Clock Designed For A CNC Router Gets New Life Using A 3D Printer”

Printable Lamp Assembles Itself

Printable-Self-Assembling-Lamp

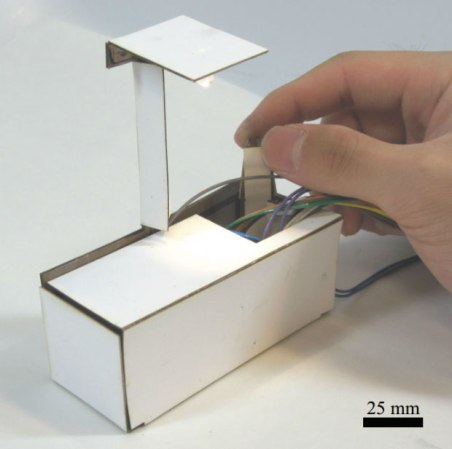
With the advent of 3D printers, printable circuits, and other “one-machine-to-rule-them-all” automated systems, printing fully functional items is fast becoming a reality. The lamp seen above starts out as a flat piece of cardboard with circuits printed onto it — apply some electricity and it will fold itself up, creating a lamp — it even has a capacitive touch sensor for turning it on!

This ingenuity comes straight from Harvard researchers who presented the project “Self-assembling Sensors for Printable Machines” at the IEEE International Conference on Robotics and Automation (ICRA) just last Tuesday in Hong Kong. It’s not fully printable (wires and the LED had to be soldered in by hand) but it’s an amazing proof of concept — there’s also an Arduino off-screen taking care of controlling it.

The cardboard is a sandwich of shape-memory polymers which are triggered by heat, generated by running electricity through thin layers of copper trace. It takes a long time to assemble so the following video has been sped up 32x speed.

Continue reading “Printable Lamp Assembles Itself”

Three-Phase Submersible Thruster Is Open Source And Awesome

submerged_mellon_assembly_v8

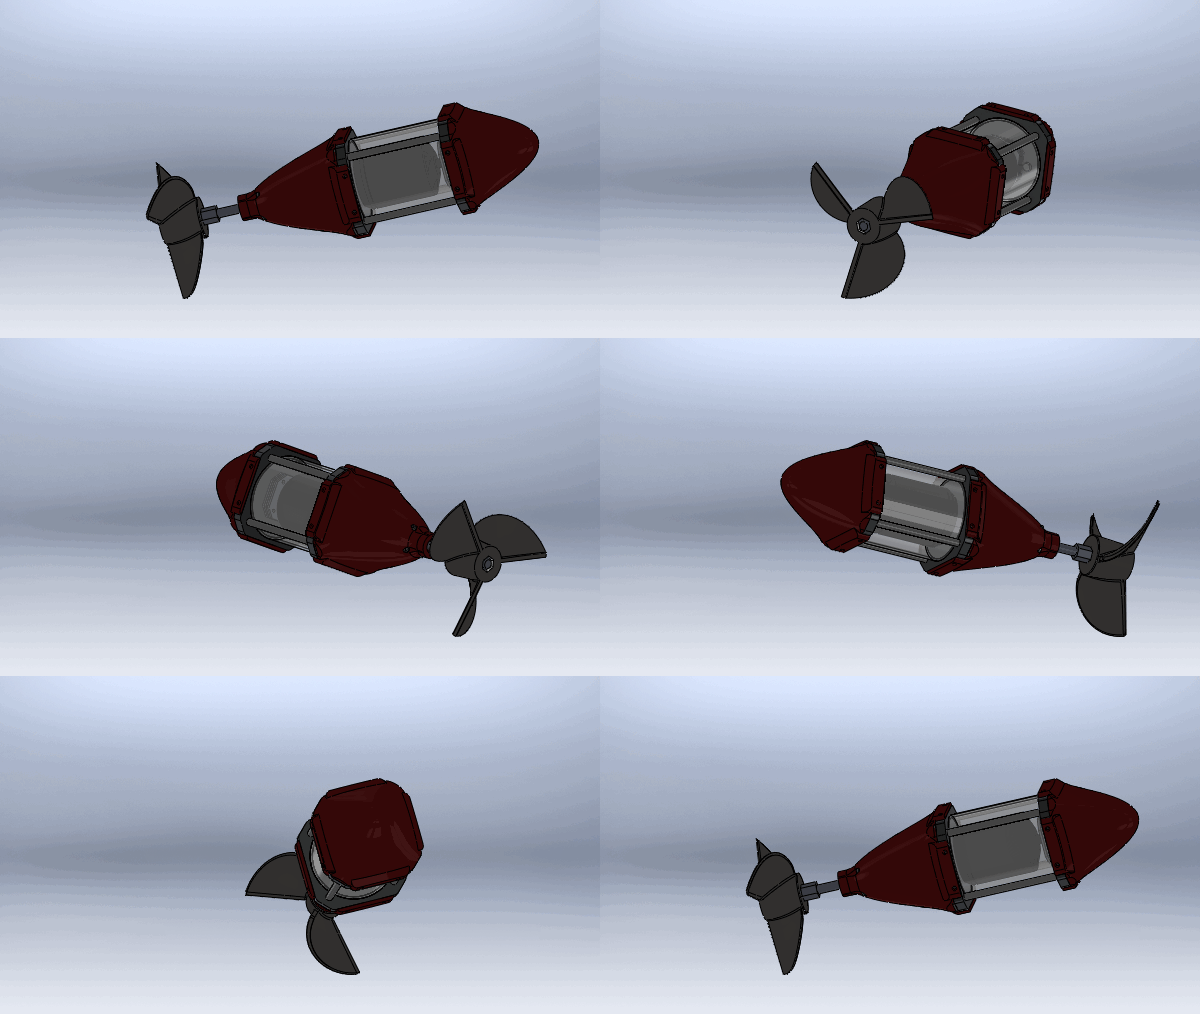
Have you ever considered building some kind of underwater vehicle? It’s rather ambitious but [Dane] of Transistor-Man has designed and built a working submersible 3-phase electric thruster — and he’s released the plans online for all to share!

He decided to make this for his 3D printed canoe (another awesome project) which is possible due to his massive SCARA robot 3D printer. The thruster makes use of readily available off the shelf components, but with 3D printed cones for decreased water resistance and other manufactured parts. The housing is water-jet cut, and the poly-carbonate tube had grooves for seals made using a lathe.  The amount of detail in his build logs is incredible — he’s fully modeled all parts in what looks like SolidWorks and uploaded detailed images and designs of all the parts.

The trickiest part of the build was making it water-tight. His first test was to submerge it in a water bath for 8 minutes, and once that was proven, he filled the inside with 5W-20 oil to make sure it wouldn’t leak the other way as well. One of his project goals is for this thruster to work 1 meter underwater without losing more than 10ml of the coolant (oil) per hour.

Continue reading “Three-Phase Submersible Thruster Is Open Source And Awesome”