
The open-source hardware business landscape is no doubt a tough one, but is it actually tougher than for closed-source hardware? That question has been on our minds since the announcement that the latest 3D printer design from former open-source hardware stalwarts Prusa Research seems like it’s not going to come with design files.
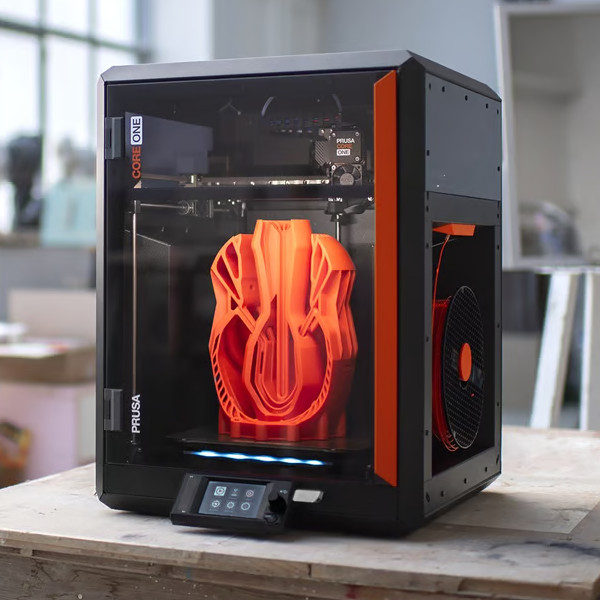 Ironically, the new Core One is exactly the printer that enthusiasts have been begging Prusa to make for the last five years or more. Since seeing hacker printers like the Voron and even crazy machines like The 100 whip out prints at incredible speed, the decade-old fundamental design of Prusa’s i3 series looks like a slow and dated, if reliable, workhorse. “Bed slinger” has become a bit of a pejorative for this printer architecture in some parts of the 3DP community. So it’s sweet to see Prusa come out with the printer that everyone wants them to make, only it comes with the bitter pill of their first truly closed-source design.
Is the act of not sharing the design files going to save them? Is it even going to matter? We would argue that it’s entirely irrelevant. We don’t have a Core One in our hands, but we can’t imagine that there is anything super secret going on inside that couldn’t be reverse engineered by any other 3DP company within a week or so. If anything, they’re playing catch up with other similar designs. So why not play to one of their greatest strengths – the engaged crowd of hackers who would most benefit from having the design files?
Of course, Prusa’s decision to not release the design files doesn’t mean that they’re turning their backs on the community. They are also going to offer an upgrade package to turn your current i3 MK4 printer into the new Core One, which is about as hacker-friendly a move as is possible. They still offer kit versions of the printers at a discount, and they continue to support their open-source slicer software.
But this one aspect, the move away from radical openness, still strikes us as bittersweet. We don’t have access to their books, of course, but we can’t imagine that not providing the design files gains them much, and it will certainly damage them a little in the eyes of their most devoted fans. We hope the Core One does well, but we also hope that people don’t draw the wrong lesson from this – that it does well because it went closed source. If we could run the experiment both ways, we’d put our money on it doing even better if they released the design files.
![[James] and his Lemontron portable 3D printer](https://hackaday.com/wp-content/uploads/2024/11/lemontron-1200.jpg?w=600&h=450)
![Overhead photo of [James]' hands assembling the Lemontron Portable 3D printer](https://hackaday.com/wp-content/uploads/2024/11/My-3d-printer-is-almost-ready-to-release-16-56-screenshot.png?w=400) Recent video updates show the Lemontron in action, printing impressively large and complex models. It tackled a marble run with 80-degree unsupported overhangs and a ‘comically large’
Recent video updates show the Lemontron in action, printing impressively large and complex models. It tackled a marble run with 80-degree unsupported overhangs and a ‘comically large’ 


