Over at the Manchester Hackerspace, [Bob] has been busy getting a 30-year-old bandsaw up and running. The saw worked great, but it was missing a fence, making straight cuts difficult to say the least. The solution, of course, was to build a new fence, and [Bob] decided to capitalize on his hackerspace’s workshop by making a new fence with a 3d printer.
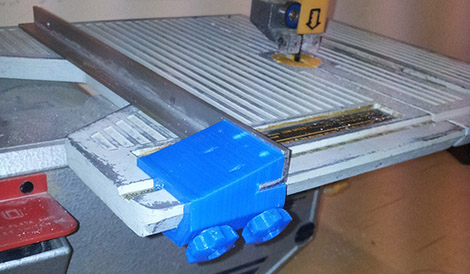
[Bob] began by taking careful measurements of the saw’s table and the channel running down the length of it. These measurements were plugged into OpenSCAD, and after a few iterations, [Bob] had an extremely well-fitting profile a fence could be attached to.
With the profile down, [Bob] created a new part in OpenSCAD that would hold an aluminum angle piece. This was attached to the plastic parts with screws, and the entire assembly clamps down to the saw with the help of a few 5mm bolts. For a machine that is usually dedicated to making 3D printer parts and Yoda heads, [Bob] did a great job making good use of his 3D printer.