Upgraded Film Scanner Handles Bigger Formats At No Cost

Film scanners are a useful tool for digitizing slides and negatives, and the Plustek 8100 that [Christian Chapman] had was capable, but limited to small format film only. Rather than pay for a much more expensive medium format scanner that could handle 120 film, he modified his 8100 to accomplish the same thing with a combination of good old software and hardware tampering.

On the software side, [Christian] modified a driver for the Plustek 8100 so that it sweeps the scan head further than usual. At the application level, to scan medium format frames, it does a total of four scans: one for each quadrant. The results get stitched together in software with a thoughtfully-designed shell script that provides previews and handles failures and restarts gracefully.

Hardware-wise, the scanning carriage needs modification to ensure nothing interferes with the scan head as it moves further than originally designed. Some CAD and 3D printing made short work of this. Incidentally, this hardware mod is an excellent demonstration of one of the core strengths of 3D printing: the ability to make geometrically-straightforward objects that would nevertheless be troublesome or impractical to construct in any other way.

Go Big Or Go Home: 0.6 Mm Nozzles Are The Future

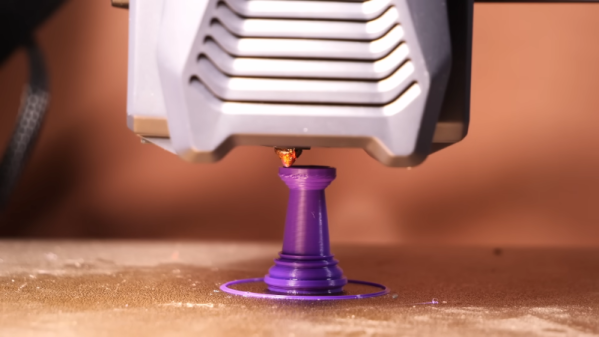
Most desktop fused deposition modeling (FDM) 3D printers these days use a 0.4 mm nozzle. While many people have tried smaller nozzles to get finer detail and much larger nozzles to get faster printing speed, most people stick with the stock value as a good trade-off between the two. That’s the conventional wisdom, anyway. However, [Thomas Sanladerer] asserts that with modern slicers, the 0.4 mm nozzle isn’t the best choice and recommends you move up to 0.6 mm.

If you know [Thomas], you know he wouldn’t make a claim like that without doing his homework. He backs it up with testing, and you can see his thoughts on the subject and the test results in the video below. The entire thing hinges on the Ultimaker-developed Arachne perimeter generator that’s currently available in the alpha version of PrusaSlicer.

We’ve experimented with nozzles as small as 0.1 mm and, honestly, it still looks like an FDM 3D print and printing takes forever at that size. But these days, if we really care about the detail we are probably going to print with resin, anyway.

There are a few slicer settings to consider and you can see the whole setup in the video. The part where an SLA test part is printed with both nozzles is particularly telling. This is something that probably shouldn’t print well with an FDM at all. Both nozzles had problems but in different areas.

Continue reading “Go Big Or Go Home: 0.6 Mm Nozzles Are The Future”

Large Format 3D Printer Is A Serious Engineering Challenge

When you want to build a large format 3D printer, you can’t just scale up the design of a desktop machine. In an excellent four-part build series (videos after the break), [Dr. D-Flo] takes us through all the engineering challenges he had to contend with when building a 3D printer with a 4x4x4 ft (1.2 m cube) print volume.

For such a large print volume you won’t be printing with a 0.4 mm nozzle. The heart of the printer is a commercial Massive Dimension MDPH2 pellet extruder, capable of extruding ~1 kg of plastic per hour through 1.5 mm to 5 mm nozzles. To feed the extruder, [Dr. D-Flo] used a Venturi vacuum system to periodically suck pellets from a large hopper. The system is driven by compressed air, which can introduce moisture back into the carefully dried pellets. To reduce the humidity levels, the compressed air passes through a series of vertical aluminum tubes to allow moisture to condense and drain out the bottom.

At 8.4 kg, it needs a powerful motion platform to move it. [Dr. D-Flo] went with a stationary bed design, with the extruder pushed around by seven high torque NEMA23 motors on a large gantry built from C-beam aluminum extrusions. A machine this size needs to be very rigid with well-fitting parts, so [Dr. D-Flo] made heavy use of CNC machined aluminum parts.

To allow dynamic bed leveling, [Dr. D-Flow] made use of a Quad Gantry Leveling (GQL) scheme. This means that each of the four Z-actuators will dynamically adjust its position based on inputs from the leveling probe. The avoid stressing the corner mountings that hold the X-Y gantry to the Z carriage plates, he used radial spherical bearings at the mounting points to allow a few degrees of play.

The build plate consists of an aluminum plate bolted onto the base in 25 positions with springs for adjustability. A massive 6000 watt 220 V heating pad sticks to the bottom, while the actual printing surface is a large sheet of borosilicate glass. One major concern was the deflection of the build plate when heated to working temperature, but with all the adjustment options [Dr. D-Flo] was able to get height variation down to about 0.25 mm. This is within the acceptable range when printing with layer heights of 1 mm or more.

We’ve featured large scale 3D printers in the past, but none are quite as big the University of Maine’s building-sized 3D printer that can print a motorboat in one piece.

Continue reading “Large Format 3D Printer Is A Serious Engineering Challenge”

A New Way To Produce PCBs With Your 3D Printer

With the low-cost PCB fabrication services available to hackers and makers these days, we’ll admit that making your own boards at home doesn’t hold quite the appeal that it did in the past. But even if getting your boards professionally made is cheaper and easier than it ever has been before, at-home production still can’t be beat when you absolutely must have a usable board before the end of the day.

If you find yourself in such a situation, this new method of DIY PCB production detailed by [Adalbert] might be just what you need. This unique approach uses a desktop fused deposition modeling (FDM) 3D printer throughout all of its phases, from creating a stencil based on the exported board design, to warming the UV soldermask to accelerate the curing process. It may not be an ideal choice for densely packed boards with fine-pitch components, but could definitely see it being useful for many prototypes.

Continue reading “A New Way To Produce PCBs With Your 3D Printer”

Custom Raspberry Pi Case Shows The Whole Workflow

If you are a process junkie and love seeing the end-to-end of how a thing is made and with what tools, then watch [Michael Klements] show off his Raspberry Pi case design. His case has quite a few cool-looking elements to it, and incorporates 3D printing as well as laser-cut and clear bent acrylic for a gorgeous three-quarter view.

[Michael]’s write-up (and accompanying video, embedded below) are partly a review of his Creality 3D printer, and partly a showcase of his Raspberry Pi case design (for which he sells the design files for a small fee on his Etsy store.) But the great part is seeing the creation of every piece that goes into the end product. Not everyone is familiar with the way these tools work, or what they can create, so it’s nice to see attention paid to that side of things.

Both the blog post and the video nicely show off what goes into every part. The video opens with unpacking and setting up the 3D printer (skip ahead to 4:58 if you aren’t interested), followed by printing the parts, laser-cutting the acrylic on a K40 laser cutter, bending the acrylic using a small hand tool, and finally, assembling everything. For the curious, there are also links to the exact parts and equipment he uses.

Like we said, it’s part 3D printer review and part showcase of a design he sells, but it’s great to see each of the parts get created, watch the tools get used, and see the results come together in the final product. And should you wish to go in the opposite direction? A one-piece minimalist case for your Raspberry Pi is only a 3D printer away.

Continue reading “Custom Raspberry Pi Case Shows The Whole Workflow”

Complex Movements From Simple Inflatables, Thanks To Physics

Inflatable actuators that change shape based on injected pressure can be strong, but their big limitation is that they always deform in the same way.

The Kresling pattern, which inspired the actuator design.

But by taking structural inspiration from origami, researchers created 3D-printed actuators that show it is possible to get complex movements from actuators fed by only a single source of pressure. How is this done? By making the actuators physically bi-stable, in a way that doesn’t require additional sources of pressure.

The key is a modified design based on the Kresling pattern, with each actuator having a specially-designed section (the colored triangles in the image above) that are designed to pop out under a certain amount of positive pressure, and remain stable after it has done so. This section holds its shape until a certain amount of negative pressure is applied, and the section pops back in.

Whether or not this section is popped out changes the actuator’s shape, therefore changing the way it deforms. This makes a simple actuator bi-stable and capable of different movements, using only a single pressure source. Stack up a bunch of these actuators, and with careful pressure control, complex movements become possible. See it in action in two short videos, embedded just below the page break.

Continue reading “Complex Movements From Simple Inflatables, Thanks To Physics”

Automated Hotend Swapping For Less Wasteful Multicolor Printing

Multicolor printing on FDM machines can be tricky to get working flawlessly, and purging hotends when changing colors can end up wasting a lot of filament and material. To solve this problem for the popular Prusa i3 and Ender 3 printers, [BigBrain3D] developed the Swapper3D, an automated system that swaps the entire hotend when the material is changed, eliminating the need for purging almost entirely. Video after the break.

The Swapper3D works very similarly to the tool-changing systems on CNC machines, and is just as satisfying to watch. A large circular carousel on the side of the machine holds up to 25 hotends, and in practice, a pair of robotic arms pop out the previous hotend, cut the filament, and load up the specified hotend from the carousel. This means you can have a separate hotend for each color or type of filament. Since most existing hotends also integrate the heating element, [BigBrain3D] created a special hotend assembly that can be robotically removed/inserted into the heater block.

The Swapper3D is designed to be used with existing filament changers like the Prusa MMU and the Mosaic Palette. Using these systems involves a lot of purging, to the point where you sometimes end up using more filament during purging than you need for the actual part. On one five-color demo print, the Swapper3D reduced the print time by 45% and the filament used by a massive 86%. It also helps to eliminate problems like stringing and color fading in multicolor prints. With those advantages, it looks like the Swapper3D might be a worthwhile upgrade if you do a lot of multi-color printing, even though it adds quite a bit of complexity to the printer.

For larger, more expensive machines, swapping the entire toolhead is becoming more popular, with even E3D stepping into the fray.

Continue reading “Automated Hotend Swapping For Less Wasteful Multicolor Printing”