Heathkit Tuner Saved From Junk Pile

We miss the old Heathkit. You could build equipment that rivaled or even surpassed commercial devices. The cost was usually reasonable and, even if you could get by with less, the satisfaction of using gear you built yourself was worth a lot. Not to mention the knowledge you’d gain and your confidence in troubleshooting should the need arise. So we were jealous of [RCD66] when he found a Heathkit AJ-43C stereo tuner in the recycle bin.

As you can see in the video below, it needed a lot of love to get back to its former self. The device dates from around 1965, when the kit cost $130. In 1965, that was a lot of money. Back then, that would have bought you about four ounces of gold and would have been a great down payment on a $1,500 VW bug.

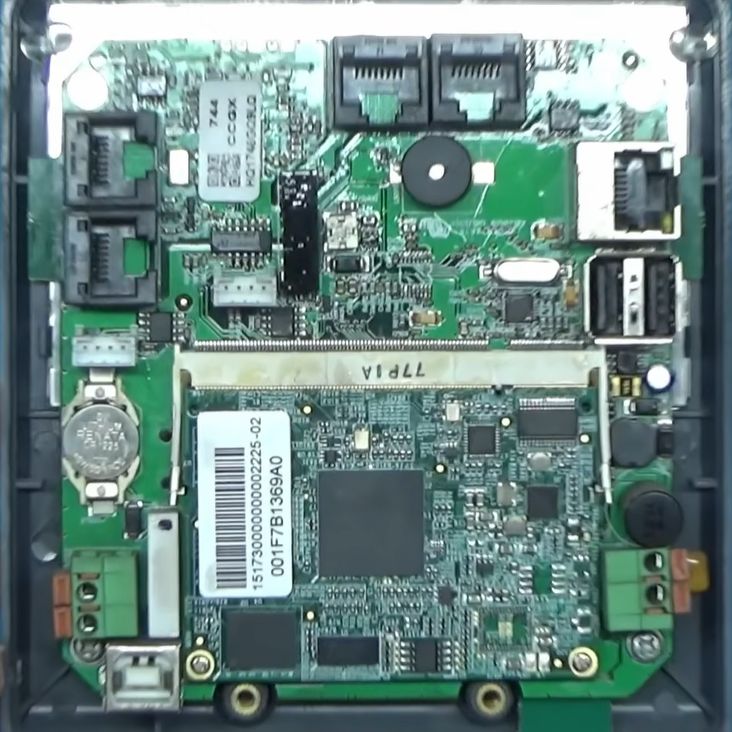
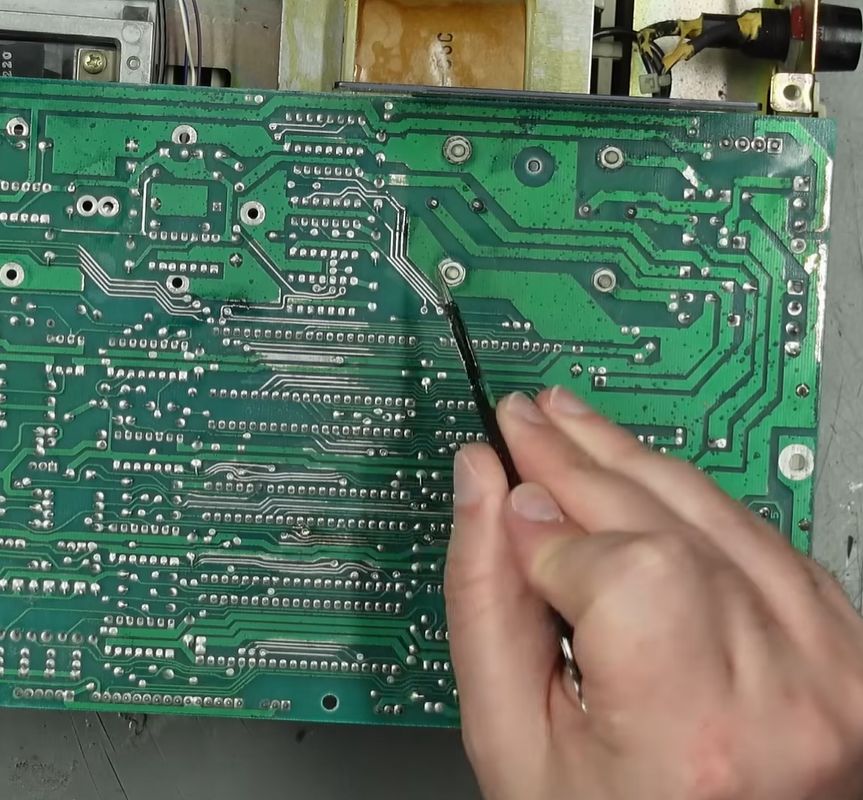
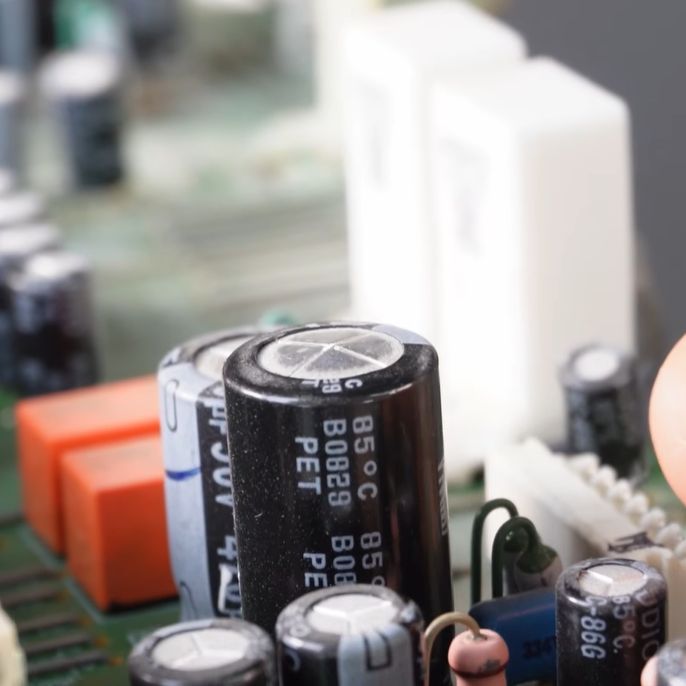
Things were a bit of a mess, so he removed all the parts and replaced most of them. Unsurprisingly, the electrolytic capacitors all tested bad. The transistors were all germanium, but if they tested good, his plan was to reuse them. There were several PCBs inside, and he made some changes, such as replacing the zener diode power supply with something more modern.

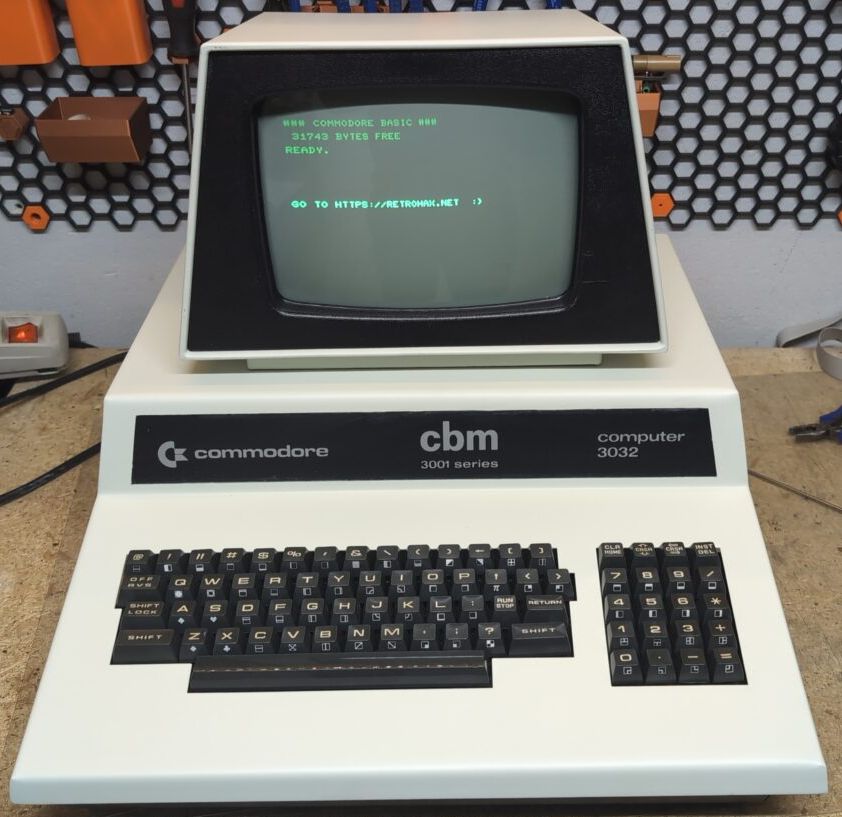
How did it sound? Watch the video and see for yourself. We usually like troubleshooting specific problems on gear like this, but in this case, it was probably smart to just do a total rework.

Heathkit had quite an origin story. This isn’t the first time we’ve seen someone strip and rebuild a Heathkit.

Continue reading “Heathkit Tuner Saved From Junk Pile”

Fixing An E-Waste ASUS P5A-B Socket 7 Mainboard

A fun part of retro computing is saving ‘e-waste’ that was headed for certain destruction. These boards can have any number of defects, modifications and more that have to be remedied prior to using them. In the case of the Asus P5A-B Socket 7 mainboard that [Bits und Bolts] rescued from the scrapheap at least one issue was obvious: someone had ripped off the plastic part of the ZIF socket, leaving only the metal pins poking out like an awkward kind of LGA socket.

In addition to the busted PGA ZIF socket there was additional damage, including a broken SMT capacitor and missing resistor. Interestingly, someone had apparently modded the ATX power connector to permanently power on the system by removing a pin and bridging to the power-on signal. Obviously this mod had to be undone by removing the bridge and installing a new pin. After this cracked solder joints had to be addressed, before the tedious task of removing the stray PGA socket pins one by one started.

Exactly what was done to this mainboard and why will likely forever remain a mystery, but at least there didn’t seem to be any serious damage. After installing a CPU it was possible to boot and access the BIOS as well as run a couple of tools, confirming that one more Socket 7 board has been saved from the scrapper.

Continue reading “Fixing An E-Waste ASUS P5A-B Socket 7 Mainboard”

Resin Injection CRT Cataract Surgery On Macintosh Monitor

Nothing lasts forever, but you’d think the leaded-glass face of a CRT would not be a place you’re likely to see Father Time causing failures. Alas, the particle accelerators we all lovingly stared at were very often not unitary pieces of glass: in case of implosion, safety glass was glued onto the front of the CRT. That glue will inevitably fail, as happened to the 20″ Mac-branded Triniton [Epictronics] had with a PowerPC 6100 that needed a few other repairs.

His version of cataract surgery was the most interesting. Usually cataracts are an issue for much older CRTs than the 90s-era Macintosh display featured here, but this particular display was literally pulled out of the trash and not stored well before that, so that’s probably what accounts for its accelerated aging. Usually what people do with CRT Cataracts is use heat to remove the safety glass and failing adhesive. [Epictronics] has a safer technique, however: inject fresh adhesive into the gap that’s forming around the edge of the display.

With a syringe and UV cure resin, he slowly and laboriously goes around the edge of the display to fill in the bubbles that can be reached. Luckily, the delamination on this CRT doesn’t extend very far beyond the edges, so a standard syringe tip could reach all the problem areas.

It looks good now, but if it doesn’t hold, [Epictronics] points out he can still remove the glass with the traditional hot-air technique. We hope it holds up; this is a nice technique to try if you have a CRT with the early stages of cataract delamination. For future reference, it took about one milliliter of resin to fill each square centimeter of affected area, which implies the cataract gap is quite small indeed.

Having repaired the monitor by about fifteen minutes into the video, [Epictronics] spends the remaining seventeen minutes getting the Mac running with its original CD-ROM drive (that needed recapped) and a DOS compatibility card.

We’ve featured [Epictronics] repairs here before, like when he tore down and rebuilt an IBM Model F keyboard. 

Continue reading “Resin Injection CRT Cataract Surgery On Macintosh Monitor”

User Repair Of A Not User-Repairable Victron CCGX Issue

Power banks come in many sizes, and those that target construction sites are probably among the largest. The massive four ton unit based around lead-acid batteries which the [Buy it Fix it] YouTube channel got handed is a good example. Inside it are Victron CCGX inverters among a lot of other Victron electronics, with the control panel for the system throwing up an error that was deemed to be not user-serviceable. Naturally, this makes for a good challenge.

The exact error as thrown up on the central control panel is error #42, indicating a storage corruption issue on the device. According to the manual this means an issue with the internal flash memory that stores settings, serial numbers and WiFi credentials, requiring it to be shipped back to the manufacturer.

To further diagnose the issue, this Color Control unit was taken out of the power bank and coaxed onto a repair bench. This device has a whole host of Ethernet, CAN and other buses on the back, along with a USB host feature, but using the latter to reflash the firmware made no difference. Fortunately it’s just an embedded Linux system running on the System-on-Module and gaining remote SSH access was a snap due to easy root access.

Interestingly, running a diagnostic on the flash IC showed it to be still in good condition. Instead an ECC issue was logged that caused it to be marked as bad. This seems to have been due to the flash IC requiring 4 bits of ECC per 528 bytes, but the software using only a single bit. After reformatting and clearing the error it seems to have fixed the issue. Apparently it was just a weird configuration error that soft-bricked the device, raising the question of how that happened.

Continue reading “User Repair Of A Not User-Repairable Victron CCGX Issue”

Diagnosing A Mysterious Fault With A Commodore 1541 Disk Drive

Some PCB corrosion on the bottom of the 1541 drive. (Credit: TheRetroChannel, YouTube)

Recently [TheRetroChannel] came across an interesting failure mode on a Commodore 1541 5.25″ floppy disk drive, in the form of the activity LED blinking just once after power-up with the drive motor continuously spinning. Since the Flash Codes that Commodore implemented and bothered to document start at 2 flashes (for RAM-related Zero Page), this raised the question of what fault this drive had, and whether a single flash is some kind of undocumented error code.

A cursory check showed that the heads were okay and not shorted, ruling out a common fault with the used floppy mechanism. Cleaning up the corrosion on IC sockets and similar basic operations were performed next, without making a change, nor did removing the ICs to induce it to produce the documented error codes, but this helped narrow down the potential causes. Especially after swapping in known-good ICs failed to make a difference. One possibility was that the drive was boot looping, as the activity LED is lit up once on boot.

Some probing around with an oscilloscope between the faulty and a working drive seemed to point to a faulty RAM IC, but while probing the faulty drive suddenly initialized successfully. After some more poking around it appeared that the drive was fine after it had a chance to warm up, which just deepened the mystery.

The drive did talk to a C64 with diagnostic cartridge at this point, but would often glitch out. Ultimately it appears that a dodgy IC socket and a few bad traces were to blame for the behavior, making it an ‘obvious in hindsight’ repair. The bottom of the PCB had some clear corrosion on it, but the affected traces were apparently still hanging on for dear life with the drive still initializing once warmed up.

Continue reading “Diagnosing A Mysterious Fault With A Commodore 1541 Disk Drive”

Restoring A Commodore PET 3032 In Rough Condition

The restored PET/CBM 3032. (Credit: Drygol, retrohax.net)

The Commodore CBM 3032 is a successor to the original Commodore PET 2001, yet due a conflicting trademark issue with Philips these first European PETs were called ‘CBM’ instead. Hence the labeling on the CBM 3032 that [Drygol] had in for a restoration, which would have been produced somewhere between 1979 and the cessation of its manufacturing a few years later. This former machine of the University of Szcezecin in Poland had languished in a basement until a local demoscene group came across it and wanted to use it, after a restoration.

Although at first glance from just the front it didn’t look too shabby, problems were apparent from just a walkaround, including rusty and buckled paneling, showing that the time spent in storage had not done it any favors. Internally there was decades worth of dust, along with a dodgy potentiometer, cold joints and some PCB-level bodges that may or may not have been there from the factory.

The main case was disassembled by drilling out the rivets to gain full access to every nook and cranny, allowing for a good cleaning and repainting prior to putting in fresh rivets. On the PCB side of things, a potentiometer and an LM340KC-12 linear regulator in a TO-3 package had to be replaced, after which the system managed to boot reliably once in every three attempts.

Fixing this took basically cleaning all contacts and IC sockets, as well as refurbishing the keyboard, with corrosion and the occasional broken trace causing a lot of grief. Ultimately the system was restored and ready to be put into demoscene service.


Fixing An Onkyo Receiver With Multiple Faults

Modern-day receivers are miracles of digital audio and video processing, but compared to their more analog brethren, they can come with a host of new and fascinating faults. The Onkyo TX-SA806 and SR806 receivers were released back in 2008, with [Tony359] recently getting the latter variant in for repair. Described as having weird digital distortion on the audio outputs, this particular issue got fixed by recapping the PCB with all the digital processing in the first video on this receiver, but this left the second issue unaddressed of a persistent hum, which is the topic of the second video on this repair.

Capacitor C5662 in the Onkyo TX-SR608 receiver with a slight bulge. (Credit: Tony359, YouTube)
Capacitor C5662 in the Onkyo TX-SR608 receiver with a slight bulge.

With the easy fix of recapping of the digital board already tried, next was a deep-dive into the receiver’s schematics to figure out where this low-frequency hum was coming from. With it sounding very much like mains frequency hum bleeding through, this was the starting point. Presumably somewhere on the power rails the normal filtering had broken down, so all rails had to be identified and checked for this interference.

With ripple on the 10V and 12V rails as well as the others seemingly in order, it wasn’t clear where the 100 Hz hum was coming from, but people on the BadCaps forum offered some help. After some back and forth it was deduced that the problem was the +15 VA rail, with heavy ripple on it due to a dead capacitor on the +22 V rail that comes straight from a transformer.

Continue reading “Fixing An Onkyo Receiver With Multiple Faults”