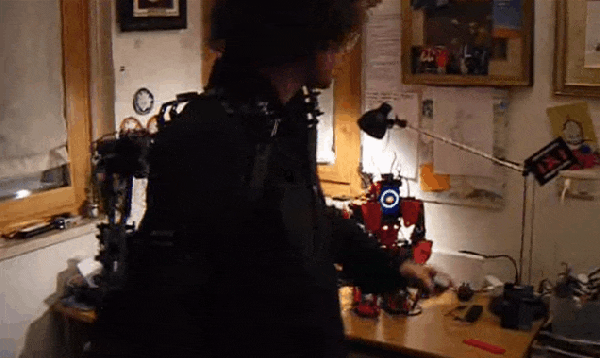
As hilariously outrageous as Pacific Rim was, it was still an awesome concept. Giant robot battle suits, duking it out with the aliens. Well, it looks as if it wasn’t quite as far-fetched as we first imagined. Maker [Danny Benedettelli] just released a video of his very own Lego exoskeleton suit that when worn can be used to control a desktop size Cyclops robot. You might remember [Danny] as the author of The Lego Mindstorms EV3 Library,
The Cyclops robot (also his design) was originally built four years ago using Lego Mindstorms NXT system with an Android phone running a custom app. Cyclops has been upgraded a bit for this demonstration. Now it communicates over Bluetooth with an Arduino to [Danny’s] telemetry suit.
Relatively speaking, the system is pretty simple. The Lego exoskeleton has potentiometers on each joint, which map to a degree of freedom for the robot. When one potentiometer spins, the associated robot joint mimics it. Simple, right?
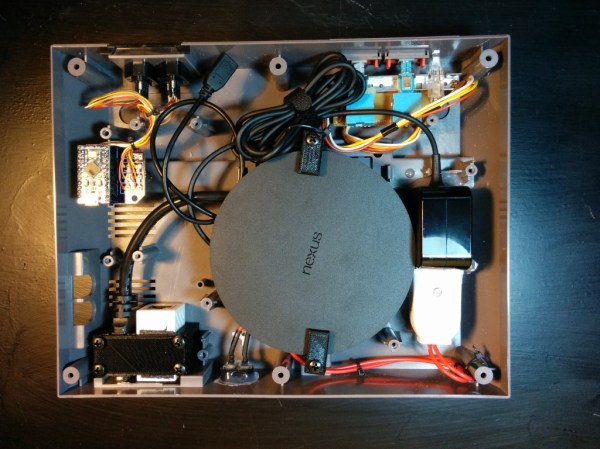
Anyone who has a Raspberry Pi and an old Nintendo has had the same thought. “Maybe I could shove the Pi in here?” This ran through [Adam’s] head, but instead of doing the same old Raspberry Pi build he decided to put a Nexus Player inside of this old video game console, with great success. Not only does it bring the power of a modern media player, it still works as an NES.
If you haven’t seen the Nexus Player yet, it’s Google’s venture into the low-cost home media center craze. It has some of the same features of the original Chromecast, but runs Android and is generally much more powerful. Knowing this, [Adam] realized it would surpass the capabilities of the Pi and would even be able to run NES emulators.
[Adam] went a little beyond a simple case mod. He used a custom PCB and an Arduino Pro Micro to interface the original controllers to the Nexus Player. 3D printed brackets make sure everything fits inside the NES case perfectly, rather than using zip ties and hot glue. He then details how to install all of the peripherals and how to set up the Player to run your favorite game ROMs. The end result is exceptionally professional, and brings to mind some other classic case mods we’ve seen before.
Not everyone can agree on what good music is, but in some cases you’ll find that just about everyone can agree on what is awful. That’s what the people over at Neo-Pangea discovered when they were listening to Internet radio. When one of those terrible songs hits their collective eardrums, the group’s rage increases and they just need to skip the track.
This is how Engineers act if the song is super-awful
Rather than use a web app or simple push button to do the trick, they turned the “skip” button into a NERF target. They call their creation the Boom Box Blaster and made a fantastic demo film video about it which is found after the break.
Inspired by a painting in the office, the target takes the form of a small hot air balloon. The target obviously needed some kind of sensor that can detect when it is hit by a NERF dart. The group tried several different sensor types, but eventually settled on a medium vibration sensor. This sensor is connected to an Arduino, which then communicates with a Raspberry Pi over a Serial connection. The Pi uses a Python script to monitor the Arduino’s vibration sensor. The system also includes some orange LEDs to simulate flames and a servo attached to the string which suspends the balloon from the ceiling. Whenever a hit is registered, the flames light up and the balloon raises into the air to indicate that the shot was on target.
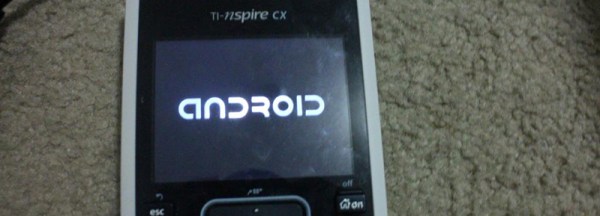
[Josh] is trying to fight a misconception that Android only runs on fast, powerful smartphones. He’s convinced Android will run on extremely low-end hardware, and after a great deal of searching, hit upon a great combination. He’s running Android Donut on a TI nSpire CX graphing calculator.
Unlike just about every other TI calculator, homebrew developers are locked out of the nSpire CX and CX CAS. Without the ability to run native applications on this calculator, [Josh] would be locked out of his platform of choice without the work of the TI calculator community and Ndless, the SDK for this series of calculators.
With the right development environment, [Josh] managed to get the full Android stack up and running and ironed the bugs out. Everything he’s done is available on the GitHub for this project, and with the instructions on the xda developers post, anyone can get a version of Android running on this TI calculator.
While [Josh] has Android Donut running along with most of the 1.6 apps, a terminal emulator, keyboard, WiFi, USB, and Bluetooth running, this calculator-come-Android isn’t as useful as you think it would be. The vast majority of calculator emulators on the Google Play store require Android version 2.2 and up. Yes, [Josh] can still run a TI-83 emulator on his calculator, but finding an app that’s compatible with his version of Android is a challenge.
Still, even with a 150MHz processor and 64MB of RAM – far less than what was found in phones that shipped with Donut – [Josh] is still getting surprisingly good performance out of his calculator. He can play some 2D games on it, and the ability to browse the web with a calculator is interesting, to say the least. It is, however, the perfect example that you don’t need the latest and greatest phone to run Android. Sometimes you don’t even need a phone.
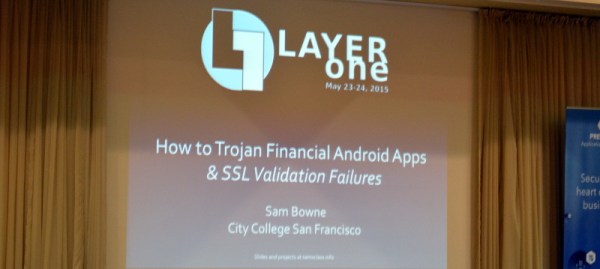
This was both an amusing and frightening talk. [Sam Bowne] presented How to Trojan Financial Android Apps on Saturday afternoon at the LayerOne Conference. [Sam] calculates that 80-90% of the apps provided by major financial institutions like banks and investment companies are vulnerable and the ease with which trojans can be rolled into them is incredible.
Some Background
[Sam] did a great job of concisely describing the circumstances that make Android particularly vulnerable to the attacks which are the subject of the talk. Android programs are packaged as APK files which are easy to unpack. The “compiled” code itself is called smali and is readable in a similar way as Java. It’s super easy to unpack and search this byte code using grep. Once the interesting parts are located, the smali code can be altered and the entire thing can be repackaged. The app will need to be resigned but Google doesn’t control the signing keys so an attacker can simply generate a new key and use that to sign the app. The user still needs to install the file, but Android allows app installation from webpages, email, etc. so this isn’t a problem for the bad guys either.
The Attack
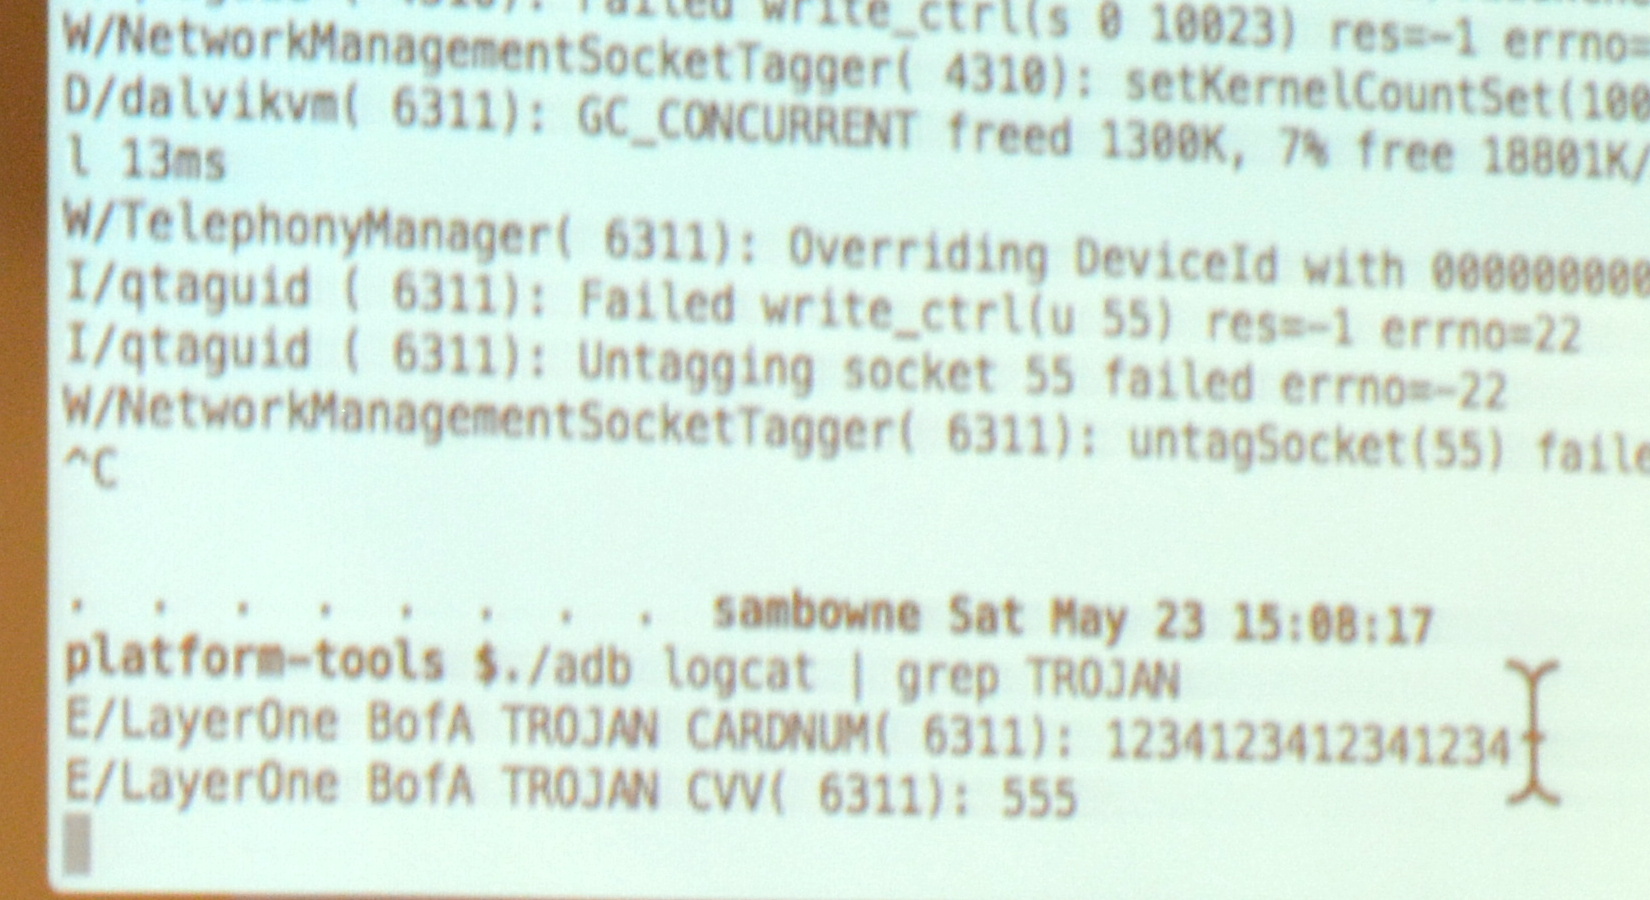
So what can be done? This is about information harvesting. [Sam’s] proof of concept uses a python script to insert logging for every local variable. The script looks at the start of every module in the smali code, grabs the number of local variables, increments it by one and uses this extra variable to write out the values through logcat.
ADB Log shows the Credit Card Number
He demonstrated live on the Bank of America app. From the user side of things it looks exactly like the official app, because it is the official app. However, when you register your account the log reports the card number as you can see here. Obviously this information could easily be phoned-home using a number of techniques.
As mentioned, the vast majority of banking and financial apps are vulnerable to this, but some have made an attempt to make it more difficult. He found the Bancorp app never exposes this information in local variables so it can’t just be logged out. However, the same trojan technique works as a keylogger since he found the same function kept getting called every time a key is pressed. The same was true of the Capital One app, but it echos out Google’s Android keymap values rather than ascii; easy enough to translate back into readable data though.
The Inability to Report Vulnerabilities
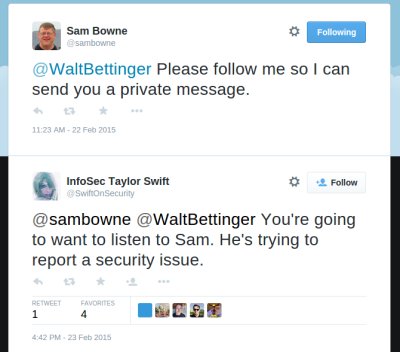
What is the most troubling is that none of these companies have a means of reporting security vulnerabilities. It was amusing to hear [Sam] recount his struggle to report these issues to Charles Schwab. Online contact forms were broken and wouldn’t post data and several publicly posted email addresses bounced email. When he finally got one to accept the email he later discovered another user reporting on a forum that nobody ever answers back on any of the Schwab accounts. He resorted to a trick he has used many times in the past… Tweeting to the CEO of Charles Schwab to start up a direct-message conversation. This itself is a security problem as @SwiftOnSecurity proves by pointing out that whenever @SamBowne Tweets a CEO it’s because he found a vulnerability in that company’s platform and can’t find a reasonable way to contact the company.
There is Hope
Although very rare, sometimes these apps do get patched. The Trade King app was updated after his report and when [Sam] tried the exploit again it crashes at start-up. The log reports a verification failure. This indicates that the injected code is being noticed, but [Sam] wonders if the verification is included in the app itself. If it is, then it will be possible to track it down and disable it.
This may sound like all of us Android users should despair but that’s not the case. Adding verification, even if it’s possible to defeat it, does make the apps safer; attackers may not want to invest the extra time to try to defeat it. Also, there are obsfucators available for a few thousand dollars that will make these attacks much more difficult by making variable names unreadable. The free obsfucator available now with the Android development suites doesn’t change names of everything… local variables are left unaltered and programmers have a habit of using descriptive names for variables. For instance, BofA used “CARDNUM” in the example above.
The Slides
[Sam Bowne’s] slides and testing results for the entire talk are available under the “Upcoming Events” part of his website.
Here’s a tip from a wizened engineer I’ve heard several times. If you’re poking around a circuit that has failed, look at the resistor color codes. Sometimes, if a resistor overheats, the color code bands will change color – orange to brown, blue to black, and so forth. If you know your preferred numbers for resistors, you might find a resistor with a value that isn’t made. This is where the circuit was overheating, and you’re probably very close to discovering the problem.
The problem with this technique is that you have to look at and decode all the resistors. If automation and computer vision is more your thing, [Parth] made an Android app that will automatically tell you the value of a resistor by pointing a camera at it.
The code uses OpenCV to scan a small line of pixels in the middle of the screen. Colors are extracted from this, and the value of the resistor is displayed on the screen. It’s perfect for scanning through a few hundred through hole resistors, if you don’t want to learn the politically correct mnemonic they’re teaching these days.
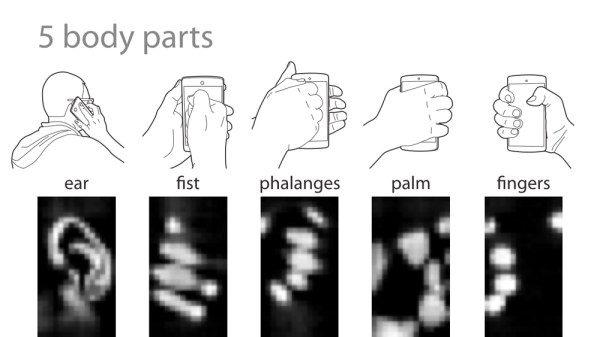
[Christian Holz, Senaka Buthpitiya, and Marius Knaust] are researchers at Yahoo that have created a biometric solution for those unlucky folks that always forget their smartphone PIN codes. Bodyprint is an authentication system that allows a variety of body parts to act as the password. These range from ears to fists.
Bodyprint uses the phone’s touchscreen as an image scanner. In order to do so, the researchers rooted an LG Nexus 5 and modified the touchscreen module. When a user sets up Bodyprint, they hold the desired body part to the touchscreen. A series of images are taken, sorted into various intensity categories. These files are stored in a database that identifies them by body type and associates the user authentication with them. When the user wants to access their phone, they simply hold that body part on the touchscreen, and Bodyprint will do the rest. There is an interesting security option: the two person authentication process. In the example shown in the video below, two users can restrict file access on a phone. Both users must be present to unlock the files on the phone.
How does Bodyprint compare to capacitive fingerprint scanners? These scanners are available on the more expensive phone models, as they require a higher touchscreen resolution and quality sensor. Bodyprint makes do with a much lower resolution of approximately 6dpi while increasing the false rejection rate to help compensate. In a 12 participant study using the ears to authenticate, accuracy was over 99% with a false rejection rate of 1 out of 13.


 What is the most troubling is that