With all the Flappy Bird clones floating around in the ether after the game’s unexpected success, there are some that are better than others. And by better, we mean, hacked together from misc hardware. If you’ve got an Arduino on hand, then you’re half way to making your own:
The “Minimalist” Version
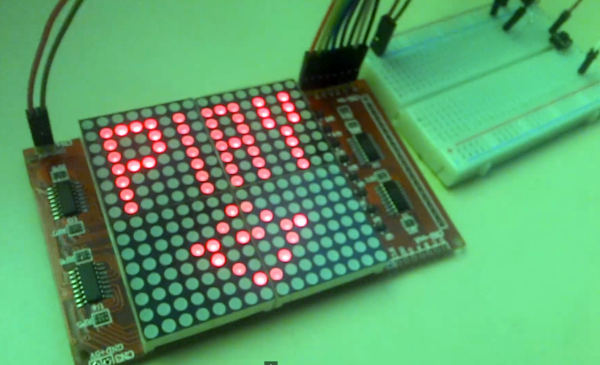
[aron.bordin] created his own Flappy Bird game with a short list of parts some of us likely have lying around on our bench. An Arduino loaded with the appropriate code is wired to a 16×16 LED matrix, which apparently displays the minimal amount of visual information you’d need to play the game. The only other parts required are a single pushbutton and resistor tethered on a breadboard to control your flapping. With the wire hookup laid out by convenient diagrams and the libraries required for the code all found on the same page, this is easily something one could bang out in an afternoon. If afterwards you still find yourself with more time to kill than you can stand to play Flappy Birds, there is always the option of fashioning a humorously-sized cell phone case to squeeze it all into… which we’d like to see.
The “Fancy” Version
If you want more resolution than solid colored LEDs, or you just have a fondness for the terrifying bird abstraction the game is known for, you can switch out the 16×16 matrix for a Nokia LCD screen. [Huy’s] rendition of this build over on Hackaday.io will deliver a “more detailed” graphic for the game, and is still roughly just as easy to assemble. Similarly, an Ardunio is loaded with the smarts required to generate the game, along with a single pushbutton tacked on for control. The code and the daunting (/sarcasm) two steps needed to wire the Arduino to the screen can be found on his project’s page.
If you must kill boredom playing Flappy Bird, there is no excuse not to do so on something you made yourself.
Continue reading “Kill Time Making Flappy Bird, Not Playing It” →