Android Flip Dot Display

Controlling A Flip-Disc Display Using Android

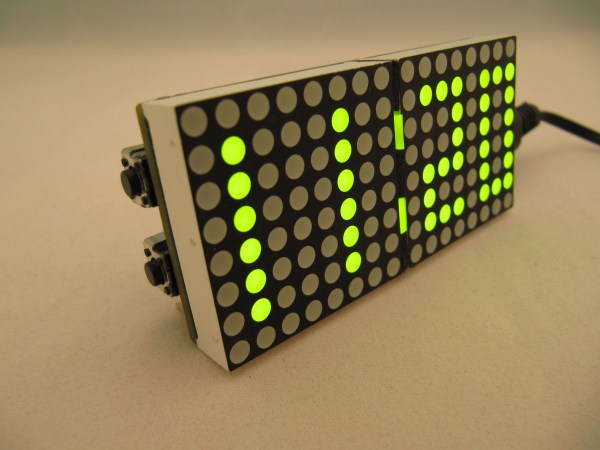
There’s just something about electro-mechanical displays that enthralls most people when they see them; and while you’ll be hard pressed to find a split-flap display for cheap, you can still easily buy flip-disc displays! That’s what [Scott] did, and he’s been having a blast messing around with his and building a system to control it via his Android phone.

He picked up the display from a company called Alfa-Zeta in Poland, a company that’s been making electromagnetic displays since 1988. No mention of price, but it looks like some pretty awesome hardware. The beauty with electromagnetic displays is they don’t consume any electricity in idle state, making them far more efficient than almost any other display technology – not to mention perfect contrast in any lighting conditions!

They work by using permanent magnets, electromagnets, and a material that can retain magnetization. A short pulse to the electromagnet causes the disc to flip into the second position, which will then hold in place due to the permanent magnet — no more electromagnet needed.

The display comes with all the necessary hardware to drive the electromagnets and interface with a microcontroller. But, it uses the RS-485 standard, which isn’t natively supported by most other microcontrollers. [Scott’s] using an Arduino which does have an RS-485 shield, but he decided he wanted to challenge himself and build a circuit to drive them himself!

All the info is on his blog if you’re looking to try something similar. Once he had it interfaced with the Arduino it was just a simple matter of writing an Android app to transmit controls over Bluetooth for the display. Take a look:

Continue reading “Controlling A Flip-Disc Display Using Android”

A Single Pixel, Color Digital Camera

[Ben] has written all sorts of code and algorithms to filter, sort, and convolute images, and also a few gadgets that were meant to be photographed. One project that hasn’t added a notch to his soldering iron was a camera. The easiest way to go about resolving this problem would be to find some cardboard and duct tape and built a pinhole camera. [Ben] wanted a digital camera. Not any digital camera, but a color digital camera, and didn’t want to deal with pixel arrays or lenses. Impossible, you say? Not when you have a bunch of integral transforms in your tool belt.

[Ben] is only using a single light sensor that outputs RGB values for his camera – no lenses are found anywhere. If, however, you scan a scene multiple times with this sensor, each time blocking a portion of the sensor’s field of view, you could reconstruct a rudimentary, low-resolution image from just a single light sensor. If you scan and rotate this ‘blocking arm’ across the sensor’s field of view, reconstructing the image is called a Radon transform, something [Ben] has used a few times in his studies.

camera [Ben]’s camera consists of the Adafruit RGB light sensor, an Arduino, a microSD card, a few servos, and a bunch of printed parts. The servos are used to scan and rotate the ‘blocking arm’ across the sensor for each image. The output of the sensor is saved to the SD card and moved over to the computer for post-processing.

After getting all the pixel data to his laptop, [Ben] plotted the raw data. The first few pictures were of a point source of light – a lamp in his workspace. This resulted in exactly what he expected, a wave-like line on an otherwise blank field. The resulting transformation kinda looked like the reference picture, but for better results, [Ben] turned his camera to more natural scenes. Pointing his single pixel camera out the window resulted in an image that looked like it was taken underwater, through a piece of glass smeared with Vaseline. Still, it worked remarkably well for a single pixel camera. Taking his camera to the great outdoors provided an even better reconstructed scene, due in no small part to the great landscapes [Ben] has access to.

3D Printing Goes Hand In Hand With Iron Man Inspired Prosthetic

It’s exciting how much 3D printing has enabled us to produce pretty much any shape for any purpose on the fly. Among the most thoughtful uses for the technology that we’ve seen are the many functioning and often beautiful prosthetics that not only succeed in restoring the use of a limb, but also deliver an air of style and self-expression to the wearer. The immediate nature of the technology allows for models to be designed and produced rapidly at a low-cost, which works excellently for growing children. [Pat Starace’s] Iron Man inspired 3D printed hand and forearm are a perfect example of such personality and expert engineering… with an added dash of hacker flair.

With over twenty years of experience in animatronics behind him, [Starace] expertly concealed all of the mechanical ligaments within the design of his arm, producing a streamline limb with all the nuance of lifelike gesture. It was important that the piece not only work, but give the wearer that appropriate super hero-like feeling while wearing it. He achieves this with all the bells and whistles hidden within the negative space of the forearm, which give the wearer an armory of tricks up their sleeve. Concealed in the plating, [Starace] uses an Arduino and accelerometer to animate different sets of LEDs as triggered by the hand’s position coupled with specific voice commands. Depending on what angle the wrist is bent at, the fingers will either curl into a fist and reveal hidden ‘lasers’ on the back of the hand, or spread open around a pulsing circle of light on the palm when thrust outward.

The project took [Starace] quite a bit of time to print all the individual parts; around two days worth of time. This however is still considered quick in comparison to the custom outfitting and production of traditional prosthetics… not to mention, the traditional stuff wouldn’t have LEDs. This piece has a noble cause, and is an exciting example of how 3D printing is adding a level of heroism to everyday life.

Thank you Julius for pointing out this awesome project to us!

Continue reading “3D Printing Goes Hand In Hand With Iron Man Inspired Prosthetic”

Gesture Controlled Quadcopter

Controlling A Quadcopter With Gestures

[grassjelly] has been hard at work building a wearable device that uses gestures to control quadcopter motion. The goal of the project is to design a controller that allows the user to intuitively control the motion of a quadcopter. Based on the demonstration video below, we’d say they hit the nail on the head. The controller runs off an Arduino Pro Mini-5v powered by two small coin cell batteries. It contains an accelerometer and an ultrasonic distance sensor.

The controller allows the quadcopter to mimic the orientation of the user’s hand. The user holds their hand out in front of them, parallel to the floor. When the hand is tilted in any direction, the quadcopter copies the motion and will tilt the same way. The amount of pitch and roll is limited by software, likely preventing the user from over-correcting and crashing the machine. The user can also raise or lower their hand to control the altitude of the copter.

[grassjelly] has made all of the code and schematics available via github.

kickstarter notifications

Kickstarter Monitor Will Brighten Your Day

Keeping up with a kickstarter campaign can be quite a task, especially if your project is real (looking at you, Scribble Pen!) and you’re trying to keep up with product fabrication and all the other logistics involved in bringing a product to market. [macetech] are currently in the middle of a campaign themselves and built a loud, bright alert system to notify them of any new kickstarter backers.

The project uses a LED marquee to display the current number of backers, but every time a new backer contributes to the project, a blindingly bright green arrow traffic signal is illuminated and a piezo speaker plays a celebration tune. All of these devices are controlled by an Arduino Yun which, with its built-in Atheros chipset, easily connects to the network and monitors the kickstarter page for changes.

[macetech] used some interesting hardware to get everything to work together. They used a USB-to-RS232 cable with and FTDI chip to drive the LED marquee and a PowerSwitchTail 2 from Adafruit to drive the power-hungry traffic signal. Everything was put together in a presentable way for their workshop and works great! All of the source code is available on their project page, and you can check out their RGB LED Shades kickstarter campaign too.

Goldilocks Climate Box Keeps Lager Fermentation Environment Just Right

September was warmish in many places around the world including [Ole]’s native Denmark. But that did not stop him from brewing lager flavored with plums from his own garden, and neither did his indifference to lagers in general.

Lager fermentation requires a consistent, low temperature. While many homebrewers might modify an electric refrigerator, [Ole] wasn’t interested in the cost of running a second one just for brewing beer. Instead, he built a climate box to work with the cool temperature in his garage. Starting with scrap wood from other projects, he lined the walls with polystyrene and put a layer of wood on the floor to help support the fermentation bucket.

Maintaining a consistent temperature in the box called for both heating and cooling. He pulled the Peltier from a 12V cooler meant to run off a car’s cigarette lighter, and used a spare ceramic heater that was lying around in case his primary reptile warmer went on the fritz.

An Arduino and a custom shield drive separate PID controllers for the Peltier and the heater. The shield has a temperature probe, and he extended the USB outside the climate box so the PIDs can be adjusted without disturbing the inside temperature. The schematic, board file, and code are all available in a zip you can get from his post.

The Peltier couldn’t quite compensate for the overly warm weather and the heat caused by the fermentation, but it was stable enough to produce a nice, plum-flavored lager he has dubbed Lektor Blom­mes malt­bol­che, which is a triple Danish pun he explains in the write-up.

Margarita Drip Infuser!

Margarita Drip Infuser Ensures A Perfect Mix

In order to get a margarita just right, the various ingredients need to be mixed together quite vigorously to over-come the different viscosity of the fluids. Looking to create his own barbot of sorts, [TVMiller] decided to make a Margarita Drip Infuser to help make margaritas a bit easier.

Using various chem lab supplies, [TVMiller] has cobbled together something pretty awesome. The Infuser can take up to 8 different ingredients into its test tube reserves, and after the drink ingredients are programmed on the computer, the magic begins.

An Arduino Uno controls a bank of 8 relays which control small fluid solenoids, with each control pulse releasing just a single droplet of fluid. An LED for each valve is run in parallel adding a bit of a light show to the mixing experience. If that’s not enough, he’s also created a copper cooling coil to chill the drink as it is poured.

Continue reading “Margarita Drip Infuser Ensures A Perfect Mix”