RGB Bike Rim Lights

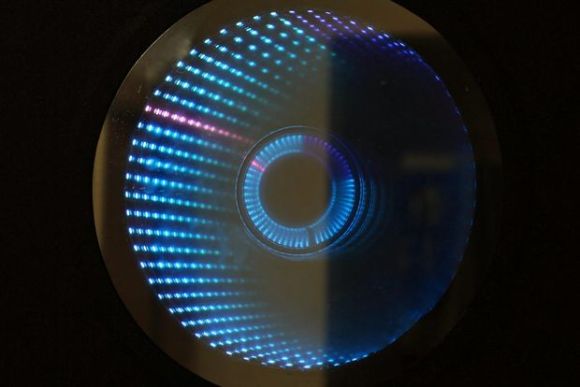
[Yvo] sent us his latest creation, this awesome POV RGB bicycle rim light build, which features a circular interweaving of common RGB LEDs that face outward along the rim as they display constantly changing animations based on the wheel’s rpm.

Like many POV wheel builds, [Yvo]’s takes advantage of a hall effect sensor and stationary magnet to determine how fast the wheels are spinning. Unlike most POV builds, however, [Yvo’s] creation doesn’t have just one or two RGB sticks clamped onto a spoke. Instead, his wheels boast several individual RGB LED modules mounted along the rim.

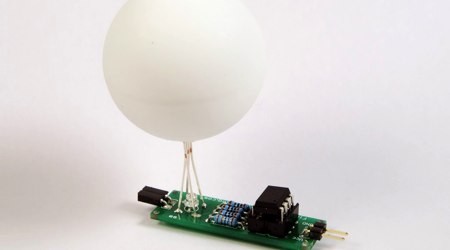
Each wheel has six modules, and each module contains a scratch-build LED controller (a daisy chain of 74HC595 shift registers) that fits into a custom-made 3D-printed enclosure. The enclosures mounts onto some aluminum strips along with the RGB LEDs, and the aluminum strips mount to the wheels by straddling the rim.

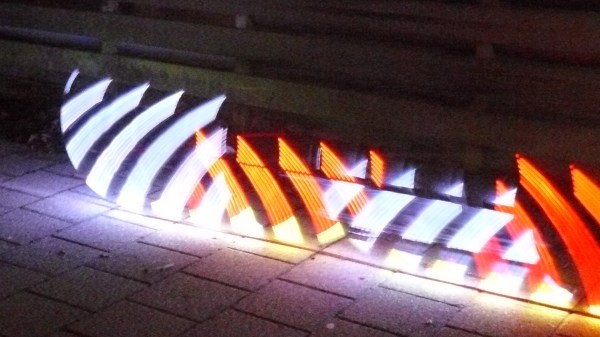
At speed, the lights go into POV mode to simulate headlights / brakes with white in the front and red in the back. Check out the difference these custom circular modules make when riding and when at rest in a video below.

Continue reading “RGB Bike Rim Lights”

IcosaLEDron: A 20-Sided Light Up Ball

Tired of balls that are just balls, and not glowing geometric constructions of electronics and wonderment? Get yourself an IcosaLEDron, the latest in Platonic solids loaded up with RGB LEDs.

The folks at Afrit Labs wanted a fun, glowy device that would show off the capabilities of IMUs and MEMS accelerometers. They came up with a ball with a circuit board inside and twenty WS2812B RGB LEDs studded around its circumference

The frame of the ball is simply a set of twenty tessellated triangles that can be folded up during assembly. The outer shell of the ball is again printed in one piece, but fabricated out of transparent NinjaFlex, an extraordinarily odd, squishy, and likely indestructible material.

Inside the IcosaLEDron is a PCB loaded up with an ATMega328p, an accelerometer, a LiPo battery charger, and quite a bit of wiring. Once the ball is assembled and locked down, the squishy outer exterior is installed and turned into a throwable plaything.

If 20 sides and 20 LEDs aren’t enough, how about a an astonishing 386-LED ball that’s animated and knows its orientation? That’s a project from Null Space Labs, and looking at it in person is hypnotic.

via Makezine

Infinity Mirror Clock: There’s A Time Joke There Somewhere

Infinity Mirror Clock

We don’t think we’ve seen an Infinity Mirror Clock before, but we love this new twist on an old favorite. Different colors distinguish between seconds, minutes and hours, and an additional IR sensor detects when someone is directly in front of the clock and switches the LEDs off, allowing it to be used as a normal mirror. This build is the work of [Dushyant Ahuja], who is no stranger to hacking together clocks out of LEDs. You can tell how much progress he’s made with the mirror clock by taking a glance at his first project, which is an impressive creation held together by jumbles of wire and some glue.

[Dushyant] has stepped up his game for his new clock, attaching an LED strip along the inside of a circular frame to fashion the infinity mirror effect. The lights receive a signal from an attached homemade Arduino board, which is also connected to a real-time clock (RTC) module to keep time and to a Bluetooth module, which allows [Dushyant] to program the clock wirelessly rather than having to drag out some cords if the clock ever needs an adjustment.

Stick around after the jump for a quick demonstration video. The lights are dazzling to watch; [Dushyant] inserted a stainless steel plate at the center of the circle to reflect the outer rim of LEDs. After a quick rainbow effect, it looks like the mirror enters clock mode. See if you can figure out what time it is. For a more step-by-step overview of this project, swing by his Instructables page.

Continue reading “Infinity Mirror Clock: There’s A Time Joke There Somewhere”

Colorize Your Election Party

blue_red
[Eric] has put together a simple python script to scrape election results from CNN.com. It uses urllib2 to return the popular and electoral votes for each party and throws an ElectionWon exception when CNN calls the race. He’s planning on hooking this to DMX controlled RGB LED lighting that will shift to either blue or red as the night progresses. It’s a great starting point if you want to pull off something similar.

You may remember [Eric] for building the IKEA MAME table and the TRS-80 wireless terminal.

[photo: skenmy]

UPDATE: [Garrett] of macetech is putting the finishing touches on his version which uses 32 ShiftBrite modules and 2 4-digit displays controlled by a CuBLOC.

LED Coffee Table

Spark Fun’s centerpiece at Maker Faire back in May was this LED coffee table. They just recently posted about how it was constructed. The surface is made from 64 8×8 RGB LED matrix boards totaling 4096 LEDs. The eight rows are connected to a custom router board so that one SPI line can control the entire display. The main microcontroller is an Olimex LPC2106 dev board. It runs a four player cooperative pong game where multiple balls are added over time. Each player gets a classic Atari paddle for control. You can see a video of the table running a screensaver after the break. Continue reading “LED Coffee Table”

RGB Monome Clone


[Julien Bayle] has posted this great breakdown of building an RGB monome clone. He is a musical performer using Ableton Live. He wanted to do away with the need for a computer screen and found that the monome would have been perfect had it been RGB. So he decided to build his own.

The parts list for the entire project is as follows:

  • 1x Arduino board
  • 4x Sparkfun breakout PCB
  • 4x Sparkfun buttons pads (like our door lock)
  • 4x Sparkfun buttons bezel
  • 64x RGB LEDs common cathode
  • 64x Diodes Small Signal (1N4148)
  • 1x MAX7221 (LED Driver)
  • 1x 74HC164 (8-Bit Serial-In, Parallel-Out Shift Register)
  • 1x 74HC165 (8-Bit Parallel-In, Serial-Out Shift Register)

He also has files for the schematics and source code as well as information on how to assemble and test it.

The RGB aspect is still under development. He is using the LEDMatrix-Serial Interface-RGB from Sparkfun Electronics to run it. It is expensive, but is exactly what he was looking for.

There aren’t very many pictures of the project, and none of the working RGB unit. He makes up for it in sheer information. Many parts have links to manufacturers or support forums. Hopefully he’ll post some pictures and video of the final product soon.

Synchronizing Fireflies NG


[Alex] from Tinkerlog has revisited an old project with Synchronizing Fireflies NG. Fascinated by how fireflies blink at same rate and synchronize with each other, he built a digital version. Each board has an RGB LED and a phototransistor or photoresistor. A ping-pong ball is used as a diffuser. The blink rate is controlled by an ATtiny13v. The board power can be daisy chained, but each firefly mote operates independently of the others. The microcontroller has a fixed flash rate and monitors for other flashes. It attempts to sync by flashing earlier. The color of the LED expresses how satisfied the firefly is with its current sync. You can see a video of eight fireflies attempting to self organize embedded below.

Continue reading “Synchronizing Fireflies NG”