Arduino Aquarium Lights

[Kalle Hyvönen] just finished building his own aquarium lights. He used four powerful soft-white LEDs, mounting them on a pair of heat sinks to keep things cool. Now he could have just connected them to the power supply and plugged it into the wall, but instead he included is own controller. An Arduino drives the switch-mode power supply, offering dimming thanks to PWM, and the ability to automatically switch the light on and off using an RTC chip with a battery backup. The sketch includes the ability to alter the lighting schedule and other variables by sending serial commands through a USB connection. This protocol is detailed with comments in his sketch.

We’ve seen a lot of interesting aquarium light projects. This one that uses heat from the LEDs to warm the water is one of our favorites. Others are full of features like this version that includes a moonlight mode. But Arduino enthusiasts don’t have to look far to find offerings like this PAR meter build, or this aquarium light controller library which can be recreated using the ubiquitous controller board.

Re-live 1978 In All Its Glory With The [Roth] Scream Box

roth-scream-box

We never imagined that [David Lee Roth] would mesh well with an Arduino, that is until Flickr user [tgtsfkncld] showed off his [Roth] Scream Box a few days ago.

The unassuming box resembles sort of a nondescript “Easy Button”, but its payload is far more entertaining than whatever Staples could have possibly recorded for their device. Once the Scream Box is powered on, each press of the button rewards the user with a short sound clip of [Roth] singing the lyrics from [Van Halen’s] “Runnin’ With the Devil”.

[tgtsfkncld] took snippets of the isolated vocal track from the song, playing them back using an Arduino along with an Adafruit Wave Shield. The circuitry behind the device is not overly complicated, though the final result is great. With the wide array of isolated vocals floating around online, it would be very easy to create one for your favorite band/singer as well.

Continue reading to see the [Roth] Scream Box in action.

[via Adafruit Blog]

Continue reading “Re-live 1978 In All Its Glory With The [Roth] Scream Box”

SMDuino Helps Arduino Fit Into Tight Places

[Adam] was tired of plopping the same components over and over into his Arduino-based designs. He spent part of his weekend laying out a small board that would host everything he needed and could be built as a single component for all future projects. Above you can see the project he calls SMDuino, an Arduino clone that can be used as a surface mount part.

The contacts on four sides of the board break out the pins. They’ve been designed with 0.1″ pitch which means they will work with standard pin headers. But since they’re plated through from top to bottom they are easy to solder to surface mount pads as well. The project is open source, so you can order your own boards (he used DorkBot PDX) or email him if you want to get in on a pre-order. That is for unpopulated PCBs only. But there’s few components used here so it’s pretty inexpensive to throw together. You’ll need four caps, four resistors, a crystal, an LED, the ATmega*8 of your choice (an ATmega328 is used here), and a low dropout regulator. Of course it is possible to go without the crystal oscillator.

Does this remind anyone else of the Basic Stamp 2?

Remove Your Arduino’s External Oscillator To Gain A Free Pair Of IO Pins

2free-arduino-io-pins

[Mark] from SpikenzieLabs was wrapping up a project using an Arduino the other day and found himself in need of a few more I/O pins. He could have added extra circuitry to the project, but he decided to see if he could gain a few pins by removing a few components instead.

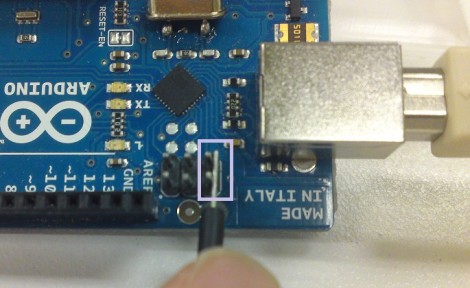
He put together one of his Minuino boards, but rather than installing the crystal and its associated capacitors, he added a couple of pin headers in their place. It’s well known that the internal clock on the chip is not as precise as a crystal, but [Mark’s] project was not that time sensitive, so he had no problem sacrificing the oscillator for a few extra pins.

With his new I/O pins in place, he merely needed to tell the ATmega chip which clock it should be using, and he was well on his way. While this might not be the best solution for all projects out there, if you are building something that values pincount over precision, this hack is for you.

Check out the video below to see [Mark’s] hack in action.

[via HackedGadgets]

Continue reading “Remove Your Arduino’s External Oscillator To Gain A Free Pair Of IO Pins”

Ancient Laptop Given New Life As Mobile Prototyping Platform

What can you do with a broken Compaq SLT 286? Its briefcase-like size and shape actually make for a pretty interesting portable electronic prototyping station. [Philip] gutted the components and started adding back the items he most commonly uses when developing a project.

He shares all of the details in the video after the break. At center stage is a double breadboard where the keyboard would normally be found. It’s hard to make out in the image above, but there is a set of terminal strips running vertically to either side of these breadboards. Each terminal is connected to a peripheral or power/ground bus. The black knob to the left lets him adjust the output of a variable voltage regulator. To the lower right there’s a rotary encoder, push button, toggle switch, and a couple of potentiometers. These, along with the keypad and character display (mounted where the screen used to be) and DB connectors (on the back of the case) have their pins mapped to the terminal block to the right. [Philip] has mounted an Arduino Uno over the area to the bottom left, but we’re sure that it’s pretty easy to swap out for just about any breakout board he needs.

To answer [Philip’s] running dialog from the video: no, it is not the worst demo ever. We think you did a great job demonstrating all the features. Loose connections are par for the course when it comes to prototypes.

Continue reading “Ancient Laptop Given New Life As Mobile Prototyping Platform”

Arduino Shield Includes Everything But The Kitchen Sink

arduino-3g-shield

The crew at Cooking Hacks in Zaragoza wrote in to share a new shield they developed for the Arduino platform. There are a hundred different shields out there that do this and that, but we think their 3G/GPRS shield looks pretty slick.

The base shield contains a WCDMA and HSPA compatible 3G modem as well as a GPS receiver. The modem can be used with an Arduino, or plugged directly into a computer via USB, allowing it to be used any way you like it. The more advanced kit offered by the Cooking Hacks crew features a VGA video camera, as well as an audio kit that can both play and record audio.

One neat feature they were quick to point out is that not all network communications need to be handled by the Arduino. Simple transactions (HTTP/FTP/POP3/SMTP) can all be carried out by sending standard AT commands to the modem.

Now, the kits don’t come cheap, but we can’t help but be interested in seeing what applications people dream up with this shield at the helm. Cooking Hacks is a division of Libelium Communcations, but as they are the company’s “Open Hardware Division” there are schematics available should you be interested in rolling your own 3G modem instead.

Birdwatching Meets A Computer-Controlled Water Cannon, Awesomeness Ensues

squirrel turret

Sure, squirrels may bother the average home owner, but few have attempted as creative a way to control them as this automated water turret. Check out the video after the break to see how this was accomplished, but if you’d rather just see how the squirrels reacted to getting squirted, fast forward to around 16:00. According to [Kurt] he was sure this would be his solution, however, his conclusion was that “squirrels don’t care.”

As for the presentation, it’s more about how to use [OpenCV], or Open Source Computer Vision. It’s quite a powerful piece of software, especially considering that something like this would cost thousands of dollars in a normal market.  An Arduino is used to interface the computer’s outputs to the real world and control a squirt gun. If you’d rather not program something like this yourself, you could always simply use a garden hose as someone suggests just after the video. Continue reading “Birdwatching Meets A Computer-Controlled Water Cannon, Awesomeness Ensues”