World’s Cheapest And Possibly Worst IR Camera

Don’t blame us for the title. [CCrome] admits it may well be the cheapest and worst IR camera available. The concept is surprisingly simple. Mount a cheap Harbor Freight non-contact thermometer on a 3D printer carriage and use it to scan the target. The design files are available on GitHub.

There is, of course, an Arduino to grab the data and send it to the PC. Some Python code takes care of converting it into an image.

Perhaps you don’t need a camera, but having a way to communicate with an $11 IR temperature sensor might come in handy someday. You do have to mash the measurement button down, so [CCrome] used the 3D printer to make a clamp for the button that also holds the POGO pins to the PCB. We would have been tempted to solder across the switch and also solder the wires to the pad. But, then again, you need a 3D printer for the project anyway.

Don’t expect the results you would get from a real thermal sensor. If you want that, you may have to build it yourself or open your wallet wide. If you need some inspiration for a use case, look at the thermal camera contest from a few years back.

Using Arduinos To Drive Undocumented Displays

For those of us old enough to remember the VCR (and the difficulty of programming one), the ubiquitous vacuum fluorescent display, or VFD, is burned into our memories, mostly because of their brightness and contrast when compared to the superficially-similar LCD. These displays are incredibly common even apart from VCRs, though, and it’s easy to find them for next to no cost, but figuring out how to drive one if you just pulled it out of a 30-year-old VCR is going to take some effort. In this build, [mircemk] shows us how he drives unknown VFD displays using an Arduino in order to build his own weather forecasting station.

For this demonstration [mircemk] decided to turn a VFD into a weather forecasting station. First of all, though, he had to get the VFD up and running. For this unit, which came from a point-of-sale (POS) terminal, simply connecting power to the device turned on a demo mode for the display which let him know some information about it. From there, and with the knowledge that most POS terminals use RS232 to communicate, he was able to zero in on the Rx and Tx pins on the on-board microcontroller and interface them with an Arduino. From there it’s a short step to being able to output whatever he wanted to this display.

For this project, [mircemk] wanted the display to output information about weather, but rather than simply pull data from some weather API he is actually using a sensor suite connected to the Arduino to measure things like barometric pressure in order to make a 12-hour forecast. The design is inspired by old Zambretti weather forecasters which used analog wheels to input local weather data. It’s an interesting build not only for the VFD implementation but also for attempting to forecast the weather directly with just a tiny sensor set instead of downloading a forecast to display. To do any better with your own forecasts, you’d likely need your own weather station.

Continue reading “Using Arduinos To Drive Undocumented Displays”

A 3D-printed mini laser engraver made from DVD-RW drive motors.

Mini Laser Engraver Could Carve Out A Place On Your Desk

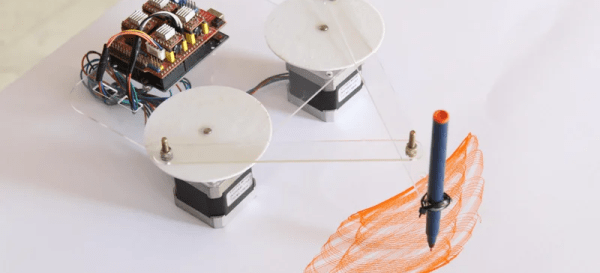
Got a couple of old DVD-RW drives lying around, just collecting dust? Of course you do. If not, you likely know where to find a pair so you can build this totally adorable and fully dangerous laser engraver for your desk. Check out the complete build video after the break.

[Smart Tronix] doesn’t just tell you to salvage the stepper motors out of the drives — they show you how it’s done and even take the time to explain in writing what stepper motors are and why you would want to use them in this project, which is a remix of [maggie_shah]’s design over on Thingiverse. As you might expect, the two steppers are wired up to an Arduino Uno through a CNC shield with a pair of A4988 motor drivers. These form the two axes of movement — the 250mW laser is attached to x, and the platform moves back and forth on the y axis. We’d love to have one of these to mess around with. Nothing that fits on that platform would be safe! Just don’t forget the proper laser blocking safety glasses!

Need something much bigger that won’t take up a lot of space? Roll up your sleeves and build a SCARA arm to hold your laser.

Continue reading “Mini Laser Engraver Could Carve Out A Place On Your Desk”

Giant working NERF gun runs on Arduino.

Giant Working NERF Gun Runs On Tiny Arduino

Well, here it is: a shoe-in for the new world’s largest NERF gun. (Video, embedded below.) The Guinness people haven’t shown up yet to award [Michael Pick], but at 12.5 feet, this baby is over twice as long as the current record holder, which belongs to former NASA mechanical engineer Mark Rober and his now-puny six-foot six-shooter.

We have to wonder if it is technically bigger than the six-shooter, because they seem to be roughly the same scale, except that [Michael] chose a much bigger model to start from. The main body is made from wood, and there are a ton of 3D-printed details that make it look fantastically accurate. The whole thing weighs over 200 pounds and takes at least two people to move it around. We especially love the DIY darts that [Michael] came up with, which are made from a PVC tube inside a section of pool noodle, topped off with a 3D printed piece for that distinctive orange cap.

Propelling those darts at around 50 MPH is a 3,000 PSI air tank connected to an Arduino Pro Mini that controls the trigger and the air valves. While [Michael] hasn’t run the thing quite that high, it does plenty of damage in the neighborhood of 40-80 PSI. As you’ll see in the video after the break, this is quite the ranged weapon. Watch it blow a hole clean through a sheet of drywall and much more.

Want to build something with a bit more stealth? Make it death from above with a NERF quadcopter.

Continue reading “Giant Working NERF Gun Runs On Tiny Arduino”

Elderly Remote Keeps Things Simple

If you are lucky, you’ve never experienced the heartbreak of watching a loved one lose their ability to do simple tasks. However, as hackers, we have the ability to customize solutions to make everyday tasks more accessible. That’s what [omerrv] did by creating a very specific function remote control. The idea is to provide an easy-to-use interface for the most common remote functions.

This is one of those projects where the technology puzzle is now pretty easy to solve: IR remotes are well-understood and there are plenty of libraries for recording and playing back signals. The real work is to understand the user’s challenges and come up with a workable compromise between something useful and something too complex for the user to deal with.

Continue reading “Elderly Remote Keeps Things Simple”

Modern Tube Tester Uses Arduino

There was a time when people like us might own a tube tester and even if you didn’t, you probably knew which drug store had a tube testing machine you could use for free. We aren’t sure that’s a testament to capitalistic ingenuity or an inditement of tube reliability — maybe both. As [Usagi] has been working on some tube-based projects, he decided he needed a tester so he built one. You can see the results in the video, below.

The tester only uses 24V, but for the projects he’s building, that’s close to the operation in the real circuits. He does have a traditional tube tester, but it uses 100s of volts which is a different operating regime.

Continue reading “Modern Tube Tester Uses Arduino”

Upcycling A VFD

A lot of electronics wind up in landfills, and when [Playful Electronics] saw an old cash register heading for the dump, he decided to give its VFD display a new life as an Arduino peripheral. While you might not find the exact same parts, it is still fun to watch him work through the process, and you might find some tips for doing your own upcycle project next time you see some old tech heading out to pasture.

The project was relatively straightforward since data for the display was available. It is meant to connect via RS232 with a point of sale printer, so working with it is pretty straightforward.

Continue reading “Upcycling A VFD”