Ambilight Clone Built From Arduino And ShiftBrite Modules

[Don] put together a guide that will help you build your own Ambilight Clone for about $40 plus the cost of an Arduino. He’s using it with the HTPC seen above, and utilized modular concepts in building it so that you can easily disconnect your Arduino board when you want to use it for prototyping.

For RGB light sources [Don] grabbed six ShiftBrite modules. These are fully addressable cascading modules which make for very easy hardware setup. Instead of buying a driver shield he built his own using an LM317, heat sink, and wall wart to source enough current to drive all of the modules.

We really enjoy the mounting scheme used. Each module is attached to a piece of acrylic which is then mounted using the standard threaded VESA mounting holes on the back of the monitor. As with other Ambilight clones this one uses the Boblight package to get color information from the video as it plays.

Arduino Boards Control Cheap Clockworks Via Coil Injection

Here’s a couple of clocks that use Arduino boards to control inexpensive clockworks. The concept is quite simple, and perhaps best outlined by [Matt Mets’] article on the subject. As it turns out, these clockworks are driven by a coil, forming a device that is quite similar to a stepper motor. If you solder a wire onto each end of the electromagnetic coil and hook those to a microcontroller, you can alter the speed at which the clock ticks. Just drive one pin high and the other low, then reverse the polarity for the next tick.

The clock you see on the right (translated) is a store-bought cheapy. The Arduino barely visible at the bottom of the image is sending pulses once every second. But as you can see in the video after the break, holding down a button will fast-forward through time. [Sodanam] posted his code as well as pictures of the hardware hack itself.

To the left is a horse of a different color. It’s a clock modeled after the Weasley household clock from the Harry Potter books. The clockwork trick is the same, but the Arduino uses GPS data and NOAA weather information to set the status.

Continue reading “Arduino Boards Control Cheap Clockworks Via Coil Injection”

Toilet Paper Printer Made From Scrap Parts

toilet_paper_printer

Some of our favorite hacks are those made with scrap materials, so we were delighted to see a contest being held by the German technology magazine c’t which focuses on using salvaged components. “Mach flott den Schrott” is the name of the competition, which loosely translates to “Make fast the scrap”.

German builder [Mario Lukas’] entry into the contest (Google Translation) is definitely unique, and certainly fits within the theme. He built a toilet paper printer that uses a bunch of recycled components to write anything he desires on a roll of the soft white stuff. His blog walks through the build details, including a bill of materials for all of the scrap bits he used to put it together. Several CD-ROM drives, printers, and even inline skates donated some components to the printer, while an Arduino controls the entire printing process.

Though [Mario] is using RSS and Twitter feeds as a data source for his toilet-side scribe, we imagine it will only be a matter of time before advertising companies seize upon this sort of technology to create personalized advertisements geared towards a decidedly captive audience.

Continue reading to see a quick video of his toilet paper printer in action.

[via Make]

Continue reading “Toilet Paper Printer Made From Scrap Parts”

Bluetooth Communications For Android Devices Via Processing

[Oscar] shows us how to use a Processing sketch for Android to communicate with Bluetooth devices (translated). It turns out this is easier than you might think. Processing and Android are both closely related to Java, and you can just import the Android libraries that deal with Bluetooth within the Processing sketch. That makes it easy to enable the Bluetooth modem when the sketch is launched, and manages connecting with devices as well as sending and receiving data.

For this example [Oscar] is using an Arduino with a Bluetooth module as a test device. His sketch first shows what devices are available, then connects to the one you select from the list. The 11 lines of Arduino code transmit a value via the serial port, and listens back for a command to toggle the LED on pin 13. [Oscar] takes time in his tutorial to show us how each step of the Processing sketch is assembled, instead of only posting the finished code.

[Thanks Sara]

Voxel Shield Makes Driving LED Cubes Easy

voxel_shield_led_cube

An Arduino can handle running a small LED cube on its own, but if you’re planning on building something big, eventually you are going to run out of pins. For something like an 8x8x8 cube, odds are you will have to turn to shift registers to get the job done. While you could design a breakout board full of shift registers on your own, [Connor] has done the work for you and produced an easy to use Arduino LED cube shield.

He calls his creation the Voxel Shield, and it incorporates 9 SN74LS595N shift registers and an external power plug for all of your LED cube needs. The shield can handle addressing up to 512 LEDs, making it an easy way to drive an 8x8x8 cube or even a 64×8 LED matrix.

It’s a nice clean and compact way to drive a large number of LEDs, so if you have the need, be sure to swing by his site – he has made his schematics and board layout files available to all comers.

[Thanks, Thomas]

Arduino Heart Rate Monitor

[Wolf] had a Polar brand exercise watch that wirelessly monitored a chest strap that sends it heart rate data. It sounds like there’s some way to transfer data from the watch to a computer, but it’s only meant for use with Polar’s website. He wanted to do a little more with the equipment so he ditched the watch and built an Arduino-based heart rate monitor.

He’s still using the chest strap and was happy to find that SparkFun sells an OEM receiver for it. Just add a 32.768 kHz clock crystal and an optional antenna wire and you’re up and running. Once the receiver finds a transmitting chest strap, it will pulse an output pin with each beat of the heart. [Wolf] used the D2 pin of an Arduino Uno to connect to the receiver because this pin corresponds to one of the ATmega’s external interrupts. A rolling average of five inputs are used to help smooth the display data, which is shown on the 2.8″ LCD screen seen above.

Automated Humane Pest Control

rat_trap_2000

[Tobie] seems to have a bit of a rat problem.

While most people would be inclined to simply buy the oversized Victor spring-loaded rat traps and call it a day, [Tobie] is a bit more humane. To help remedy his problem while also ensuring that no rats are harmed in the process, he built the Rat Trap 2000.

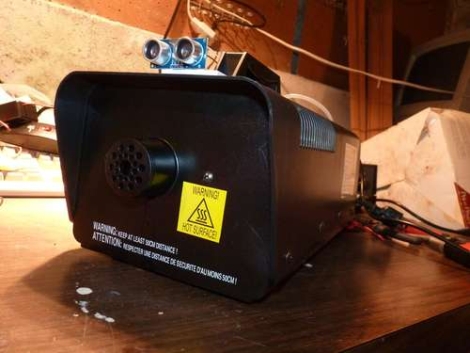
Self-described as completely over the top, the Rat Trap 2000 lures the rodents into its containment area with apples and corn, securing them inside using a servo-actuated trap door. The door is triggered by an Arduino that monitors the holding pen for movement using an IR sensor. All of the action is captured on video using the web cam on his Eee-PC, as you can see in the very short video below.

This certainly isn’t the most cost-efficient way to control your vermin problems, but if you’ve got some spare parts laying around, why not? It’s far more humane than some of the other rodent control solutions we have seen, and it sure beats living with rats!

Continue reading “Automated Humane Pest Control”