The car in question is a Hobbyking Desert Fox RC car – normally a four-wheel drive truck which ships ready-to-run, making it a great way to get a project started quickly. Rocket power is provided by the same type of motor used in the Swedish Rocket Knives we’ve covered previously.
Initial testing proves unsuccessful – the car simply tumbles out of control when the rocket is fired. It takes a beating, losing a wheel in the process. Following on from this, a decision is made to cook up a slower burning rocket motor and switch to an asphalt surface for testing. This is much more succesful and the car begins to see some properly high speeds, nearly peeling the tyres off the rim in the process!
It’s a fun concept that could likely be replicated with off-the-shelf rocket motors, too. Throw us your ideas for better rocket powered transports in the comments below.
The humble car alarm has been around almost as long as the car itself, first being developed by an unknown prisoner in Denver, circa 1913. To the security-conscious motorist, they make a lot of sense. The noise of a car alarm draws attention which is the last thing a would-be thief wants, and the in-built immobilizers generally stop the car being moved at all without a time-consuming workaround. Both are a great deterrent to theft.
It may then surprise you to know that I, dear readers, consider the aftermarket car alarm to be one of the most heinous devices ever fitted to the modern automobile. Combining the unholy trifecta of being poorly designed, cheaply made, and fitted by only the most untalented or uncaring people to wield a soldering iron, they are a blight that I myself refuse to accept.
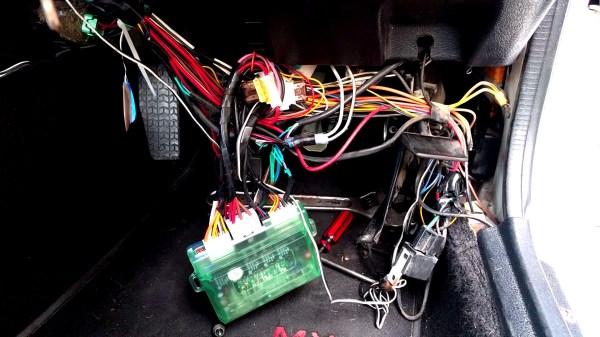
It was my very own Mazda that suffered at the hands of a car alarm system. Two days after purchasing the car, the keyfob died, and thus the car would no longer start. My other car was already out of action due to bent valves, and I needed to get to work, so I figured as a competent hacker, I’d be able to quickly disable it.
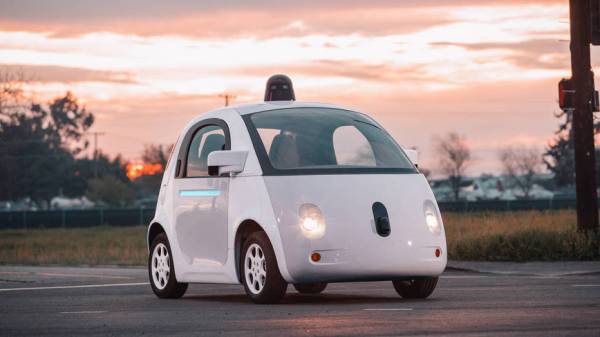
Alphabet’s self-driving car offshoot, Waymo, feels that may be the case as they were recently granted a patent for vehicles that soften on impact. Sensors would identify an impending collision and adjust ‘tension members’ on the vehicle’s exterior to cushion the blow. These ‘members’ would be corrugated sections or moving panels that absorb the impact alongside the crumpling effect of the vehicle, making adjustments based on the type of obstacle the vehicle is about to strike.
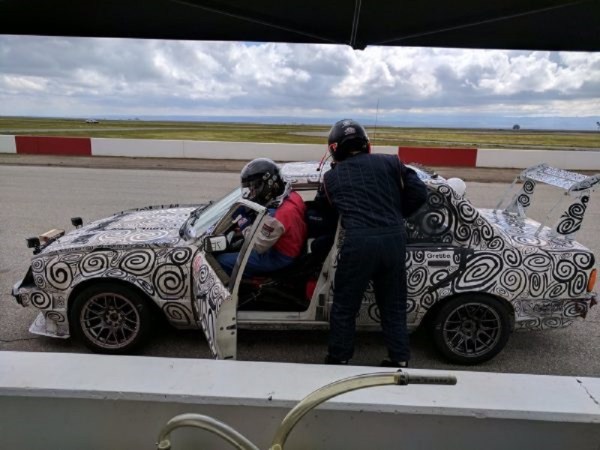
[Big Fish Motorsports] has a vehicle with an adjustable rear spoiler system that broke in the lead up to a big race. The original builder had since gone AWOL so the considerable talents of [Quinn Dunki] were brought to bear in getting it working again.
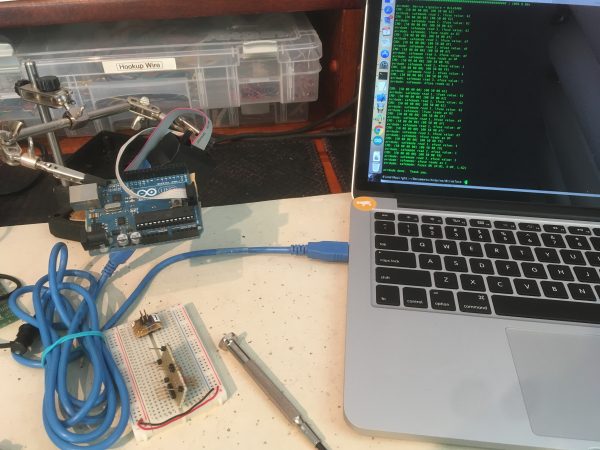
Cracking open the black control box of mystery revealed an Arduino, a ProtoShield and the first major road block: the Arduino remained stubbornly incommunicado despite several different methods of trying to read the source code. Turns out the Arduino’s ATMega324 was configured to be unreadable or simply fried, but an ATMega128 [Quinn] had proved to be a capable replacement. However, without knowing how the ten relays for this spoiler system were configured — and the race day deadline looming ever larger — [Quinn] opted to scrap the original and hack together something of her own design with what she had on hand.
The [BBC] is reporting that driverless semi-trailer trucks or as we call them in the UK driverless Lorries are to be tested on UK roads. A contract has been awarded to the Transport Research Laboratory (TRL) for the trials. Initially the technology will be tested on closed tracks, but these trials are expected to move to major roads by the end of 2018.
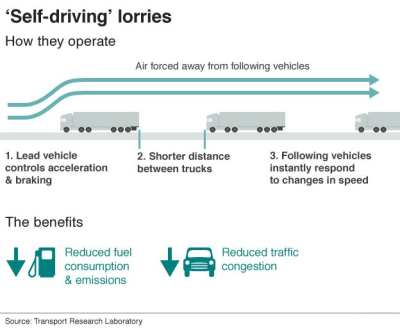
All of these Lorries will be manned and driven in formation of up to three lorries in single file. The lead vehicle will connect to the others wirelessly and control their braking and acceleration. Human drivers will still be present to steer the following lorries in the convoy.
This automation will allow the trucks to drive very close together, reducing drag for the following vehicles to improve fuel efficiency.”Platooning” as they call these convoys has been tested in a number of countries around the world, including the US, Germany, and Japan.
Are these actually autonomous vehicles? This question is folly when looking toward the future of “self-driving”. The transition to robot vehicles will not happen in the blink of an eye, even if the technological barriers were all suddenly solved. That’s because it’s untenable for human drivers to suddenly be on the road with vehicles that don’t have a human brain behind the wheel. These changes will happen incrementally. The lorry tests are akin to networked cruise control. But we can see a path that will add in lane drift warnings, steering correction, and more incremental automation until only the lead vehicle has a person behind the wheel.
There is a lot of interest in the self driving industry right now from the self driving potato to autonomous delivery. We’d love to hear your vision of how automated delivery will sneak its way into our everyday lives. Tell us what you think in the comments below.
The piston engine has been the king of the transportation industry for well over a century now. It has been manufactured so much that it has become a sort of general-purpose machine that can be used to do quite a bit more than merely move people and cargo from one point to another. Running generators, hydraulic systems, pumps, and heavy machinery are but a few examples of that.
Scale production of this technology also had the effect of driving prices for these engines down, and now virtually everyone in the developed world has cheap and easy access to them. In the transportation world, at least, it looks like its reign might finally be coming to a slow, drawn-out conclusion as electric cars capture more and more market share.
Electric motors aren’t the first technology to try to topple the piston engine from its apex position on top of our modern transportation industry, though. In the 1960s another technology, the gas turbine engine, tried to replace it — and failed.
As ever, I am fighting a marginally winning battle against my 1991 Mazda MX-5, and this is the story of how I came to install a wideband oxygen sensor in my Japanese thoroughbred. It came about as part of my ongoing project to build myself a viable racecar, and to figure out why my 1990s Japanese economy car engine runs more like a late 1970s Malaise-era boat anchor.
I’ve always considered myself unlucky. My taste for early 90s metal has meant I’ve never known the loving embrace of OBD-2 diagnostics, and I’ve had to make to do with whatever hokey system was implemented by manufacturers who were just starting to produce reliable fuel injection systems.
Narrowband oxygen sensor voltage output. The output is heavily dependent on sensor temperature and highly non-linear, making these sensors unsuitable for delivering a true AFR reading.
This generally involves putting in a wire jumper somewhere, attaching an LED, and watching it flash out the trouble codes. My Mazda was no exception, and after putting up with a car that was running rich enough to leave soot all over the rear bumper, I had to run the diagnostic.
It turned up three codes – one for the cam angle sensor, and two for the oxygen sensor. Now, a cam angle sensor (CAS) fault will normally prevent the car running at all, so it’s safe to assume that was an intermittent fault to keep an eye on.
The oxygen sensor, however, was clearly in need of attention. Its job is to allow the engine control unit (ECU) to monitor the fuel mixture in the exhaust, and make sure it’s not too rich or too lean. As my car was very obviously running too rich, and the diagnostic codes indicated an oxygen sensor failure, a repair was in order.
I priced up replacement sensors, and a new oxygen sensor could be had for under $100. However, it wasn’t exactly what I wanted, as not all oxygen sensors are created equal. Cars in the 80s and 90s typically shipped from the OEM fitted with what’s called a narrowband oxygen sensor. These almost always consist of a zirconia dioxide cell that outputs a voltage depending on the difference in oxygen concentration between the exhaust gas and the free air. These sensors generally sit at 0.45 V when the fuel mixture is stoichiometric, but rapidly change to 0.1 V in a lean condition and 0.9 V in a rich condition. The response is highly non-linear, and changes greatly with respect to temperature, and thus is only good for telling the ECU if it’s rich or lean, but not by how much. ECUs with narrowband sensors tend to hunt a lot when running in closed loop O2 control – you’ll see an engine at idle hunt either side of the magical 14.7 stoichiometric air fuel ratio, never able to quite dial in on the correct number.
As I intend to switch to an aftermarket ECU in the future, I’ll need to tune the car. This involves making sure the air/fuel ratios (AFRs) are correct, and for that I need to be able to properly measure them. Just knowing whether you’re rich or lean isn’t enough, as often it’s desirable to run the engine intentionally rich or lean at certain engine loads. To get a true AFR reading requires fitting a wideband oxygen sensor. These are a little more complicated.


 will connect to the others wirelessly and control their braking and acceleration. Human drivers will still be present to steer the following lorries in the convoy.