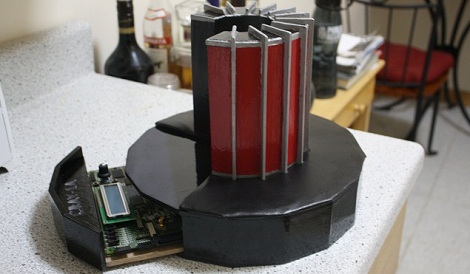
Turning Beer Cans Into Bells With 35kV

It looks like we now have another way to annoy ourselves with extremely high voltage.

The bells operate under the same principles as the electrostatic see-saw we covered last month. A voltage is applied to one can while the other can is grounded. An insulated pendulum is placed between each can, and with a little coaxing can be made to oscillate back and forth between the cans. As the pendulum touches the charged can, it is repelled as it gains the charge and moves to the grounded can. There, the charge is released and the cycle continues again. A homemade Cockcroft Walton multiplier is used to generate the +35kV needed to get the pendulum moving.

[Ben Franklin] invented the Franklin Bells while he was investigating electricity in the 1750s. Originally an extension of the kite & key experiment, the bells were historically used to warn of approaching thunderstorms – when the bells rang, the atmosphere was charged and lightning could strike. Even though the voltage between the bells is huge, very little current is drawn – the Oxford Electric Bells have been ringing since 1840 using the same electrostatic battery.

Displaying Graphics On An Oscilloscope

[Andrew Rossignol] was curious one day and decided that he wanted to display graphics on an oscilloscope after playing around with the X and Y inputs.

[Andrew] started out with a resistor ladder on the DAC of his AVR Butterfly. He was able to to draw a line on the oscilloscope’s screen but bandwidth limitations forced him to reconsider his approach. A friend wrote a Python script to generate C code so the ports of the Butterfly can be toggled. After getting the Butterfly to generate a voltage for every non-white pixel, [Andrew] was impressed with the results so the code was modified determine the brightness of each pixel. The setup managed 10 shades of gray and careful selection of what graphics to post on the build log assured the project a little bit of blog cred.

There are a few ways to display a picture on an oscilloscope, like plugging the Hsync and Vsync into the inputs of a scope. Except for a few music visualizations, we haven’t seen a scope display generated from a microcontroller. Great work [Andrew], but we’d like to mention there’s a grayscale Hack a Day logo from way back when.

Check out a video of [Andrew]’s oscilloscope after the break.

Continue reading “Displaying Graphics On An Oscilloscope”

Gigantic Ball-manipulating Binary Computer

The folks at Evil Mad Scientist Labs just put up a post on the giant mechanical binary computer they brought to last month’s Maker Faire.

As a faithful reproduction of the Digi-Comp II from the 1960s, every operation is powered by balls falling onto levers. Unlike the original, the larger version is powered by billiard balls instead of half-inch marbles. The Digi-Comp II is able to count, add, subtract, multiply, divide, get the 1s or 2s complement and zero all of it’s bits. With a 7-bit accumulator, the Digi-Comp II is able to calculate anything where the result is less than 127, so we wouldn’t recommend doing your taxes on it. In the demo video, it took the Digi-Comp II about two minutes and twenty seconds to multiply 3 by 13. We’re not going to venture a guess on the equivalent seconds per cycle for an electronic calculator, but it’s an impressive build

The Digi-Comp II is a great way to show the process of binary arithmetic in a computer and we were wondering why there aren’t any educational toys like the Digi-Comp II out today. A site linked from the build page tells us there will be kits available this summer, we’re hoping the kit doesn’t fill the bed of a pickup truck.

Check out the video after the break for the multiplication demo.

Continue reading “Gigantic Ball-manipulating Binary Computer”

Another Smarter Water Heater Timer

When notes stuck to the water heater failed [Ryan] decided to whip up “the world’s most expensive 240V relay” using a servo, a real time clock and of course an Arduino. All in an attempt to save a buck or two thanks to LA’s “Time-of-Use program”.

Using a protoshield Ryan soldered up a RTC module using the DS1307 chip. On board he added some LED’s and switches including a holiday switch keep the heater off, a next cycle button when you need some hot water and to hell with the expense, and a pulsing blue LED.. for no reason at all. The board flips the mechanical switch using a servo and piano wire, simple but effective. We wonder how many days/weeks it will take for it to offset its expense?

Vintage Peripheral Hacks Roundup

A few days ago, we featured an Apple ][ USB keyboard mod, and several readers chimed in sharing their own retro conversions in the comments section. We had no idea that many of you had made similar modifications of your own, so here’s a quick roundup of what your fellow Hackaday readers have put together.


Optical Atari STM1 Mouse

atari_stm1_usb

[JJ] had a 25-year old Atari STM1 mouse sitting around and was wondering how to get it to work with his new computer. Instead of interfacing the old mouse with his computer via a custom circuit board, he gutted the STM1 and replaced the innards with those of a much newer optical mouse. He did a bit of trimming to get the new PCB to fit, aiming the optical sensor through the now-empty “ball hole”. According to [JJ] it works just as good as it looks.


ZX Spectrum USB keyboard conversion

sinclair_zx_spectrum_usb

[Lee] is a sucker for vintage hardware, and with the help of his friend [LanceR], resurrected an old Sinclair ZX Spectrum computer into a working USB keyboard. After replacing the deteriorated membrane, the pair mapped out the keyboard to figure out how the matrix was wired. With that done, they built a prototype USB interface board, which they later replaced with a proper PCB.


BBC Master Compact USB keyboard conversion

bbc_master_compact_usb

A friend of [MoJo’s] had a BBC Master Compact computer from back in the day and wanted to have the keyboard converted to USB in order to use it with certain emulators. [MoJo] gladly took on the project, stripping some of the old motherboard components out to make room for his new circuitry. He built a USB interface board around an ATMega162, and even got the old built-in speaker working properly. From the outside, the keyboard looks like it has never been touched – nice job!

Apple ][ Converted Into USB Keyboard

Sometimes it’s apparent that there is no practical use for something featured on Hack a Day, but we don’t know if [Andrew Filer]’s Apple ][ USB keyboard qualifies for this.

After reading through the very thorough documentation available in electronic and dead tree formats, [Andrew] decided that Apple ][ would make a great USB keyboard. Unlike modern keyboards, vintage computers like the TRS-80, Commodore 64, and the Apple ][ return the 7-bit ASCII value of the key instead of a scan code. The ASCII codes generated by the keyboard were sent through a Teensyduino running [Andrew]’s keyduino sketch.

Modern PS/2 keyboards use MAKE and BREAK scan codes sent from a microcontroller that reads the keyboard matrix. For example the MAKE code for the letter ‘A’ is 1C, while the BREAK code is F0 1C. There is a reason for this design, but for the DIYer, interfacing a keyboard becomes a challenge without a separate microcontroller. We’re thinking [Andrew]’s keyduino could be a great way to put a keyboard in a project, but we’re not about to tear up our Apples and C64s to get a keyboard.

DIY Digital Bench Power Supply

[Guido Socher] built himself a great little bench power supply that’s able to put out 30 Volts at 2 Amps.

Instead of taking the easy way out by putting a few taps on an ATX power supply, this project was built around a generic 24 Volt laptop power brick. An ATmega8 generates a PWM signal that is sent though a low-pass filter, allowing everything to be very precisely controlled. This DC signal is then sent through a BD245 power transistor to bring everything up to the desired output. [Guido Socher] included a USB port for computer control of everything, and the final project is something we’d be happy to have on our bench.

We’ve seen a few computer power supplies converted into a bench power source, but we’re impressed with [Guido Socher]’s build log. It’s not often we see a hack that goes over the theory of operation, and the end product is very nice (and functional) too.