Nixie Sudoku: A Look At The Hardware

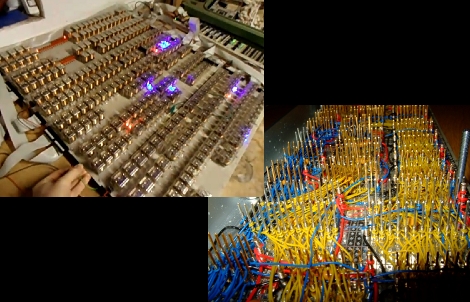
We’re always happy to receive a tour of the guts that make things work. [John Sarik] posted several pictures and descriptions of the hardware that makes up his Nixie Sudoku build. The modular design uses professionally made circuit boards which greatly improve the durability of a large set of circuits such as this.

The design draws on good ideas from similar hardware. The Nixie Duo kit from Ogi Lumen allows tubes to be mounted on top of driver boards with cascading shift registers for control of up to 8 tubes. The ArduiNIX shield makes the high voltages needed for Nixies easy to control with an Arduino. No, [John] didn’t just order these kits and plug them into each other. He designed his own boards to suit his needs. Each driver board can control 9 tubes in a 3×3 grid, all on one PCB. His high voltage board can supply enough juice for the whole system which is tied together with a single Arduino board.

His writeup is quite interesting so do take a look. He also filmed a walk through video which we’ve embedded after the break. It clears up some questions, such as showing the use of a blinking decimal point to indicate the current cursor position.

Continue reading “Nixie Sudoku: A Look At The Hardware”

Servo Controller Board

This board is [Eric Seifert’s] venture into working with AVR microcontrollers. He has worked with PIC microcontrollers in the past and used the goal of developing a servo controller board as his motivation to try the grass on the other side of the fence. He found he likes the AVR line for its ease of development under Linux, a feature we also appreciate. What he ended up with is a tiny board that controls up to eight servo motors. If you’ve got a project that is spilling over with servo-controlled limbs, maybe this will save you some development time.

SEGA Genesis Cloned With An FPGA

[Greg] managed to clone a SEGA Genesis using a field programmable gate array. He used a Terasic/Altera DE1 board, which will set you back about $160, during development. The onboard push buttons are currently used as the controller with VGA for the display. Who knows, maybe there’s enough programming space left to drive a PSP screen and turn this into a handheld?

You can see some gameplay footage after the break. If SEGA was never your thing don’t forget that there is an NES FPGA hack out there too.

Continue reading “SEGA Genesis Cloned With An FPGA”

Decapping Integrated Circuits With Sap

[James] is interested in reverse engineering some integrated circuits. One of the biggest hurdles in this process has always been just getting to the guts of the chip. He used acetone to dissolve the plastic case but had trouble getting through the epoxy blob. Commonly, the epoxy is soaked in nitric acid for a few minutes but [James] didn’t have access to that chemical. Instead he popped into the local music store and picked up some rosin (used to make violin bows sticky enough to grab the strings of the instrument). After boiling down the rock-hard rosin and the chip for 20 minutes, he got a clean and relatively undamaged semiconductor that he can easily peer into.

Nixie Sudoku

[John Sarik] asked himself why a project should only have a handful of Nixie tubes? Without a good answer to his query he went ahead and built this Sudoku game using 81 Nixie tubes. There’s not much of a description for his work but here’s how we think things go: The two knobs manipulate a cursor, one for rows and the other for columns, while the keypad is used to input your chosen number. The system is Arduino based and [John’s] linked to his code, schematic, and board layout files on Dropbox. He’s even written a recursive solver which can be seen in the video after the break. Would it be inappropriate to bring this to work and whip it out during some down time?

Continue reading “Nixie Sudoku”

Control A TV With GLCD Commands

[youtube=http://www.youtube.com/watch?v=t3gMjuVdQnA]

This hack lets you use a TV in place of a graphic LCD screen. But we like to think of this less as a replacement for a GLCD and more of a simple way to get your information onto a television. A PIC 18F452 acts as a translator between the GLCD parallel inputs and a composite video output. There are some malformed image links on the page which we’ve fixed and linked to after to the break so that you can take a look at the schematic, component layout, and PCB artwork. The assembler code and hex file are available for download but you’ll need to register to get access to them.

Working image links:

[Thanks Flacoclau]

Whole House Current Monitoring

[youtube=http://www.youtube.com/watch?v=HlRBrTTLQFU]

[Debraj Deb] put together a current monitoring device that interfaces with the circuit box at his house. The system is controlled by a PIC 18F4520 and uses an LM358 Op-Amp to rectify the AC signal, as well as an MCP6S21 for range adjustments for detecting both high or low current loads. The data displayed on a character LCD includes average, RMS, and peak current. For now the data is saved to an EEPROM and can be dumped using a serial connection but [Debraj] plans to add a GSM modem so he can send energy use data to his cell phone.

[Thanks Ganesh]