The unique look of early desktop computer systems remains popular with a certain segment of geekdom, so it’s no great surprise when we occasionally see a modern hacker or maker unceremoniously chuck 40+ year old electronics from a vintage machine just to reuse its plastic carcass. We try not to pass judgement, but it does sting to see literal museum pieces turned into glorified Raspberry Pi enclosures.
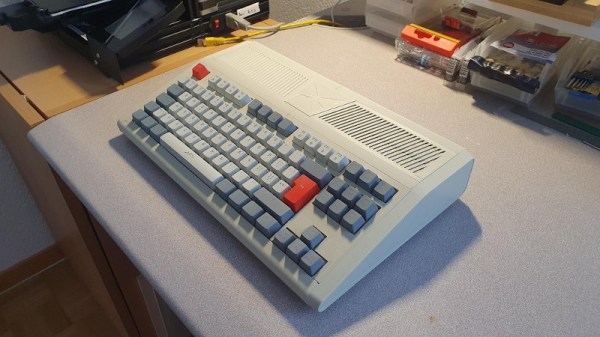
But with a little luck, perhaps the Retro Wedge Computer case designed by [AndyMt] will be able to save a few of those veteran computers from an unnecessary lobotomy. As the name implies, this 3D printable model is designed to resemble “wedge” desktop computers such as the Atari ST, TI-994A, and Commodore 128. But don’t be put off by its considerable size — the model has been chopped up so no piece is larger than what can fit on a fairly standard 230 x 230 mm print bed. Continue reading “Retro Computer Enclosure Without The Sacrifice”