We’ve always found the various methods for adding text and graphics to 3D prints somewhat underwhelming. Embossed or debossed characters are fuzzy, at best, and multi-color printers always seem to bleed one color into the next. Still, the need for labels and logos is common enough that it’s worth exploring other methods, such as this easy toner transfer trick.
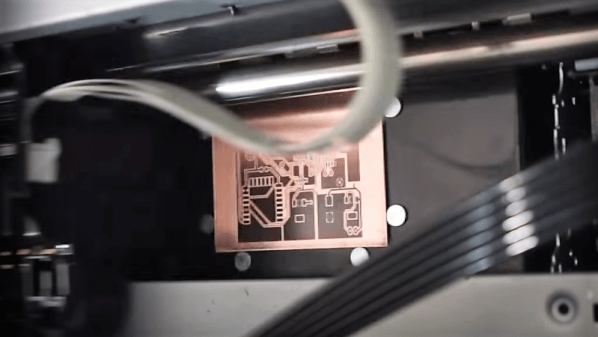
Home PCB makers will probably find the method [Squalius] describes in the video below very familiar, and with good reason. We’ve seen toner transfer used to mask PCBs before etching, and the basic process here is very similar. It starts with printing the desired graphics on regular paper using a laser printer; don’t forget to mirror the print. The printed surface is scuffed up a bit, carefully cleaned, and coated with a thick layer of liquid acrylic medium, of the kind used in paint pouring. The mirrored print is carefully laid on the acrylic, toner-side down, and more medium is brushed on the back of the paper. After the print dries, the paper is removed with a little water and some gentle friction, leaving the toner behind. A coat of polyurethane protects the artwork reasonably well.
[Squalius] has tested the method with PLA and PETG and reports good results. The text is clear and sharp, and even fine text and dithered graphics look pretty good. Durability could be better, and [Squalius] is looking for alternative products that might work better for high-wear applications. It looks like it works best on lightly textured surfaces, too, as opposed to surfaces with layer lines. We’d love to see if color laser prints work, too; [Squalius] says that’s in the works, and we’ve seen examples before that are reason for optimism.
Continue reading “Dress Up Your 3D Prints With Toner-Transfer Labels”


![article-1212214-0659F596000005DC-336_468x324[1]](http://hackaday.com/files/2009/09/article-1212214-0659f596000005dc-336_468x3241.jpg "article-1212214-0659F596000005DC-336_468x324[1]")


