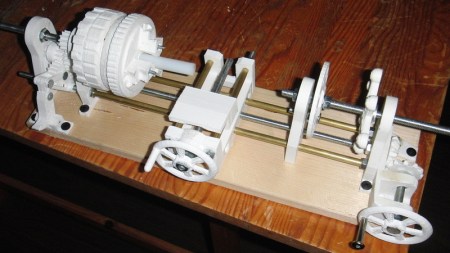
3D Printer With Insane Accuracy Uses A DLP Projector

After years of work, [Junior Veloso] is finally getting his 3D printer project out to the public. Unlike the Makerbots and repraps we usually see, [Junior]’s printer uses light-curing resin and a DLP projector to build objects with incredibly fine detail.

One highlight of [Junior]’s project is the development of low-cost resins. Normally, light curing resins are extremely expensive, but [Junior] is actively trying to get the price of resin down to $150 USD per kilogram. A quick back-of-the-wolfram calculation tells us you should be able to print about 7-800 cubic centimeters with a kilogram of resin. It’s much more expensive than plastic filament used in other 3D printers, but that’s the price you pay for quality.

There’s a very popular Indiegogo campaign that is trying to raise money to mass produce the resin and some components of this kit. We’re not impressed with the rewards for this campaign – $59 for a .PDF description of the printer without any dimensions, $159 for a BOM, dimensions and the formula to make your own resin, and $400 for the closed-source software [Junior] devleoped – but hopefully this Indiegogo gets cheap resin out onto the market. There’s a short FAQ about this printer, so we’ll leave our readers to tactfully discuss the merits of this printer in the comments below.

You can check out the process of printing a remarkably detailed alien skull in the video after the break.

Continue reading “3D Printer With Insane Accuracy Uses A DLP Projector”

Who Needs Mecanum Wheels?

Skills are all that’s needed to solve a problem. Take this four-wheeled robot as an example. [Michal Zalewski] wanted it to be omnidirectional but wasn’t very satisfied with the concept of mecanum wheels and the like. So he designed a chassis with wheels at each corner that can pivot as one to change orientation. The image may look like a rendering at first glance, but this is actually the physical prototype. See what we mean about skills?

Okay, so the robot design is pretty cool. But we’re more excited about the build process. We’ve looked at [Michal’s] work before. He wrote a thorough guide about CNC mold making. These parts are all cast from epoxy. This starts with a rough milled mold, which is given a second pass for the fine details before being painted with a release agent and used to make a silicone mold. From this the parts are produced. Check out the Flickr set showing the casting process for the planetary gear box on each motor. If only these results were as easy to achieve as he makes it look.

[via Reddit]

A Little Geneva Drive Made Of Wood

MDF Geneva drive in action

Long ago, before servo motors and linear actuators were common, clever mechanical devices were what engineers used to produce the needed motion for their processes. The CNC-cut Geneva Drive may not be fit for industrial use, but this type of device has been used in everything from film projectors to rotating assembly tables. The constant rotation of the driving wheel is translated into intermittent motion by the [Maltese cross] driven wheel.

The drive and Maltese cross section of this particular drive are made out of MDF with the exception of a putty material that the motor shaft press-fits into. The article claims that this is the only Geneva drive in existence made out of MDF, however, we’d love to see that proven wrong in the comments!

If you’d like to make one of these yourself, CAD and G-code files are given for the hand-cranked version that this Drive is based off of in a separate post.  If you’re not familiar with how a drive like this works, or would just like to see everything in action, be sure to check out the video of it after the break! Continue reading “A Little Geneva Drive Made Of Wood”

A Better Dust Skirt For Your CNC Mill

[Joshendy] wanted to get a better look at the cutting head on his CNC mill when it was running. The problem is that the rotating blades throw up a lot of junk which you don’t want flying around the shop so they’re usually surrounded with a shroud connected to a shopvac. He just milled is own transparent dust skirt to solve the problem.

The original dust skirt uses black bristle brushes to contain the waste from the cut. In addition to obscuring your view of the cutter this didn’t do a very good job of containing bits and pieces. The solution seen on the right uses clear, flexible PVC as the skirt. The video after the break details the build process. [Joshendy] cut out a replacement plate which is then fitted with magnets to connect to the cutter. The skirt is affixed to that plate with a series of screws, making it easy to replace if it ever wears out.

Continue reading “A Better Dust Skirt For Your CNC Mill”

Nanoscale 3D Printing

This 3D-printed model of the Tower Bridge is only 200 micrometers long. To put that into perspective, the distance between the towers is the width of a human hair. This model is the product of research at the additive manufacturing department of the Vienna University of Technology

The models were fabricated much like normal stereolithography – a laser shines onto a vat of light-sensitive resin. The resin hardens when exposed to light, and the model is built up layer by layer. These nanoscale models were made using a process called “two-photon lithography,” something we’re not going to pretend we understand completely but here’s a nice paper that provides a good overview. Needless to say, the precision these prints exhibit are nearly ludicrous. The researchers claim a precision of ±1µm, a respectable amount of precision for very high-tech machining applications.

The researches posted a video of the fabrication of a nanoscale F1 race car filmed in real-time. Check that out after the break.

Continue reading “Nanoscale 3D Printing”

Carabiner Helps You Hone Your Milling Skills

[Christian] is learning to use the metal milling tools at what we assume is his local Hackerspace. We love this about the communal spaces, they provide so many opportunities to delve into new fields. He embarked on a voyage that included visits to most of the machinery in the shop as he build his own carabiner with a magnetic gate. He’s not going to be hanging off the side of a mountain from it. But his keys or a water bottle will find a happy home thanks to the device.

It all started with some sketches to establish the shape of the overall design. From there he spent some time modelling the frame of the carabiner in CAD. He’s lucky enough to have access to a water jet which took the SolidWorks files and cut out the aluminum frame for him. That left a part with very sharp edges, so he used a wood router with a carbide bit to round them over.

The next part is adding the gate. He used an end-mill to add a mounting area on the frame. The locking ring for the gate was textured using a knurling tool, and the rest is milled with a simple cutting tool. This gate uses a magnet to center itself, with the knurled ring as the only mechanical latching mechanism. [Christian] does a good job of demonstrating the completed carabiner in the clip after the break.

Continue reading “Carabiner Helps You Hone Your Milling Skills”

3D Printing From An Android Device

[skullkey] over at the House4Hack hackerspace in Pretoria, South Africa wanted a way to get kids excited about technology and desktop fabrication labs. Wanting to give kids a visceral feel for the march of technology, he created Makerdroid, an android app that allows for the creation 3D objects on an Android tablet and preparing them to be printed on a Reprap or Makerbot.

What’s really interesting about this build is not only the fact that [skullkey] and his lovely beta testers are generating .STL files on an Android device, the object files are also being converted to GCode on the Android, without the need for a conventional computer. Makerdroid uses the very popular Skeinforge to generate the instructions for the printer (although a lot of people are switching over to Slic3r).

Makerdroid doesn’t need a PC to print objects out on a 3D printer, but we think the process of shuffling GCode files from a tablet to the printer with an SD card is a little archaic. It might be possible to print directly from an Android tablet over Bluetooth with the Android Bluetooth Reprap app that is currently in development. Still, we love the idea of printing objects we just created on a touch screen, as shown in the Makerdroid demo video after the break.

Continue reading “3D Printing From An Android Device”