
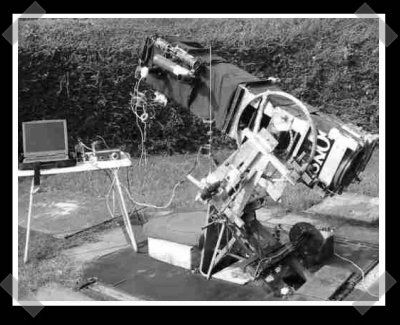
The idea of using servos to aim a telescope isn’t new, but [John]’s build looks so much like a prop from Johnny Mnemomic that we can’t resist posting it. The goal isn’t so much remote control as it is usability. He added a webcam and a pair of servos to help him fine focus and adjust the elevation of the scope to minimize vibration during those sensitive operations.
digital cameras hacks1039 Articles
Twitter Security Cam
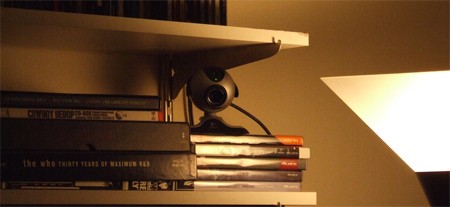
It seems that people keep coming up with ingenious things to with Twitter. Reminding you to water your plants is relatively inventive, but for shear practicality, [Shantanu Goel] created a security camera using a webcam, a few freeware apps, and a Twitter account.
To make this work, install Motion on a system running Linux. As its name suggests, Motion is a free motion-detecting application that monitors movement in a webcam’s field of view. Once installed, it should be configured to take a snapshot of the event whenever something moves; with the locate option turned on, it draws a square frame around the area where motion occurred. The program includes http server functionality, so the photos can be viewed from a remote location. When all of that is properly configured, motion can be set to trigger cURL, Wget, or [Goel]’s Perl script to post a message to Twitter about the event. From there the Twitter account can be configured to send text messages to a phone, creating a virtually instant notification of motion sensed by the webcam.
[via Hackszine]
Laser Insect Photography Rig
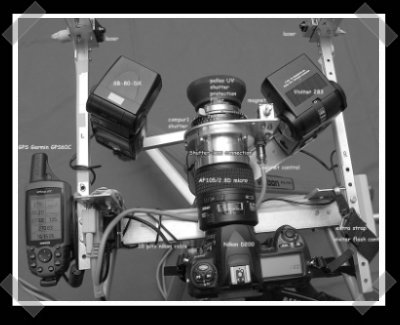
[Marc] sent in this awesome insect photography rig. The camera is manually pre-focused and set for a 30 second exposure at ISO100. The aluminum cylinder in front of the lens is an external shutter mounted with a custom turned lens adapter. It’s used because the built in shutter is too slow for insect capture. The camera/shutter is triggered by a pair of lasers with photo detectors. When both beams are broken, the insect should be in front of the lens. A Garmin GPS provides position information that’s tagged on the image by the Nikon D200. A large photo of the rig is here, while a more detailed writeup on building it is here.
Update: It looks like we covered a previous version of this rig, but the old links are down and we didn’t have a shot of the setup. Oh, and I forgot to mention [Marc] new control box for running this rig.
Stabilized Video Collages
This is some beautiful work. The clip features multiple video streams stabilized and then assembled into a whole. First, [ibftp] used the “Stabilize” feature in Motion 3 (part of Apple’s Final Cut Studio 2) to remove the camera shake from the clips. Then he was able to blend the videos with “fusion” set to “multiplication”. If you’ve got access to the tools, this shouldn’t be too hard to do yourself. We’re certain someone in SIGGRAPH is already attempting to do the same thing live. If you want to see image stabilization really making a difference, have a look at the stabilized version of the Zapruder film embedded below.
Camera Lightning Capture
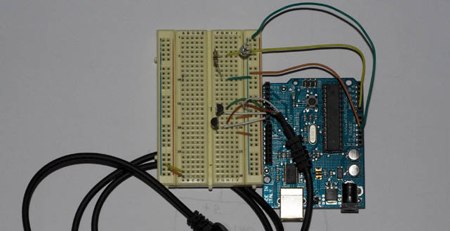
The people at [Hobby Robotics] decided to build a trigger circuit for lightning photography. There are more complex ways to do this, but they just used a photo transistor and an Arduino. The Arduino watches the photo transistor’s value and compares it to the previously captured one. If the difference is above a certain threshold, it means a rapid change in the amount of light has occurred, which triggers the shutter. An earlier post covered how to directly control the Canon 30d using an Arduino. All of this works because the shutter lag and code execution together are less than lighting’s 100ms duration.
TI-83 Intervalometer
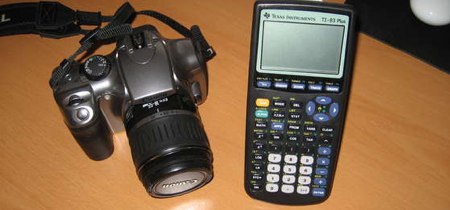
The headline How to Make Time Lapse Video With Your DSLR didn’t really grab us. Honestly, you pay that much for a camera and it can’t do time lapse out of the box? Well, we nearly missed the real story: [Chris Martino] was using a TI-83 to act as the intervalometer for the camera. The calculator has a 2.5mm audio jack for it’s data port and the camera has an identical port for the shutter trigger. The TI-83 runs a program with a FOR loop to act as the timer. When the loop completes it sends data to the port, and the voltage triggers the shutter. The rate isn’t very exact and varies depending on the charge left in the batteries. [Chris] estimated 10000 program iterations ends up being about 26 seconds between pictures. This technique has been tested on 84, 86, and 89 series calculators too. There are a couple example time lapse videos embedded after the break.
Porting CHDK To New Cameras
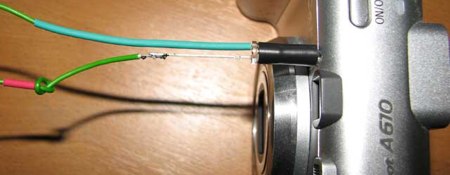
While researching the CHDK How-To, we came across the team’s instructions for porting the firmware to entirely new cameras. In theory, CHDK should work on any Canon running the DIGIC II or III processor since most of them are running the same VxWorks OS. A dump of the camera’s firmware is required before porting work can begin. On some cameras, the firmware was retrieved using software, but others required a hardware route. Pictured above is a Canon A610 that’s slowly flashing out every bit of its firmware using the built in LED. The photodiode is hooked up to a soundcard where the entire bitstream is recorded. It takes 1-7 hours to read the entire firmware. Once the sound file has been captured, it’s reverted to the original bytes and can then be decompiled with something like IDApro.









