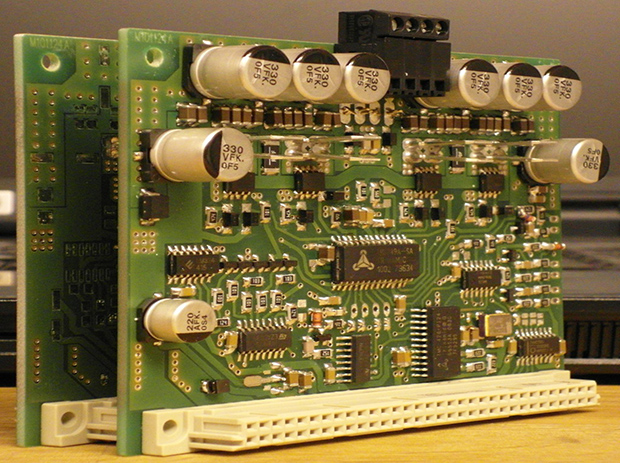
Ghostly Images Captured Only On Camera

is that a logo

A while back our good buddy [Ch00f] built a QR code clock, unreadable to both humans and computers. A human couldn’t read the clock because of the digital nature of a QR code, and because the clock used persistence of vision in driving the LEDs, a digital camera can’t capture all the pixels in the QR code at the same time. It’s a highly useless but impressive art piece. Now, [Ch00f] is turning that build on its head. He created a rudimentary display that is invisible to the human eye, but easily detected with a digital camera.

This build exploits a basic property of CMOS digital cameras – the rolling shutter. Because it takes time to get pixels off a modern digital image sensor, each picture is actual a composite of many different strips, each taken slightly out of sequence. You can see this for yourself by taking a picture of something rotating very fast with your camera phone; a picture of an airplane propeller will make the blades appear curved, or look like [Dr. Seuss] has an aeronautical engineering degree.

To create his display, [Ch00f] found a few inexpensive fiber optic lights. By aligning a few of these into columns and lighting them up in a precise sequence, he can exploit the rolling shutter and make an image appear. To the human eye, it looks like a solid wall of illuminated fiber optics.

As for how practical this build is, [Ch00f] says not much. For cell phone cameras, you’d need to have a very, very short exposure time for this to work. The only way to do that is to make this display unbelievably bright, or just put it out in the sun. We can’t see that being practical for any potential use case, but we’d be more than happy to see a large-scale attempt at displaying images with this technique.

Taking Picture Of Exploding Wire

wire

[Patrick] didn’t just want his name in lights. He wanted his name in glowing plasma explosions, made by sending thousands of volts through a very thin wire.

This project is an experiment in capturing high speed images of exploding wires. [Patrick] wanted to know if he could shape wires in such a way that they would explode into letters of plasma. Of course, photographic proof of this would be needed, and would make for an awesome logo in any event.

To get pictures of wire turning into plasma, [Patrick] first needed to construct the necessary electronics. A simple spark gap was constructed on a large plastic cutting board – an excellent high voltage insulator. The huge capacitors are charged with a pair of high voltage transformers, and the entire assembly is triggered with an optocoupler and a very beefy SCR.

Even though [Patrick] designed the system for a low propagation delay, there was still the matter of capturing an exploding wire on film. The camera delay varied by about 120μs, but with a really great camera trigger, [Patrick] eventually got some impressive pictures.

After getting the electronics and photography portion of the build down, [Patrick] turned to making letters out of expanding plasma. Simply shaping the wire into a letter shape before vaporizing it had no effect, so he turned to 3D printed channels to contain the plasma. After a few attempts, this actually worked, allowing him to form the letters L, U, and X in an expanding ball of vaporized wire.

The Best Photo Booth For Really Small Stuff

tank

[Doog] builds plastic models, and like anyone who makes really small stuff, he needed a good photo booth to show off his wares and techniques. He was working with the very common ‘poster board and work light’ setup we’ve all put together, but after photoshopping seam lines one too many times, he decided to upgrade his booth to something a little better.

The new setup consists of an aluminum frame with a 40×80 inch sheet of translucent plexiglass forming the bottom and backdrop of the booth. Two lights in diffuser bags illuminate the subject from the top, while the old worklights are attached to the bottom of the table frame to light the subject from beneath.

Compared to the ‘poster board and work light’ technique of the past, [Doog]’s new photo booth is absolutely incredible for taking pictures of very small things. This model of a Spitfire looks like it’s floating and this snap of a Thunderbolt is good enough to grace magazine covers.

Of course this photobooth isn’t just limited to models, so if you’re looking at taking some pictures of hand-soldered BGA circuits in the future, you may want to think about upgrading your studio setup.

Showing Off A High-performance Brushless Motor Camera Gimbal

gopro-brushless-motor-gimbal

Here’s [Tom Parker] showing off a brushless motor gimbal stabilizer for his GoPro camera. We saw a similar project a couple of weeks back that featured a 3d printed quadcopter mount. This offering is meant to be held in your hands. It keeps the subject in frame even if the cameraman’s hands pitch and roll (we figured aeronautical terms were best here). This image shows him demonstrating a level camera as he quickly rolls the frame from one side to the other. It doesn’t compensate for yaw, which is something he may change in the next iteration. We already like the results he’s getting with it.

About 3:15 into the video demo below we get a very quick description of the build itself. He started it as a project at University. Fabrication included work on a 3D printer, laser cutter, and vacuum forming machine. The grips are bicycle handlebar components. To overcome the stabilization system the operator has access to a joystick. Without this you’d never be able to aim the camera up or down because of auto-leveling.

Continue reading “Showing Off A High-performance Brushless Motor Camera Gimbal”

Seeing Plant Health In Infrared

aerial

Since the 70s, NASA, NOAA, and the USGS have been operating a series of satellites designed to look at vegetation health around the world. These satellites, going under the name Landsat, use specialized camera filters that look at light reflecting off chlorophyll to gauge the health of forests, plains, oceans, and even farms. It’s all very interesting technology, and a few very cool people want to put one of these near infrared cameras in the hands of everyone.

The basic idea behind gauging the health of plants from orbit, or the Normalized Difference Vegetation Index, is actually pretty simple: absorb red and blue light (thus our verdant forests), and reflect nearly all infrared light. By removing the IR filter from a digital camera and adding a ‘superblue’ filter, the NDVI can be calculated with just a little bit of image processing.

The folks behind this have put up a Kickstarter with rewards including a modified webcam, a custom point and shoot camera, and a very low-cost source of one of these superblue filters. Just the thing to see how your garden grows or how efficiently you can kill a houseplant.

Bullet Time With A Ceiling Fan

freaking awesome

Bullet time has been around since at least the first Matrix movie (actually there was a Gap ad before that), and despite it being an oft-used cinematic technique, it still hasn’t gotten old. [Jeremiah] wanted to tap into the awesomeness of bullet time, and managed to come up with a great camera rig using only a GoPro and a ceiling fan.

The build really relies on only two components: a GoPro camera and a ceiling fan. In [Jeremiah]’s videos, a ceiling fan is mounted between two trees on a sturdy piece of lumber. The GoPro is suspended from one of the fan blades with the help of a piece of wood, a hinge, and a short bit of cable. After [Jeremiah] wired up the fan to a dimmer switch he could control the speed of the fan and Bob’s your uncle.

This isn’t the first time a GoPro has been used for a bullet time rig. In fact, our buddy [Caleb] did a similar build by spinning the camera around on a lazy suzan. Gotta love the high frame rate available on the GoPro, huh?

Vidias after the break.

Continue reading “Bullet Time With A Ceiling Fan”

3D Scanning By Calculating The Focus Of Each Pixel

calculating-focus-to-generate-depth-map

We understand the concept [Jean] used to create a 3D scan of his face, but the particulars are a bit beyond our own experience. He is not using a dark room and laser line to capture slices which can be reassembled later. Nope, this approach uses pictures taken with several different focal lengths.

The idea is to process the photos using luminance. It looks at a pixel and it’s neighbors, subtracting the luminance and summing the absolute values to estimate how well that pixel is in focus. Apparently if you do this with the entire image, and a set of other images taken from the same vantage point with different focal lengths, you end up with a depth map of pixels.

What we find most interesting about this is the resulting pixels retain their original color values. So after removing the cruft you get a 3D scan that is still in full color.

If you want to learn more about laser-based 3D scanning check out this project.

[Thanks Luca]