Anyone who’s ever had the pleasure of programming FPGAs knows that it’s a land of proprietary tools that almost require marriage level commitment to a specific platform to be effective. Symbiflow hopes to solve this by becoming the GCC of FPGAs.
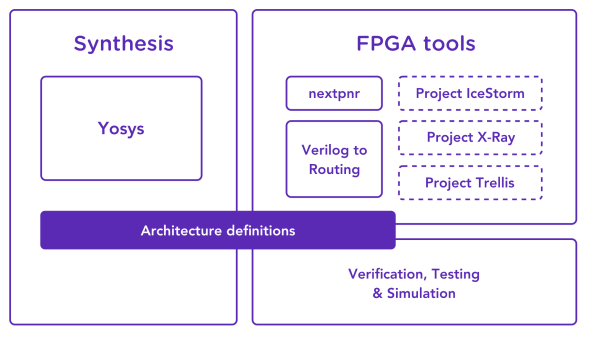
Rather than a tool built around a specific chip or architecture, Symbiflow will provide a more universal interface. Users can program in Verilog; architecture definitions define how the code will be compiled for the right chip. They are currently targeting the popular Xilinx 7-series, the very affordable iCE40 series from lattice, and the ECP5 FPGAs also from Lattice.
If you’re headed to Hackaday Supercon this year, [Timothy Ansell] will be giving a talk on how Symbiflow is making this process much more approachable and much less proprietary. Overall we’re very excited about a common interface, especially as the price of FPGAs keep dropping into micro controller territory while also increasing in capability.
(Speaking of Supercon, and maybe this is a spoiler, the badge would not have been possible without Symbiflow, Project Trellis, Yosys, and NextPNR.)